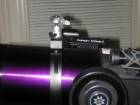
Easy Swivel Head for Piggy Back Mount
If you do piggy back astrophotography especially in the Polar Mount position on your EXT and find your camera is not in the best position for your subject and you can’t afford a professional swivel head mount, this may be just for you. The approximate cost of the materials is about $18.00. Materials are the mini tripod, epoxy putty, super glue gel and a ¼” nut. This mount works best for the light-weight digital cameras such as the Nikon Coolpix series and other digital camera brands. The old 35mm SLR’s are a bit heavy, but doable.
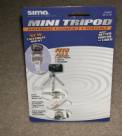
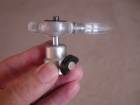
I found the same type mini-tripods at Best Buy and Circuit City for $12.95 or $14.95 depending on the features. The $14.95 has a neat removable head that makes threading the camera on the mount a snap. After completing the modifications, the unit threads on the Scopetronix ETX’s Piggy Back Mounting bracket or any mounting bracket with a standard ¼” bolt.
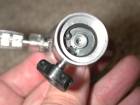
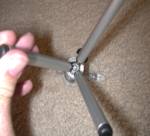
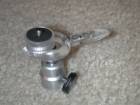
To remove the swivel head from the tripod legs, turn the unit upside down and you will see a Phillips head screw. Remove the screw and the tripod legs will come off. Be very careful removing the screw because it is on very tight and the screw head can be easily stripped.
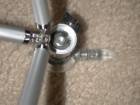
Once the tripod legs have been removed, you are ready to fasten the ¼” nut to the inside of the base where the screw was just removed. Cut a small piece of duct or electrical tape to cover any opening to the ball & socket area below the base. Rough up one side of the nut with a file or bench grinder and apply super glue to the surface. I use the gel super glue, less messy. Press the nut firmly in the center of the base directly over the screw hole and hold it until the glue sets.
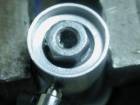


Next, mix the epoxy putty (not the liquid form) so that it is one color and pliable. Roll small pieces between your fingers to form a cylinder shape and insert them complexly around the nut. Make sure the putty is flush with the top of the nut and not any higher. Do not get putty on the threads. Wet the tip of your finger to smooth out the exposed putty surface around the nut. Wipe off all excess putty from the surfaces of the swivel unit. Allow the epoxy to fully cure over night.
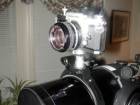
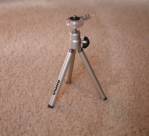
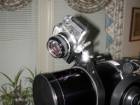
Mount your piggy back mount to your OTA and screw on the swivel head to the ¼” bolt.
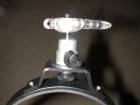
Tighten firmly but not over tight. Depending upon your piggy back system or method, you may attach your camera to the swivel head first and then to the OTA. If you have the mini tripod with the detachable head, all you do is loosen the long handle that is attached to the removable head (see last photo) and screw the head to the base of the camera then lock the entire assembly into the swivel head. Now you’re in business to adjust your camera to most any angle to properly frame your photos.
Any questions email Jack Fox at jackfox@mindspring.com