JUST FOR FUN!
Last updated: 3 February 2001
JUST FOR FUN! |
One thing that all ETX users have in common who log onto the Weasner Mighty ETX Site (besides, of course having an "ETX scope!") is the fact that we ALL use COMPUTERS! I got tired of looking at my "Windows Start Screen" which featured an old astrophoto that I took of the Orion Nebula in 1985 through the McDonald-Douglas telescope in the Davis Mountains of west Texas and decided to put up something different on my "Start Page" of Windows.
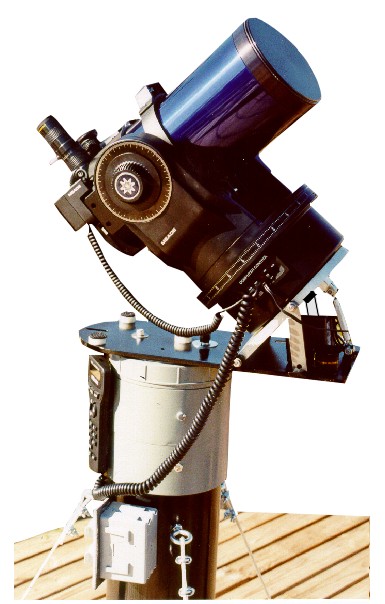
What did I decide on? Oh come on, now! Using an ETX is not a "hobby"....it's an obsession! So, what better than a background screen of my ETX 125? I have my own ETX 125 featured on my computer, the scope equipped just the way I like it on my custom pier at my observing platform.
I scanned the image and "enveloped" it to take out the background and placed in on a bright white background. The telescope image was then converted to a j-peg format, sized and positioned for optimal screen placement and now attached for YOU to download for your own personal use!
When it flashes up on your computer screen, instead of the old standard start page background, you're sure to get a smile on your face as you see your ETX and await the next dark, clear night!
A lot of users are not familiar with replacing the standard background screen on their "start page," so, instructions follow:
(NOTE: I BEG FORGIVENESS FOR THOSE COMPUTER GURUS OUT THERE WHO ALREADY KNOW HOW TO DO THIS....MOST FOLKS DON'T KNOW HOW TO REPLACE THEIR START SCREENS, so please bear with us through this, for the sake of all our ETX friends out there!)
1) Double-Click on the image shown below; you will get a fly-out screen that asks if: a) you want to OPEN the file; or, b) if you want to SAVE it to your computer;
2) You want to SAVE the file in a "Temporary File;" when you tell the flyout to "Save", it will come up with your file options in a window at the top of another screen (just like it does when you choose between your hard drive, a floppy disk, or a program file);
3) Whatever your hard drive is designated (most use "C") double click on that and open (mine is listed as nec_sac"C"); you will see many file folders to scroll;
4) Scroll down the folders until you see "TEMP" folder; double click on that to open and press "enter"; the file name ETX2 will now be stored as a Temp file on your main drive;
5) Now close out ("x"-out until you get back to the beginning) and get to your opening (Start Page) screen on the computer (windows 95 or 98); there, you will see your dull and drab "off-the-shelf" background that has absolutely NOTHING to do with your interests or lifestyles....we're about to change that!
6) Do NOT press "Start" Go to the icon on the Start Page that says "My Computer" and double-click;
7) You will see many new icons; find the one that reads "CONTROL PANEL"; double click on that one and even MORE icons appear;
8) Find the icon that reads "DISPLAY;" (mine has a little monitor/screen icon); double click on that icon and it will open up many options, the FIRST usually being a tab that is entitled 'SCREEN'; (IF NOT OPENED, CLICK ON THAT "Screen" tab at the top to open);
9) An image of a monitor is shown with the drab background you are now using! You are no doubt very familiar to this opening face! Look at the BOTTOM RIGHT of this display and you will see a button called "Browse" (to the left of it is a scroll-down of many Microsoft backgrounds available, but no ETX's are provided! - NOT YET, AT LEAST!)
10) Click the "Browse" button and it once again opens all your file options on your main computer drive (probably "C" drive); once again scroll to your "TEMP" files and double click to open; you will see your new "ETX2" JPG image filed away;
11) Click the ETX2 file icon to highlight; the flyout has a button called "Enter;" once the file is highlighted, press "Enter" and the file now is transferred to your BACKGROUND SCREEN scroll list! Use the arrow to look for it at the very bottom of your options;
12) Highlight ETX2 with your mouse and press "Okay" or "Enter" and then EXIT back to your start screen.
13) There, you've got your pride-and-joy ETX image, welcoming you every time you turn on your system to open up Mike's marvelous web site!
14) If the image is NOT CENTERED, in the LOWER one-half of your screen, go back to the "Control Panel" then to "Display" again (Steps 7 & 8); directly below your "Browse" button is a small scroll window named "DISPLAY" that lists "center," "tile," and "stretch;" PRESS "CENTER" to position your ETX correctly on your screen and now exit back out to your Start Page once more;
15) The ETX image (it is an ETX 125, but looks very generic, so those with ETX 90's won't miss a thing) should now be centered at the lower part of a standard resolution screen.....NOW arrange all your Windows icons around the image to suit your fancy; simply click ONCE (highlight) the icon and hold down your LEFT mouse key and DRAG to whereever you want the icon to be and release the button.
Now, sit back and enjoy your computer screen, even if the weather is too nasty to enjoy the scope in person!
All the best in dark skies and steady air....
P. Clay Sherrod
Return to the top of this page.
Go back to the Just for Fun page.
Go back to my ETX Home Page.