SHOWCASE PRODUCTS
Last updated: 31 October 2000
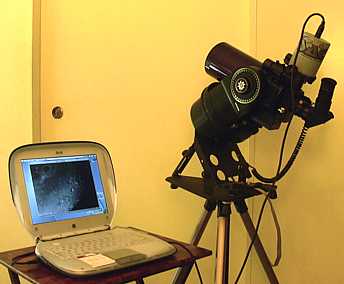
For my setup, I used an Apple Macintosh iBook laptop computer as shown in this photo. The screen shows ReelEyes v1.1.1 (version 1.1 was on the CD-ROM) as seen during a capture of the Moon.
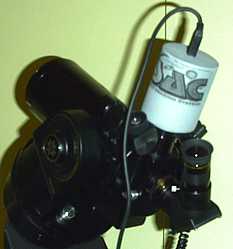
The CCD imager is very lightweight so counterbalancing is not an issue when it is inserted in the 90 degree eyepiece port, as shown here.
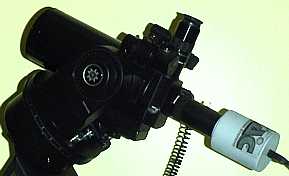
However, with it mounted at the rear Prime Focus port (as shown next), it will stick out enough to make counterbalancing a good idea (although still not required).
While the SAC IV CCD looks rather huge compared to the overall size of the ETX-90RA (as seen in the above two photos), it looks more at home on the ETX-125EC, as shown in these photos.
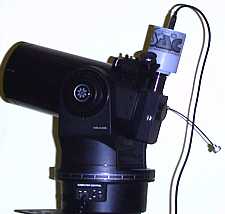
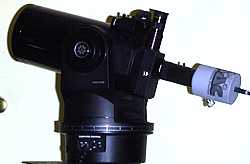
A problem becomes obvious as you look at the photos of the rear port mounted imager. In Alt/Az mounting, the imager will strike the ETX base as you move the ETX to higher angles of altitude. But since the SAC IV can be mounted in the eyepiece hole this is not a major drawback.
OK, so it can be mounted on the ETX. How does one actually use it?
The basic use of the SAC IV is simple. To keep the cost reasonable, it is not a "cooled" imager so you don't have to deal with extra power to support that. All the power for the imager comes from the USB bus on your PC or Mac. You mount the SAC IV in either the ETX eyepiece hole (without an eyepiece) or to the rear port. When mounting at the rear port, it would not reach a focus on the ETX-90RA with the Meade T-Adapter unless I removed the extension from the adapter. Without the extension, achieving focus was possible (I'll have more on focusing later). When the USB cable is attached to your computer, the imager is powered on. You then use the supplied software to see on the computer screen what the imager CCD "sees". You can then capture still images or even movies.
For my first use, I put the SAC IV in the eyepiece hole of my ETX-90RA, connected the cable to the iBook, and fired up ViCAM TV (a basic capture program supplied by Sonfest on the Mac CD-ROM). Using an eyepiece at the rear port of the ETX-90RA, I centered the Moon and then switched the ETX flip-mirror to the 90 degree eyepiece hole. An out-of-focus image was visible on the iBook; I focused it using the normal ETX focus. I then slewed the ETX around while viewing the Moon on the iBook. This was really a cool thing to do. I felt like a Starfleet captain, flying over the Moon, looking at the image on the large bridge display. But then it was time to get serious. Using ViCAM TV, I began recording the view to a QuickTime movie file. ViCAM TV does not allow much control over the camera, but it did verify that everything was working. Here is a still frame from that first movie (captured at 320x240):
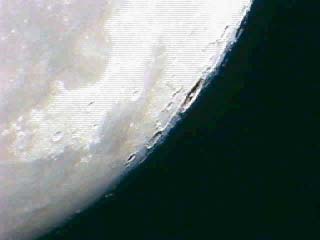
Portions of this image are slightly overexposed. This is where having better control over the camera becomes a necessity. Unfortunately, ReelEyes v1.1 (on the CD-ROM) had a problem where the CCD image would blast through all windows, making it impossible to use the software. However, not all images were overexposed with ViCAM TV, as seen in this frame from the second movie I captured:
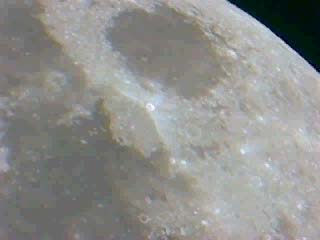
Neither of the two photos above were post-processed; they are just the raw frames from the two movie files.
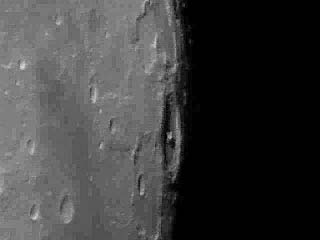
It is noted in the SAC IV documentation that you can use the CCD with a Barlow Lens. I tried that next. I attached my 2X Barlow to the ETX-90RA and mounted the CCD on the Barlow (just like an eyepiece). I found focusing more challenging in this configuration. It was very easy to overshoot a precise focus. Patience and small incremental focus changes were required. Here is a frame from my third movie (I applied some levels adjustment and unsharp masking in Photoshop for this one):
I then mounted the imager at the rear port (using one extension of the Meade T-Adapter). Again, focusing was a challenge. This is a frame from my fourth movie (some unsharp masking filtering applied in Photoshop):
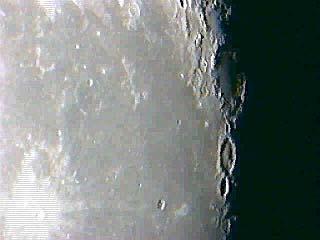
Some scan lines are visible in the lower left corner of the image.
![]() The SAC IV documentation properly mentions that seeing can affect your captures. To see a portion of the fourth QuickTime movie showing the affects of seeing, click the image above. This movie shows the blurring that can occur when seeing is not very good. Some frames are good, some are blurry. If you don't have QuickTime, click the button on the right.
The SAC IV documentation properly mentions that seeing can affect your captures. To see a portion of the fourth QuickTime movie showing the affects of seeing, click the image above. This movie shows the blurring that can occur when seeing is not very good. Some frames are good, some are blurry. If you don't have QuickTime, click the button on the right.
A few days later, ReelEyes v1.1.1 was released. I tried this one; the CCD image still blasted through most windows, but I was able to adjust the camera controls (gain and shutter speed). I then mounted the SAC IV to the ETX-125EC (eyepiece port). My first attempt was M57, the Ring Nebula. While it had appeared very nice to my eye using the 26mm eyepiece, I could never see an image of it on the computer screen no matter how I set the gain and shutter speed. (According to Sonfest, "To image DSO, one needs to reduce the focal length to F-6 or less.") During my attempts to locate M57 on the screen I made two important discoveries about using a CCD imager: perfect finderscope alignment is a must and focusing is nearly impossible when you don't have a bright object in the field-of-view of the CCD. Having some sort of position counter on the focus mechanism would be very handy when using a CCD.
I gave up on M57 (for now) and switched to the fine double star Albireo (Beta Cygni). In ReelEyes I was capturing at 640x480 and Albireo made a fine target. Here is a frame from that movie (reduced from 640x480 to 320x240 with no other post-processing):
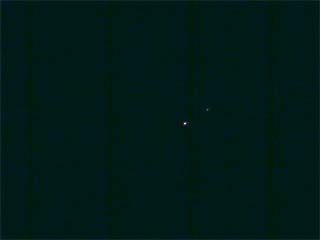
The bright star near the center is the yellow star in Albireo and the fainter blue star is just up and to the right of the yellow star.
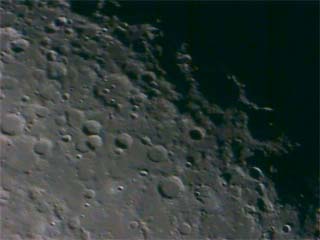
I then took another flyover across the Moon's surface. This time I recorded my entire session (144MB QuickTime movie file). Here is a frame from that movie (reduced from 640x480, no other post-processing since I had adjusted the gain and shutter speed for the exposure):
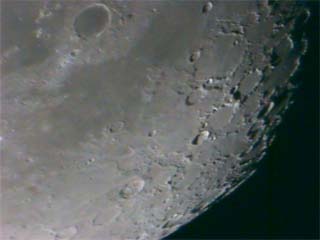
Seeing was still a problem, as you can see in the QuickTime movie clip (click on this next image):
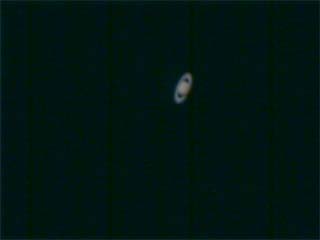
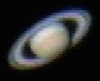
By now Saturn was visible above the neighbor's house. It was necessary to adjust the gain and shutter speed a lot in order to get a reasonable image of Saturn. Here is a frame (reduced from 640x480) from my Saturn movie:
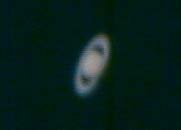
I then combined three of the best Saturn images from this 640x480 movie using Photoshop and cropped the result:
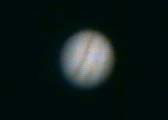
Next up was Jupiter (frame reduced from 640x480):
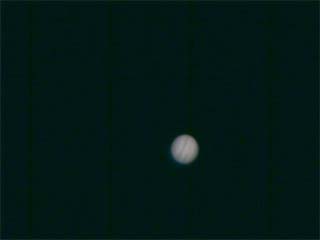
For the next image I combined five of the best frames, adjusted the level, and cropped the result:
So ended my first experiences with the Sonfest SAC IVb CCD imager. I wanted to let everyone know what a typical first use might be like. As I gain more experience using the software, I hope to be able to capture images like that shown on the Sonfest Gallery web page. There is no doubt that the SAC IV is a very capable imaging solution for the ETX. But let me reiterate some important points:
- Perfect finderscope alignment is a must if you are to easily locate objects in the imager. While using the Autostar may help, you will still use the Finderscope at times. Adding an eyepiece on the port that the CCD imager is not attached to helps a lot.
- Focusing is a challenge. Use a bright object (which may be just out of your field-of-view) to focus. Make small changes in the focus adjustment and watch the computer display for the change. Remember that your seeing conditions may affect how sharp the image appears.
- To get the best possible images, you will have to spend time adjusting the camera settings in software. Keep experimenting until you get the results you want. Then save the image as a single frame or a movie to disk.
- In order to get the most out of the saved images, expect to do some post-processing in a graphics or photo editor application.
As I use the SAC IV CCD more, I'll report back here on the results. Stay tuned.
For another user experience, continue reading. I've posted his Jupiter shot (cropped from the original 640x480 image) as an example of what can be done with good seeing.
Subject: ETX125-EC & SAC-IVb camera
Sent: Tuesday, August 29, 2000 16:02:22
From: EricDreczko@email.msn.com (Eric S. Dreczko)
Noticed a message on your site questioning the use of a SAC-IV camera with an ETX125-EC telescope and thought I would respond as I recently made this very purchase.
I just purchased a Meade ETX125-EC a few months ago and have only been involved with telescopes for less than 1 year. Reading all of the notes and comments everywhere regarding CCD imaging and the high price of these cameras made me leary of spending alot of money on something I might never get the hang of. I first wanted to build one using the CCD Cookbook as I like that kind of stuff. I did not like the idea of hauling a 5 gallon jug of water around to cool the thing so I kept looking. I found adds for the SAC-IVb and thought that would be easier on the pocketbook if I were to lose interest due to what sounds like a complicated procedure. I purchased a SAC-IVb in July.
With my first attempts, I was getting very frustrated as I could not keep the image centered nor could I focus the thing. Of course, it was first, the camera and then the telescope. It couldn't be me or my lack of experience! Once I used up all the cuss words I have in my vocabulary, I visited your website and noticed a comment by another which helped me greatly. Someone noted that they had problems tracking. They noted that if they pressed the right arrow key after centering the object in question, they were successful. I did basically the same thing.
I set up my telescope, connected my SAC-IVb to my laptop and after some experimenting, I was able to get Jupiter displayed onscreen. It moved off real fast so once I got it back, I quickly pressed the opposite arrow key. If I used the left arrow key to move Jupiter onto my screen, once there I tapped the right arrow key. If I used the right arrow key, I tapped the left arrow key.
This seemed to lock my object onscreen as I was now able to focus carefully and save multiple images without adjusting the telescope anymore.
 To end this story, what I sent you is an untouched image and it is my
FIRST attempt with the SAC-IVb camera of anything beyond the moon. Using
prime focus, I attached only a 3" camera adapter to the SAC-IVb to
produce this image. Although I took a dark field image also, I have now
got to learn how to use a graphics program to process my images.
To end this story, what I sent you is an untouched image and it is my
FIRST attempt with the SAC-IVb camera of anything beyond the moon. Using
prime focus, I attached only a 3" camera adapter to the SAC-IVb to
produce this image. Although I took a dark field image also, I have now
got to learn how to use a graphics program to process my images.
If anyone taking a look at the image I sent you has any suggestions to improve my results, the suggestions would be greatly appreciated.
For those just starting out in CCD imaging, the SAC-IV is a great entry level camera.
[9/6/00]
Subject:	 SAC-IVb
Sent:	Saturday, September 2, 2000 03:22:48
From:	EricDreczko@email.msn.com (Eric S. Dreczko)
Here is an image of Saturn.

Used ETX125-EC with SAC-IVb, prime focus, 1/15 sec shutter speed in the
Chicago suburbs. Very difficult to focus but it looks like I was able to
capture the Cassini Division. Flipped this one horizontally to show proper
orientation.

Feel free to use this image or throw it away.

Eric
[9/12/00]
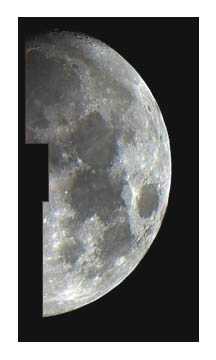
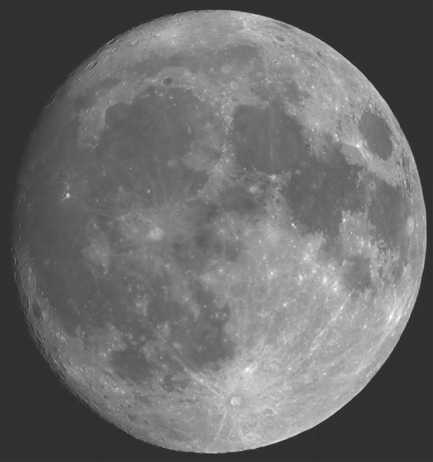
Subject:	 ETX125-EC & SAC-IVb
Sent:	Sunday, September 10, 2000 08:45:33
From:	EricDreczko@email.msn.com
Here is my first attempt at a mosaic of the Moon.

Equipment Used:

ETX125-EC
SAC-IVb with short adapter (supplied with camera)
Wide Field Deluxe Prism (Shutan)
ViCam imaging software (came with SAC-IVb)
Shutter speed set at 1/500th
Adobe PhotoShop 5

Location: Chicago - NorthWest suburbs (light polluted)

Am impressed with the Wide Field adapter. Without it, my views of the
Moon through the SAC camera are huge and I have yet to be able to
achieve a sharp focus. Clouds were coming in and I could actually see
them floating past the Moon as I was viewing the images on my computer
screen! Being the first time I had seen this happen, I was somewhat
impressed. Focusing was easy. I used PS5 to piece this view together,
flip it horizontally and lighten it slightly. No flat field and/or dark
field pre-processing as I still have to learn how to do that properly.

One question I have that maybe someone can help me out with:

I noticed when trying to put multiple images together as one, some had a
faint redish tint on one edge. Not all of them had this. This would show
up like lines in a puzzle. I ended up cropping this tint out. Cropping
this tint out left me with some white space so I ended up with only half
of what I actually was trying to do. (create one mosaic of the entire
Moon.)

Is there a way to either eliminate the redish tint (not knowing you are
going to get it in the first place) or some way I can remove it without
"cropping" it out?

Will try this adapter on Jupiter and Saturn next clear night I have
available.
[9/17/00]
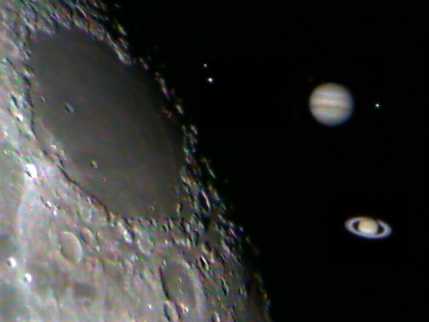
Subj: 	SAC 4 Imager Picture
Date: 	Sunday, September 17, 2000 07:00:03
From: 	matthewr@edusourcepc.com

Here is a photograph I took of the Moon, Jupiter, and Saturn on
September 15th, 2000 in northern Minnesota with a 125-ETX and my newly
acquired SAC 4c ccd imager.  Actually, it can be classified as my first
experience with the SAC.  There were a total of 4 pictures taken, and I
combined them into one using Photoshop. 1 picture of the moon, 1 picture
of Saturn, and 2 pictures of Jupiter (1 at 1/4 sec to capture the moons,
and another one to get a good image of the planet). I did nothing to
enhance colors, clarity, etc.  I am really impressed with Saturn and the
colors that the SAC 4 imager picked up.

Thanks,

Matthew T. Russell
matthewr@edusourcepc.com
[9/26/00]
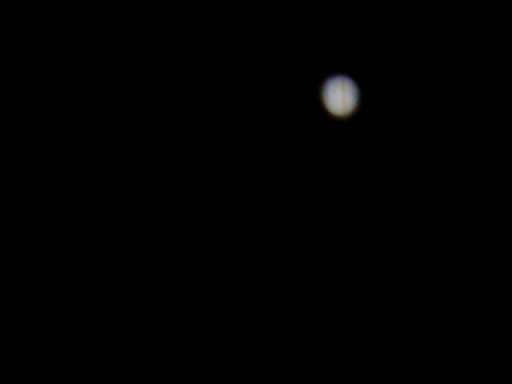
Subject:	 Photo of Jupiter
Sent:	Monday, September 25, 2000 18:10:47
From:	ricardo@iconos.com.ve (Ricardo Maduro)
Hi, I'm Ricardo, here is my first photo ever with the telescope.  It was
taken with a ETX 90/EC an a SAC IVc on the eye pice and a laptop.  I
live in Caracas, Venezuela.  The nigth was very clear.  It is blurry,
but I think that is very good for a first try.
Thanks
Ricardo Maduro
[10/6/00]
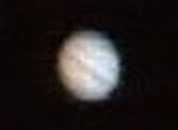
Subject:	 Jupitor
Sent:	Saturday, September 30, 2000 21:57:40
From:	jcoppock@alltel.net (john w. coppock)
Many thnx for posting my first lunar image.Here is the first one of
jupitor. ETX90EC @ prime focus ,using 12 frames thru Astrostack, And a
SAC IVB Camera.
                                                       Great Site,
                                                        John Coppock
[10/31/00]
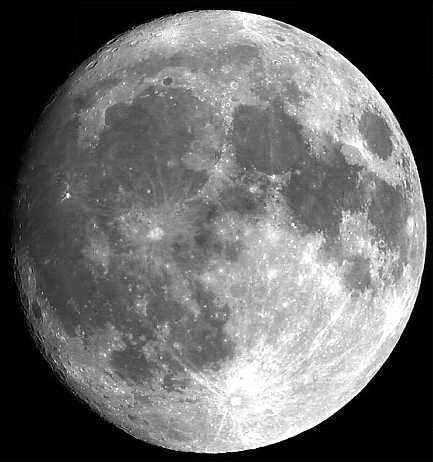
Subject:	 ETX125-EC and the SACb CCD
Sent:	Saturday, October 28, 2000 10:38:42
From:	EricDreczko@msn.com (Eric Dreczko)
Attached you should find a jpeg of the moon taken with the ETX125-EC and
the SACb CCD camera. In one of my previous notes I asked if anyone know
how to get rid of the red tint around the edges of the SACb images. I
found that I could get rid of this tint by changing the images to
grayscale when editing within PhotoShop5. Still looking for a way to
eliminate this tint before editing the image. Grayscale won't help if I
am trying for color images.

Have you tested the Integration software for the SAC camera?
Go to Part 2 of this report.