 |
Last updated: 4 June 2010 |
|
|
Sent:	Tuesday, June 1, 2010 13:54:02
From:	Michael Slevin (micksl@ntlworld.com)
Hi everyone before I begin I would just like to thank Mike for a
fantastic site. Keep up the good work.

So here goes. I have an ETX 60 with an external 12v sealed lead acid
battery attached. Last week as I was using the scope the battery fell
and the leads shorted. The autostar went blank but the led on the etx
was still lit. Blown autostar me thinks. Lucky for me im an electronics
engineer so I started off by opening the autostar and connected a 9v
battery to the unit (pic 1) the autostar fired up ok. Leave the autostar
unplugged.

Ok what now? as you probably know the autostar is powered from the HBX
socket on the ETX base a check on the pins here verified that no power
was present (pic 2)So time to open the base I must stress that doing
this Will invalidate your warranty but as the battery caused this it
will be invalid anyway. The fix was very easy. Getting In to the base is
another matter. First you need to remove the plastic cap under the base
to reveal the "nuts" you need to remove (pic3)For me this first nut was
impossible to remove due to the plastic protruding through the holes in
the nut used for locking. The only way I could do it was to heat a pair
of long nosed pliers and melt the plastic through the holes. (Try to
remove without melting first) Drastic yes but it worked. Once this is
off you will see a washer also a disk with small runners in it and a 3
pronged piece of metal (pic4) once removed you will see the white nut
that is attached to the R/A locking lever. Unscrew this and the base
will separate. Next you need to remove the fork with the control panel
unscrew the A/Z lock and remove it. Tip the base over and you will see 5
screws 3 large 2 small. Unscrew all 5 and the fork will slide out. Now
you have the fork removed remove all the screws and remove the cover.
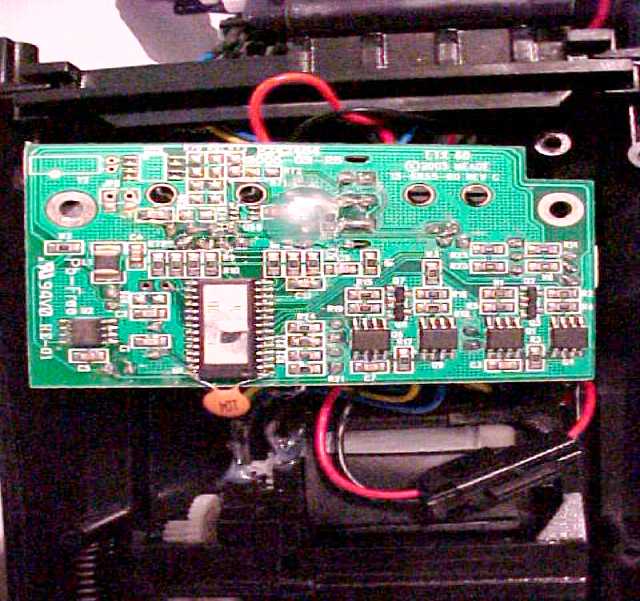
Now you can see the control board (pic5) my first impression of the
board was not good the soldering was very poor with dry joints
everywhere which would surely lead to problems in the future. I
carefully re soldered all the joints on the board (only attempt this if
you are confident with soldering) Now to the fix I attached the internal
battery pack switched on and checked for the autostar voltage none was
present. Next I checked the 0V line all good so the fault is in the +v
line. Tracing this back I discovered it goes to the on/off switch. So I
soldered a piece of thin insulated wire from the switch to the HBX
socket (pic6) checked the voltage all good. Switched off the unit
connected the autostar which fired up no problems. Whilst the scope was
in bits I decided to remove all the grease I could see and replaced with
wd40 but this is up to you. I also cleaned the encoders with a small
piece of tissue. Re assemble the scope in reverse order until you get to
the white nut. Now this bit is trial and error im afraid the white nut
needs to be finger tight so the base moves freely. There is a link to
this on the site http://weasner.com/etx/techtips/2008/etx60_repair.html
By Chris Erikson.

Well that's it I hope you all understood my ramblings and I hope it
helps people with dead autostars. If anyone needs further help please
let me know ill do my best to help you.

Mike Slevin
England


Go back to the Tech Tips page.
Go back to the ETX Home Page.