ETX TECHNICAL TIPS
Last updated: 23 June 2001
ETX TECHNICAL TIPS |
Subject:	ETX 125/LX50 TRIPOD MODIFICATION
Sent:	Saturday, June 23, 2001 7:53:01
From:	cashford@global.co.za (chuck)
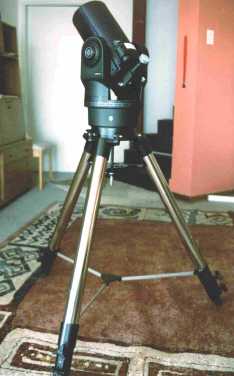
Here's a fairly simple mounting option (photos below) for the ETX125 in
altazimuth mode. This gives a rock-solid mounting with simple & quick
set-up, plus height adjustment facility. The only real downside is the
pricy LX50 tripod, but this modification still allows you to use both
the ETX & the tripod in their original configurations. If you already
have an LX50 tripod this option should be even more attractive.

This is what you do:

Modification

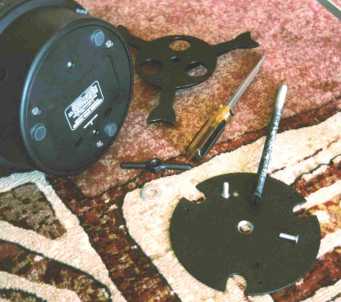
1. Replace the LX 50 longbolt with a same or similar thread countersunk
flathead bolt with a wingnut. The longbolt should be slotted at the end
as this allows a screwdriver to be used if the wingnut should lock up
(after assembly you will not have access to the bolt head). Retain the
large washer.
2. Drill a suitable hole in the ETX adapter plate to take the new
longbolt & countersink it from the topside, the side that will face the
base of the ETX.
3. Countersink the two mounting holes in the adapter plate from the
bottom, the side away from the ETX's base. You will need two new screws,
4/5 inch long (so they don't bottom in their holes), same thread as the
originals but with countersunk flat heads.

Assembly

1. To assemble set up the LX50 tripod with the spreader ready (pic #1).
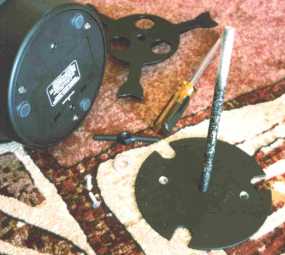
2. Insert the longbolt through the adapter plate (pic #2).
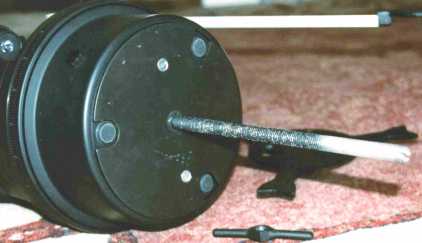
3. Place the adapter plate onto the base of the ETX & insert the two
screws & tighten (pic #3).
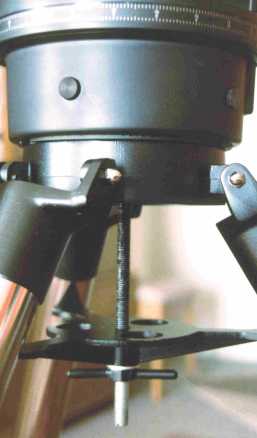
4. Place the ETX onto the tripod, feed the spreader & washer onto the
longbolt, fit the wingnut, & tighten (pic #4).
5. Ready to go! (pic #6).

Thanks for a great site, best wishes,
Chuck Ashford
Return to the top of this page.
Go back to the Tech Tips page.
Go back to the ETX Home Page.