Last updated: 26 January 2003
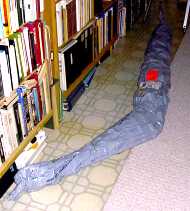 In March 1999, Clear Night Products (http://home.earthlink.net/~barrycnp/) sent me one of their TeleDomes to evaluate for ETX usage. The "giraffe leg" (as they like to describe its look when shipped) arrived in good shape (photo on right). It is a large product (8 feet long) since the only collapsing it does is about its vertical axis. This large size makes it somewhat less portable for field trips unless you have a large car, minivan, van, or truck. But for moving from inside your house or garage to your backyard it is very portable since it only weighs about 22 pounds.
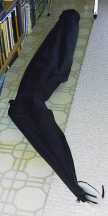 Overall, the hardest part of setting up the TeleDome was the unwrapping from its shipping bag. I decided that I wanted to keep the thick plastic shipping bag so had to carefully remove all the wrapping tape. Of course, being careful is a good idea even if you don't plan to keep the bag since you don't want to cut through the dome material. Once unpacked you still have the giraffe leg (photo on left).
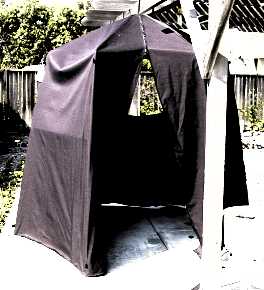
The included two-page instruction sheet (with color photos!) was adequate to explain how to set up 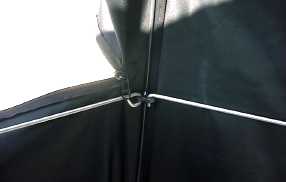 the TeleDome. But while it looks easy, until you actually set it up the first time you'll find yourself struggling with the legs that always seem to want to go where you don't want them. The process of setting up the dome is to stand it (collapsed) on its legs and then begin pulling the two "side" legs away from the rest of the legs while backing up so that all the legs will spread out. There was a slight breeze blowing and I was trying to set it up on my concrete patio (which is slick versus a grass yard), so the legs kept sliding around on me. But once I managed to get the legs moved into their proper positions and the cross-braces attached (photo on right), I found that I had a nice observatory (left photo, view through the "door" with the observing slot in the back).
I then moved the ETX and Meade Deluxe Field Tripod through the opened door into the TeleDome (photos below), an easy process.
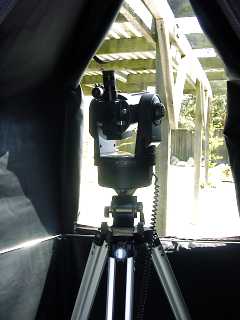
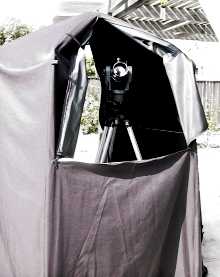
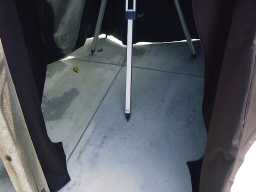 Once both you and the telescope are inside the observatory you can close the door and view through the slot or leave the door open and just attach its cross-brace. You can position the tripod close to the edge so that you can view the zenith through the opened slot. There is plenty of room inside the 7.5-foot wide observatory for the tripod, observer, and even a small table or chair (right photo). Two observers could even fit inside although it would be slightly cramped when trying to switch who was looking through the eyepiece.
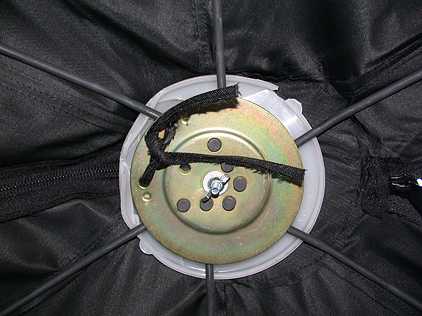
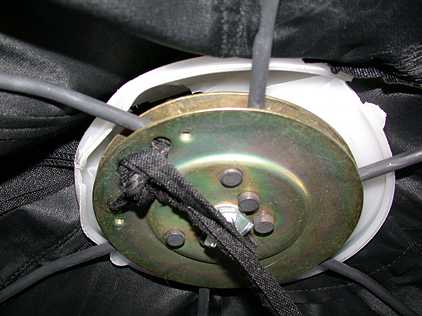
Rotating the observatory is a simple matter of pushing up on the central plate on the roof (photo on left), grabbing a leg, and rotating the whole dome. With the ETX-90/EC, you may find yourself doing this a lot while 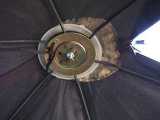 aligning the Autostar. And as you change objects of interest with any telescope, you may need to rotate the dome. The only caution is that in the dark and with the smaller confines than the observer may be used to, it is easy to hit a tripod leg and so disturb the scope's celestial alignment.
With the door zippered shut and the observing slot open the TeleDome is very stable although it can move from the wind. Included with the TeleDome are separate metal stakes to push into the ground for extra security but I couldn't use these on my concrete patio. With the door open all the way, the TeleDome is less stable but there is no danger of it collapsing on you or your telescope.
The TeleDome is well-made and comes in two heights: 6-foot and 6.5-foot. The cover is heavy-duty black Cordura fabric that Clear Night Products states will stay flexible and not crack in the cold. The legs are 1/4-inch diameter steel rods and should not bend under normal usage. The door and observing slot zippers are large and double-sided for use from both inside and outside of the observatory. The only oversight I saw in the design was that there should have been velcro attach points on the outside to affix the door and slot flaps when they are open. This would keep them from blowing back closed in the wind.
My second set up was after dark. It only took me a couple of minutes to set up the TeleDome and put the ETX inside. You will need a flashlight to assist. One item I discovered is that the cross-braces make an excellent place to hang a clipboard or other items. Just supply a hook; even a bent paperclip will work for light or small items. I had only two problems during an actual observing session. The first was that I could not easily aim the ETX at Polaris for a polar alignment. The second was that the observing flaps continually flopped back in the way. Those velcro attach points mentioned earlier are sorely needed. But other than these problems, while inside the TeleDome I felt like I was back in a real observatory, shielded from the outside world with just me, the telescope, and the rest of the universe. Nice feeling.
Take down in the dark was a simple, two-minute process. The only difficulty I had was getting it compact enough to wrap and velcro seal the bottom strap.
Another benefit of the TeleDome is that you can leave the telescope outside for periods of inactivity. While I waited for the moon to get higher in the sky I just closed up the observing slot and door. This protected the ETX and also provided some security in that the telescope was hidden from the casual passerby. When I was ready to observe again I just unzipped the openings, went inside, rotated the dome to allow the moon to be seen, pointed the ETX at the moon, and began viewing it.
Whether you should consider purchasing a TeleDome will depend upon several factors. One is the cost; nearly as much as the ETX itself. Another is its size, both height and width when setup. In my limited patio space, the width presents a challenge on setup and positioning for the best viewing. Consider your viewing location when thinking about the TeleDome. In usage, the TeleDome does provide an excellent environment for observing when you expect to be outside a long time. You and the telescope will be protected from the wind and other some other evils that can befall the observer. The setup time is minimal, although you should allow extra time for setup in the dark versus practice setups in the daytime. I look forward to using it while doing long duration piggyback astrophotography and will report back as I spend more time in the TeleDome.
Barry Craig from Clear Night Products has provided the following comments on the above. Where appropriate, my response is shown:
To transport in a car, put the TeleDome over the passenger seat with the bend side down and the top toward the back window. For cars with split front seats, lay the unit on its side between the seats with top toward the back window and the bottom into the passenger leg well. With both methods, enter the unit from the passenger side.
Another way to open the TeleDome is to stand with your back to it and spread it open like if you had bat wings. This is backwards from the instructions. Some users get more control this doing it this way. Using it on grass is best. Practice setup and take down in the daytime with and without eyes closed.
My response:
I did try the reverse method of setting up the TeleDome during my first setup exercise. But that didn't work for me given the constraints I was under.
More from Barry:
To keep the flaps from blowing back into the TeleDome, firmly pull the door/window fabric over the metal rods that form the openings. With one hand grab the short fabric loop on the inside of the dome that has the metal rod going through it while pulling the door/window fabric over the metal rod. Continue to pull the fabric over the metal rod until it almost is completely past the rod. In this position the flaps should stay put. It's kinda like pulling a pant leg over a knee cap.
My response:
I tried pulling the flaps over the rods but they still came back. I probably wasn't getting them far enough over due to the tautness of the fabric. I think that adding the velcro attach points (or a long strip of velcro) so that the flaps (both slot and door) could be held open even if not fully pulled over the rods.
More from Barry:
When taking down the Teledome, with your hand gather all the metal rods through the fabric at the roof bend. Do this when the dome is re-collapsed and standing upright. Lower the dome unto its side on the ground while dragging it slightly to help the faric at the bottom to lay straight. With this completed lasso the bottom with the bottom Velco strap.
