3D Printed Thing
ETX Rear Port Adapter
Posted: 16 January 2023
Submitted by: Dave Wilson (texasdavew@gmail.com)
I will mention up front that I have not tested this camera port adapter under a heavy load and it is possible that it could fail. Proceed at your own risk.
I wanted a camera port adapter for the ETX-90 but those I found were pricey. The camera port is 1.375" and the threads seemed difficult to locate. After lots of searching, I discovered that a standard 44mm diameter bicycle disc brake rotor adapter fits perfectly.

With the disc brake adapter in hand, I designed this camera port adapter for the ETX-90.
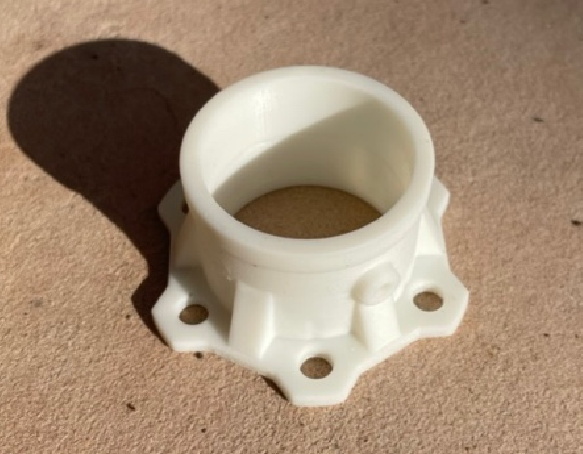
I chose to print this with the "SLA resin printer" for added strength compared to my FDM printer. FDM printers print by fusing layer upon layer and the shear forces along those layers seem likely to fail in this application. Also, FDM printers typically fill hollow spaces with non-solid infill structures, and again, seem much more likely to fail in this application.
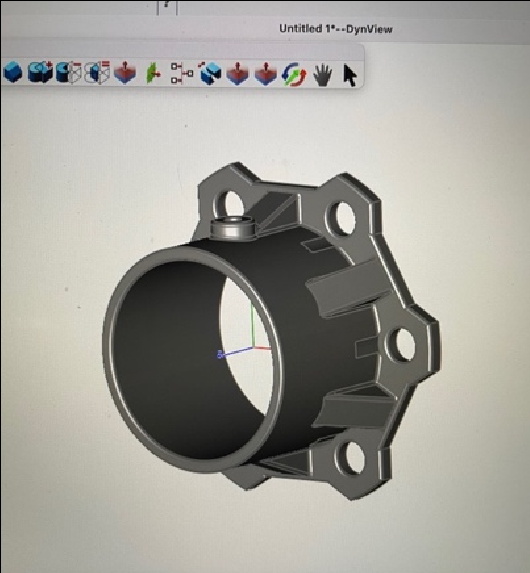
The brake adapter uses 6 M5 screws. I chose hex drive screws to minimize the head diameter of the screw:

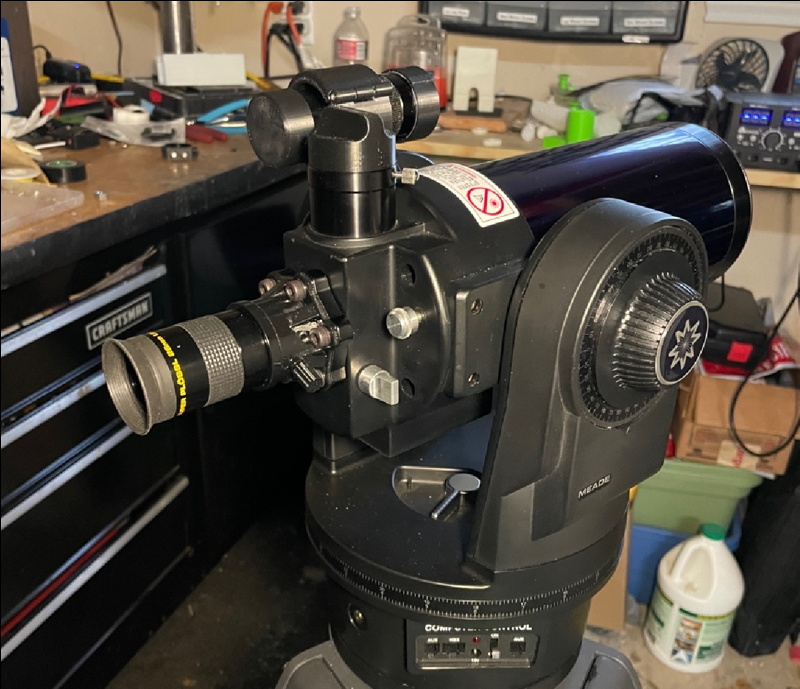
I painted the adapter black, then screwed the printed adapter to the disc brake hub and screwed in the knurl-capped screw:
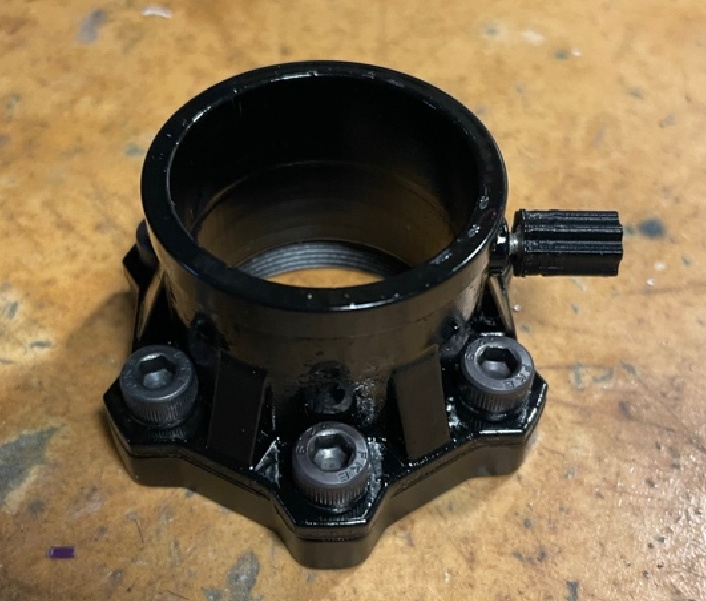
The knurl-capped screw was 3D printed using the FDM printer and a #4-40 screw head was heated and melted into the cap to hold it.
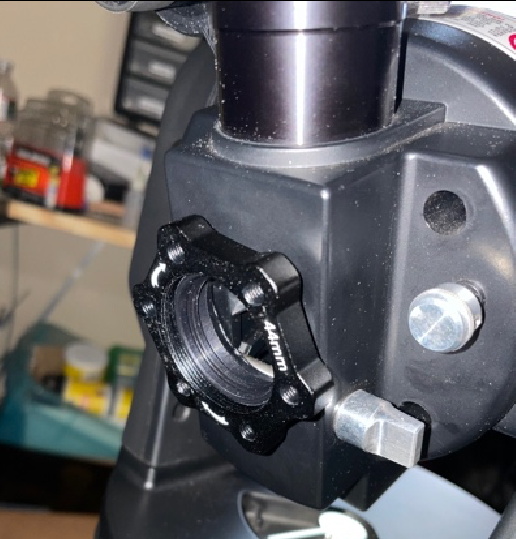
I screwed the adapter onto the ETX-90 and it’s ready for 1.25” accessories:
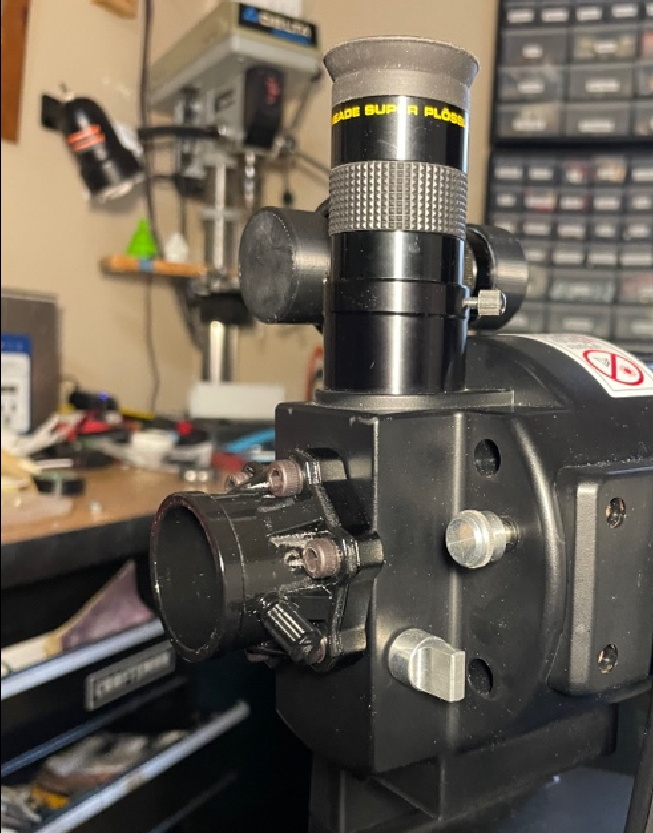
The result works well with my eyepiece but at this time has not been tested under the heavier load of a prism or a camera:
Print Information
- SLA printer
o Printer: Elegoo Saturn
o Resin: Elegoo ABS-Like resin
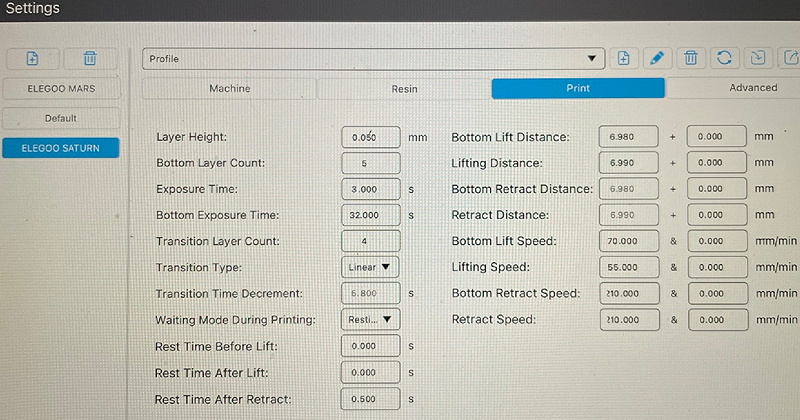
o Bottom layer exposure time: 32seconds
o Normal layer exposure time: 3.0 seconds
o Supports : none
- FDM printer
o Printer: Davinci Pro 1.0
o Filament: Flashforge Pro 1.75mm ABS Black
o Print Speed: 20mm/sec
o Layer height: 0.2mm
o Extruder temperature: 230 deg C
o Bed temperature: 100 deg C
o Fill density: 30%
o Support density: None
Materials
- Resin: whatever color desired. Possible to paint afterwards
- Filament: 0.5 meters (estimate)
- 1 4-40 hex drive screw 8mm long
- 6 M5 8mm hex drive screws
- 1 44mm diameter bicycle disc brake rotor adapter
Build Tips
- The cavity of the printed knurled knob for the 4-40 screw head is slightly small. The screw head was heated then melted into the printed knurled cap holding it in place.
- Screw the hub adapter onto the camera port threads and then align the printed adapter with the hub adapter so that the knurl-capped screw is where you can easily access it. Note or mark this position, then, unscrew the hub adapter, attach the printed adapter to the hub with the 6 M5 hex screws at the determined position.
- The printed adapter does not have threads printed for the 4-40 screw. The threads are created by forcibly screwing the 4-40 screw into the hole and effectively cutting its own threads into the plastic.
- I used a white resin to print the adapter then painted it black. The black paint I used was glossy and it is possible this will create light reflections internally. A Flat black paint may be beneficial.
Files
There are two files for the camera port adapter:
- The file for the SLA printer for the main adapter named: ETX-90_Rear_Port_Adapter.stl
- The file for the FDM printer for the knurled cap named: ETX-90_Knurled_Cap.stl
Good luck with your build. If you have any questions – contact me at texasdavew@gmail.com
Click to download the 3D printer STL files (1 MB)
Go back to the ETX Home Page.