
FINDERSCOPES
Last updated: 21 February 2009
|
ETX Flip-Finder Bracket (08/28/05) Apogee Right-Angle Conversion Kit (11/24/02) Crossman "Red Dot" (12/31/01) Meade Right Angle Finder (1/28/00) Tasco RF 4x20 Scope (1/9/99) Daisy red dot BB gun sight (6/08/03) Tasco 2.5X20mm Scope (6/4/98) Meade 6x30 Finderscope Orion 6x30 Archromatic Finder Scope JMI 90 Degree Finder Kit |
Red-Dot Gun Sight (02/21/09) Brass Eagle Red Dot finderscope (12/14/04) Stellarvue "Red Dot" (2/12/02) BSA 30mm "Red Dot" (2/5/01) Scopetronix LightSight (5/10/99) Telrad (11/30/00) Celestron Star Pointer Finder (7/18/98) Right Angle Conversion (11/4/98) Rigel QuikFinder (2/14/99) Orion EZ Finder Reflex Sight (6/14/98) |
| Accessory | Manufacturer | Model | Price |
| Red Dot finderscope | Brass Eagle | N/A | $9 |
Brian Eckert reports: "Thanks for the incredible insight your site gave me in choosing to get a finder scope for my ETX70-AT. I read the reviews that were there and I am so happy I did not buy the stock finder scope for the ETX based on your site's reviews. Here's a review of the one I ended up purchasing, feel free to post it on your site if you would like. I have attached two photos as well.
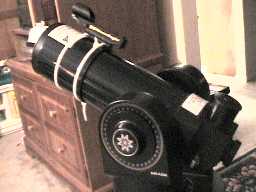 I purchased the Brass Eagle Red Dot finder scope (Walmart $8.84). This finder scope is a fantastic low cost alternative to the stock scope for the ETX70-AT. It has a laser dot that shows up in the viewfinder and it already has two brightness settings...no need to modify the finder at all. I also did not do anything with the tinted coating. It can be a little difficult to find the star you are trying to center on with the tinted coating but was still able to find what I was looking for. Mounting the scope took about 5 minutes. As you can see in the attached photos, I simply used two cable wraps to mount the scope slightly off center at the end of the
 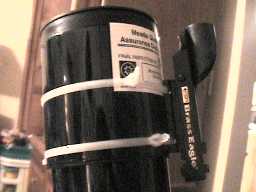 scope barrell. When you unpack the finder scope, it has a mounting that will accept a dovetail mount for standard BB guns or Paintball guns. I removed that mounting and then threaded the cable wraps throught those screw holes. It's not the most secure mounting but it does allow for adjustment pretty easily, plus I didn't want to permanently attach anything to my scope barrell. Bottom line...on the first night I had it out, I was able to zero in on the piece of sky in Orion I needed and I hit the Orion Nebula on the money!!! I used to take me a few minutes hunting up and down with the Autostar to find it, with this finder on it...bam...there it was. If you are looking for a really inexpensive finder scope that mounts quickly with no modifications, I highly recommend this one."
|
|||
| Right-Angle Conversion Kit | Apogee | N/A | $35 |
| Tiffani Brown (tiffbrown@earthlink.net) reports: "I recently purchased a right-angle finder conversion from APOGEE inc. which I find to be a very good deal ($34.95)! I called them ahead of time, and they assured me that they use only Meade optics, which made me assume that I would have to convert my own standard finder with Apogee's prism. I was pleasantly surprised when I recieved the package which included the finder-scope and prism! (I now use my stock finder as a monocular!). it was indeed a Meade 8x21 finder with a right-angle prism attached. Installation was easy (it WILL come to focus, keep turning!) and the optics appear to be excellent! I The only time it interferes with your viewing is when you use very high-power eyepieces, but I just raise them in them up in the holder, and lock them down with the set-screw! I tried the Meade 8x25 right-angle finder on a friend's ETX, and I found the eye relief on Apogee's find MUCH better! It costs alot less. too! Highly recommended! Chris Brown" | |||
| Stellarvue "Red Dot" | Stellarvue | N/A | $25 |
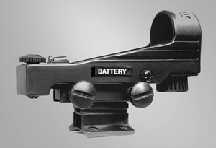 penburyst@on-edie.net reports: "Yet again great thanks for the essential website. Your website helps turn a good piece of kit (the mighty ETX) into a great piece of kit. Well Done!
I have recently taken delivery of a Stellarvue red Dot Finder for my ETX90EC and would be grateful if you would consider the following for inclusion on your Finderscope Review section.
Having been increasingly dissatisfied with the usability of the finderscope supplied with my ETX 90EC I have been looking around for a sensible alternative. I carried out a pretty exhaustive search for a red dot finder to supplement the supplied finderscope and I decided to plump for the Stellarvue Red Dot Finder at $24.95 + $ 6.00 p+p from www.stellarvue.com. It has a large window size of 1 1/8th inches, much larger than many of its competitors. The alignment adjustment claims to be by knurled knobs only, but I found it easier to use a wide-bladed stubby screwdriver to turn the ALT adjustment knob. The brightness of the very small red dot is continuously variable which is very useful when trying to find faint deep sky objects and helps save your night vision.
I considered other 1 x finders including the Telrad (too big), the Rigel (base plate to big and got in the way of the eyepiece) and the Tele Vue Starbeam (too expensive), the Scopetronix light sight, Orion EZ Finder, Televue Qwik Point, and Celestron Starpointer had too small a viewing screen, were more expensive and some relied on a screwdriver to adjust alignment.
Before ordering the finder from Stellarvue, I first e-mailed them to find out how much the shipping charges were going to be to the UK. Imagine my delight and surprise that they told me that the charge was the same very reasonable $6.00 shipping charge for the UK, the same as for the US. Seven days after ordering it over the internet from Stellarvue, the red dot finder arrived on my door step in the UK. Great service!
My only serious gripe was that the finders mounting which did not fit smoothly on to the supplied dovetail mounting plate. However, after spending two minutes carefully taking about 0.2 mm off the top of the dovetail mounting plate with some P60 emery cloth, it fitted just fine.
The finder is advertised as being designed to fit a 90 mm OTA. I tried to fit the dovetail to the front black plastic to the right of the eyepiece holder. The supplied double sided adhesive pad was only just adequate, so I decided to fix the dovetail in the same position with epoxy resin. First I had to sand down the outer sections of the underside of the dovetail to provide a better fit to the external diameter of the OTA at this point. When positioning the dovetail, great care is needed to ensure that the final position of the finder does not interfere with the eyepiece holder (try it with a 9.7 mm eyepiece) and the fork arms when pointing at the zenith. The finder sits well above the OTA which gives a good viewing position, even for targets near the zenith and around Polaris when in polar alignment.
In an ideal world a 1 x finder would have a reticule rather than a dot, and a 90 degree mirror, but at $24.95 + $6.00 p+p, (22.53) in the UK, this was cheaper than any other sensible option and better than many"."
|
|||
| Crossman "Red Dot" | Crossman | N/A | $13 |
Steve Stearns (steve@tomasara.com) reports: "I just installed a $13 Crossman red-dot sight on my ETX-125 and I am thrilled with the results. The details follow: After reading about the assorted finder solutions on the Mighty ETX site and being very frustrated with the lack of a useful finder for non-automatic operation with my ETX-125, I headed off to the local quality finder store (aka Kmart) to look at gun scopes and red-dot finders.
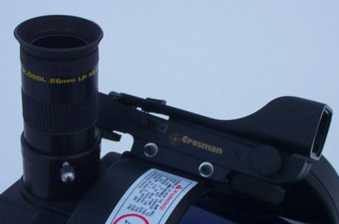
The previously reviewed Daisy finder was on sale for $10 dollars but, for an item such as this, I figured "why go cheap" and spent $13 instead on a crossman "wide angle" sight. It has a significantly larger window than the daisy. Upon getting it home I determined that to mount it in the appropriate location (see picture) I would have to make some minor modifications to it.
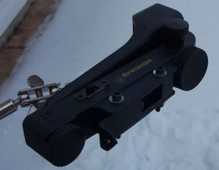
 I moved the switch and the "windage" adjustment from the right side to the left side of the sight. Disassembly is straight forward (see picture) as is reassembly of the windage adjustment "on the other side". Moving the switch was also no big deal if you don't mind cutting a new switch hole (I used a dremel tool with a twist drill bit and cleaned it up with an exacto). You have to desolder a wire, cut a little glue and straighten a little bent metal on the switch to get it out.
I used a "higher tech" approach to mount it on the scope than some other product reviewers as I couldn't figure out a way to get rubber bands to work. I took the metal mounting flanges off the sight and just hot-glued the sight to the scope right-side-down. It was easy to hold it at the desired angle where I wanted it but I was sure to get the alignment right as I put it in. I have not yet cleaned the coating off the lens (I'm going to try muriatic acid) nor put in a potentiometer for brightness adjust (I'm going to try a miniature 10k when I find one). A less impatient person than I will do those mods prior to hot gluing the sight to the scope (as I have now prohibited myself from normal disassembly).
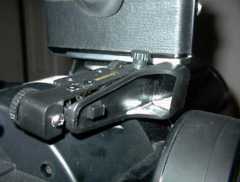 I'm left eyed so I have adjusted the stock finder as far back as it will go and can easily look through the stock finder, the scope eyepiece and the red-dot sight. The red dot also shoots below the right side of my camera (mounted on a JMI piggyback mount) and so it is still usable with the camera mounted. Another nicety is that when I am looking through the sight with my left eye, my right eye is in the clear and able to focus on the same piece of sky.
How did it work out? I chose my first test to be my first attempt to acquire a satellite (the space station in fact). Passage in our area that night only lasted two minutes. I obtained current ephemeredes from celestrak.com (meade's data was out of date) and, much to my surprise it all worked. I was able to look for the space station to appear with my head up. When it did appear I looked through (and around with my other eye) the red-dot sight and started the scope tracking when they came together (within a second or two of the autostars predicted time).
Still looking through the red-dot, I fine tuned the scopes tracking and I then jumped onto the eyepiece (18mm SWA) and there it was nicely in the field of view. I did have to keep making minor adjustments to keep it centered and twice I lost it by hitting left when I should have hit right but each time I jumped away from the eyepiece and successfully reaquired by using the red-dot sight. I am positive that without the red-dot I would have been very frustrated and likely would have completely failed to track the space station. As it was, it was a piece of cake and left me just plain thrilled! It is quite a view to be looking at the space station with all the stars whizzing by in the background.
Best wishes and Great Web-Site, Steve."
In summary, adding the 10k ohm potentiometer was worth it though a 5k ohm or possibly even smaller would be better. Note however, that removing the lens coating was NOT worth it, I
John & Anna Tait (johnanna@telusplanet.net) note: "Continuing the thread on Finderscopes I thought I would add my development on the mounting of the same Crossman 'Red Dot' sight as described by Steve Stearns. Simply remove the plastic optical mounting bracket from the telescope and make a new bracket for the Crossman from aluminium plate. The plate is easily manufactured using a hack saw, file and Dremel and fits to the scope using the original screw as well as the slot the original plastic mount slips into. The result is a neat and unobtrusive mount. Paint the aluminum matt black to conceal it as much as possible. 2 New bolts will be required as the fitting plates which come with the sight are not required. Some shaping of the scopes base may be needed to aid the alignment process. Hope this is of use to someone." 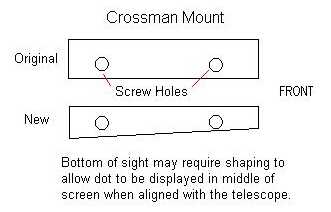 
|
|||
| BSA 30mm "Red Dot" | BSA | N/A | $35 |
| Nick Roy (nickroy@home.com) tells us: "I am just starting out with my ETX, and I love your site, it's the best I've seen, packed with great information. Here's my review of the BSA 30mm "Red Dot": I just picked up a BSA 30mm "Red Dot" finderscope and have set it up with plastic "click-lock" straps (cable ties) about 3/4 of the way up the tube of the ETX. The scope has 10 levels of brightness, and aligning the scope to Polaris is incredibly easy now. I just want to emphasize this for everyone who has bought the new ETX 70 or 60, which don't come with finders: I highly recommend getting a red dot scope at your local sporting goods store, it makes setting the scope up and tracking down alignment stars quick and painless. This scope is adjustable in both elevation and windage (Dec/RA), but I have not found this to be necessary, as it was very well aligned from the factory. A great add-on! The scope was $35 at Cabela's in Owotona, MN." | |||
| Right Angle Finder | Meade | #825 | $50 |
|
Tomuphigh@aol.com reports "As an owner of an original ETX, I find your site useful and informative. I recently purchased Meade's ETX right angle finderscope and would like to submit the following review. Keep up the good work.
As any owner of any ETX model can understand, the stock finderscope really leaves a lot to be desired. When I realized that the finder is useless for polar alignment, I checked into alternatives. When Meade recently made a right-angle finderscope available, I bought one.
I ordered mine from Pocono Mtn West ($49.95 + $6.00 shipping) and it arrived via UPS ground in about 5 days. Everything went smooth with the purchasing.
It comes with good accurate instructions, looks like good quality, except for the plastic mirror housing, and installed easily in seconds, just like the ad says. To my surprise, the finder is readily focusable.
This is where the easy part ends. First I tried about every possible position for the finder eyepiece including straight up, parallel to the main eyepiece to 90 degrees to the main eyepiece and everything in between. I chose to mount it straight up because when the finder is rotated the image rotates to an orientation different than that of the ETX. Since the RA finder already has a reversed image (left to right, just like the ETX), any different orientation causes the user to need to learn to use it that way and seemed more complicated than necessary. The only drawback to this is that it can sometimes get in the way of the main eyepiece, especially when using small focal length eyepieces (i.e. the 9.7mm) or can sometimes be obstructed by the eyepiece when using the barlow. This was not a difficult problem to work around, though and was a minor inconvenience when compared to the benefits gained. Once the position was decided upon, aligning the RA finderscope with the ETX took more time than I expected because of having to fiddle with those little screws on the bracket and the motion they caused. The only real mechanical problem I encountered was that the mirror housing on the RA would hit the fork mount near polar position and knocked it out of alignment. I used my dremel tool to remove just a little of the fork arm plastic so the finderscope mount would hit first to protect the finder. I am a little surprised at Meade for missing this detail.
I took the ETX out to the Great Sand Dunes National Monument in Colorado last weekend to shake it down. I was not disappointed. Polar alignment is now a snap. Once I got used to the reversed(left-right) orientation, which was not a stretch because the ETX is already that way, finding targets was dramatically improved. Gone were the neck cramps and trying to polar align with the 26mm eyepiece. Having the finder focusable is cool but of questionable value. One bonus is using the old finderscope as a small spotting scope. Its fixed focus means it is always ready to view. The occasional problems with access to the RA were well worth the compromise. My only question is why didn't the ETX come like this in the first place, instead of an extra $50 or so in hidden cost. You can do without it, but if you observe with the ETX on a regular basis, the RA finder makes is much more pleasant, and thus well worth the $$$."
Jose Rizal (rizaljp@hotmail.com) adds: "Just adding to the review of the Meade Right Angle Finder, albeit convenient, its optics have more spherical aberration compared to the stock ETX finder." |
|||
| LightSight "Red Dot" Finder | Scopetronix | N/A | $25 |
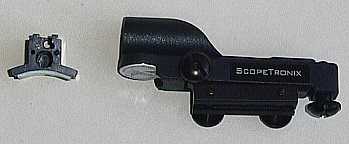 Scopetronix recently sent me one of their new LightSight Zero Power Red Dot Sight finderscopes. It comes with an included battery (calculator style) and a mounting bracket with sticky foam tape (see photo on the right). The rod dot (focused at infinity) has two brightness settings and both are easily visible in the daytime, dusk, or at night (see photo on the left). Mounting it on the ETX is a simple matter
  of sliding the sight onto the mount and attaching the mount to the ETX. Determining WHERE you want to mount it will likely take longer than the actual mounting operation. You will want to position it where it will not interfere with the DEC movement nor be in the way of any screws or other devices you may use with the ETX. As can be seen in the next photos, I mounted it on the rear of the ETX on the right side. In this position the ETX can fully move in DEC and I can still loosen and tighten the eyepiece locking screw. I opted for this position at the rear so that I could attach my 35mm camera using the JMI Piggy-back Camera Mount, which slides onto the ETX OTA. Unfortunately, I can't use the LightSight while the camera is mounted since the camera body blocks the view through the LightSight. Always some tradeoff! Once mounted you can adjust the LightSight horizontally and vertically using two large thumbscrews to align it parallel to the ETX optical axis. This is a much simpler operation than trying to align the standard ETX finderscope with its six screws.
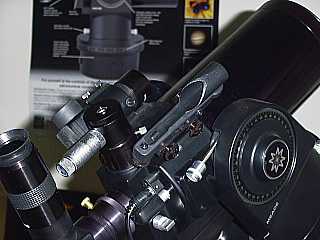
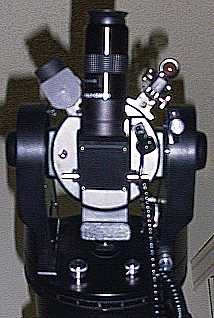
In use, the LightSight works well. I thought the red dot was a little bright for night time usage (it was brighter than Mars). Rather than have the dot overlay an object, I aligned it to be at an offset from the object being centered. This worked well. For daytime use, the brighter setting works perfectly. Overall, the LightSight is another fine product from Scopetronix. It is lightweight and small enough to not look out of place on the ETX. It requires no tools or modifications to install. It can easily be removed for travel. While there are many other "red dot" finders available, most are large and will look cumbersome on the ETX. If you like red dot sights, consider the LightSight from Scopetronix. Scopetronix reminded me that red dot sights can be used with both eyes. So even though the lens of the LightSight is blocked by the piggybacked camera body, when I moved my head to the side of the ETX I could see the dot superimposed on the sky with my left eye and the target sky area with my right eye. Worked great. |
|||
| Tasco RF 4x20 Scope | Tasco | N/A | $15 |
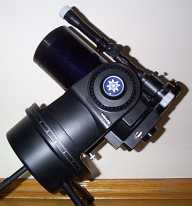 Chuck Bryson (ChuckBIII@aol.com) reports: "While looking for a Daisy Electronic Point Sight at "KMART" I fond another inexpensive scope that is easy to attach to the ETX and works much better thab the orginal scope. It turns out that the TASCO model RF 4x20 scope designed for either a rim fire 22 or air rifle is both easy to mount, reasonably bright and has a useful magnification. The eyepiece end of the scope is 1 1/8 inch in dia. and is long enough to fit directly in the mount supplied with the ETX. The stock screws hold the riflescope securly and provide adquate adjustment range. I found the scope easy to align to the main tube. The field of view includes all three of the stars in Orion's belt making navigation easy. The only down size is the color correction of the TASCO scope is not perfect. However it only cost $14.95."
|
|||
| Telrad | Telrad | N/A | $40 |
| Larry O'Connor (larry.oconnor@shaw.wave.ca) reports: "I listened to the advice of several contributors regarding the virtues of a TELRAD, in all its ungainly glory. Boy, I wish I had bought one earlier. What a relief to be actually able to "Point and See". I mounted mine on the right side (looking from the back) with about 6 elastic bands around the base and optical tube. (Hi tech eh!!!) My head gets in the way if its on the left. I also removed the finder scope with its right angle adapter and have had no problem getting down and looking up. My ETX is on a MANFROTTO tripod and sits "ready to go" in the family room. I can be outside in 2 minutes and looking. I know the eyes take a lot longer to adjust, but with the TELRAD I can be polar aligned almost instantly. It's neat to be able to nip out for a quick look whenever you feel like it, without any involved set-up. I have taken the TELRAD off the base and reinstalled it to see how much it changes, but it only required minor correction to be on again even with the crude attachment system."
Brian Nakata (bnakata@cybcon.com) comments: "Yes, this thing is almost as big as the scope! They really need to come out with a "micro" version that's 2/3 or even 1/2 the size. I used the double stick tape mounting scheme that comes with the unit, and with the rear butted up against the plastic piece at the rear of the OTA, the front end of the unit is almost even with the front of the OTA. A solar filter, which I'd like to get in the future, probably won't fit. Anyway, this thing is worth the trouble, IMO. Once aligned, which is accomplished with three nylon nuts conveniently located at the rear of the unit, it's so easy to aim the scope that it's almost cheating. I also got the pulser unit, which requires drilling a 1/4" hole in the side (and replaces the two AA batteries with one 9V), and this is great for dim objects as it allows you to move the scope when the reticle is off and check the alignment when it turns back on. The flashing rate is adjustable via a knob accessable by opening the battery door (the whole top of the unit) and ranges from "fully on" to an extremely large number of seconds. The hole you have to drill allows a three position toggle switch to protrude from the unit. The center position is off, the position closest to you is on (like a "normal" Telrad), while the position furthest from you is for flashing. The normal on/off/brightness control still works although it no longer functions as a power switch. Thus, you can control both the flashing rate -and- the brightness of the reticle when it is on."
Ted Kurkowski reports: "I'm not an ETX user - I have a different GoTo scope - but I do find that
your site has a lot of useful information - thanks!
I'd like to add to your Finderscopes section. Although the Telrad finder is
|
|||
| Daisy red dot BB gun sight | Daisy | N/A | $14 |
| Paul (strburst@ix.netcom.com) reports: "The narrow field of view for both the ETX and it's finder scope (not to mention the finder scopes awkward position) makes it difficult to get a quick fix on stars and planets. A Telrad type sight would be perfect but the Telrad is almost as large as the ETX itself. There are other small reflex sights available for about $40 or, you can purchase a 'Daisy red dot' BB gun sight from Wal Mart for about $13.95. Its small size and light weight make it ideal for the ETX. You can easily locate Polaris for a quick polar alignment or any other naked eye star by looking through this sight and placing the red dot over it, just like a Telrad. Place the Daisy sight onto the optical tube using a good quality double sided tape such as Radio Shacks high temperature double sided tape strips. You can remove the Daisy gold lettering printed on the sides of the sight with lacquer thinner or nail polish remover to make the sight look like a factory item. See the link below for pictures and some additional info such as adding a variable resistor to adjust the LED brightness.
http://home.att.net/~jblessin/daisy.htm This project is by far one of the easiest, inexpensive and most useful additions that can be done for your ETX." Dennis Fisher (fisher2314@hotmail.com) adds this: "The attached 2 photographs show my adaptation of a spotter sight for the ETX 90. I think this would make a useful addition to your site as this accessory is very useful and was done with almost no money. The sight is a Daisy B-B infared sight that operates on a small button battery. The sight costs about $13 at K-mart. When turned on (the light intensity is variable by the way), it projects a small red dot on the cross hairs. I installed it on the ETX 90 using 2 worm gear type hose clamps (6" diameter and $1.45 each at the local hardware store) and a dovetail mount I found in the gun department of a sporting good store for about $2.00. The dovetail has 2 small holes in it for mounting to a gun or pistol. Drill a small hole in each hose clamp (about 1/8" is sufficient) and with short screws and hex nuts, firmly bolt the hose clamps to the dovetail. Two are recommended as with only one,one wrong bump and the sight will twist out of alignment. The sight can then be bolted to the dovetail and the hoseclamps attached to the scope. During the day, spot the sight in using a utility pole or some other distant stationary object. The sight has two adjustment screws to move it up-down or left-right for alignment. When the alignment is complete, sighting through the cross-hairs will perfectly aim the scope at the object you are trying to view or get aligned with. It works perfectly, only weighs about 2 ounces, is much cheaper that similar laser sights and allows for a very fast alignment procedure for the scope. I hope you find this useful information and can post it on your web site. Thank you for the useful information from the site and keep up the good work." 
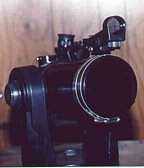
David Butler (Ginahoy@aol.com) adds: "I was looking for a small red-dot finder and your web site mentions the Daisy BB gun red-dot sight. Only problem is you have to install a potentiometer to control the brightness. I just visited Daisy.com and they now offer one with a brightness control (Max View Electronic Point Site, Item 7811). My local K-Mart sells this newer version for $13.95. Wal-Mart apparently only stocks the original version, but marked it down to $8 and change." |
|||
| Celestron Star Pointer Finder | Sky Instruments | N/A | $132 |
| Mark Fex (mafex@sympatico.ca) reports: "Was just on your website - Great Job - Many thanks for the time and effort you put into it.
I was reading with interest the various solutions people are coming up with for the " finderscope " on the ETX, and thought I would send in my two cents worth. First I purchased the Celestron Star Pointer finder which is very similar in function to the Orion device described on the website. It was easy to install. has adjustable brightness and is a snap to use. I would recommend it to any one for any size scope. Next I found a wonderful 8 x 50 finderscope manufactured by Sky Instruments in Richmond B.C. I paid $190.00 CDN (about US$ 132.00) including all taxes - out the door including a set of scope rings to mount it with from a local dealer in Windsor Ontario. It is finished in a dark blue like the Meade series of finders but best of all is that the eyepiece is a standard 1.25" diameter and is available as a 90 degree OR a 45 degree ERECT IMAGE finder!!! I bought the 45 degree model and made a custom bracket to fit the tube of the ETX ( the scope rings I got had a base cut for an eight inch tube ) This finder has separate focus for the cross hairs and the image itself. The image is correct up and down and left to right !!! It is a pleasure to use!. I live about four miles from downtown Detroit and can easily see stars to 7th magnitude from my back deck with it. Star hopping to your objective with a star atlas is great. The finder also has a built in dew cap which makes it look rather long, but is a small price to pay for dew-free seeing and the wonderful images I can see with it. I mounted the Star Pointer near the front of the scope off to the right of the eyepiece and mounted the finder so that the finder eyepeice was just a couple of inches to the left of the scope eyepeice. I can go from finder to scope by moving just slightly. The combination of these two devices allows me more time to enjoy the view rather than spending all of my time looking for it! Definitely five stars in my book. Regards |
|||
| Bantam 2.5X20mm Shotgun Scope | Tasco | N/A | $40 |
Greg Kohanim (gregko@microsoft.com) reports: "Great site for any ETX user. As many of your readers, I too purchased an ETX for it's  portability (already owning a Meade 16" Starfinder that is anything but portable) and have quickly discovered that the finderscope is completely useless. Rather than spending big bucks on a right angle adapter or retro-fitting a larger viewfinder that would provide an upside-down/ backwards image, I decided to outfit my ETX with a rifle scope as I did with my giant dobsonian. The advantage to using a rifle scope as a telescope finder are many including: portability (already owning a Meade 16" Starfinder that is anything but portable) and have quickly discovered that the finderscope is completely useless. Rather than spending big bucks on a right angle adapter or retro-fitting a larger viewfinder that would provide an upside-down/ backwards image, I decided to outfit my ETX with a rifle scope as I did with my giant dobsonian. The advantage to using a rifle scope as a telescope finder are many including:
1) Correct image orientation. After much measuring and shopping around, I found what I believe to be the perfect scope for the ETX. It is a Tasco Bantam 2.5X20mm shotgun scope. It is small, light, and has a huge exit pupil and excellent eye-relief characteristics. Also, it will fit in the ETX's existing mount and will allow full scope mobility in the forks to a true 90' for polar alignment. Best of all, it only costs $39.95 retail, and works FLAWLESSLY. BTW - The ETX fits in my Doskocil large case just as well with the new Tasco scope as it did with the 8X21 that Meade provides. (For those who are wondering about the Moonlight shown in the photo, it is an inexpensive Zenit-made device sold at COSTCO for about $250. Although it works well on the ETX for amplification of light, the images are annoying in that the entire field of view is bright green, so contrast is at a minimum. More of a novelty I guess.)" |
|||
| Meade 6x30 Finderscope | Meade | N/A | $50 |
| Geoff Gaherty (Geoff.Gaherty@logicbbs.org) reports: "Here is an account of how I upgraded the finder on my ETX. The ETX finder suffers from too small aperture, too high magnification, and a terrible location for the eyepiece: too close to the telescope. I ruled out a right-angle adapter, because it doesn't help the first two problems, and is useless for the "two-eye" finding method I prefer. I also ruled out a 1x "heads-up" finder since the light pollution where I live doesn't show me enough stars to navigate by, especially with the ETX' small field of view. I noticed that Meade's 6x30 finder is almost the same diameter as the ETX finder. After getting one, I discovered that it is about 1mm too large to fit in the ETX finder bracket. With my jeweler's saw, I cut the ETX' finder bracket just to the left of its attachment to the telescope, allowing the ring to open slightly. The 6x30 finder now slips into the finder bracket, and is held firmly at the objective end. The finder bracket is tapered slightly on the inside, opening towards the eyepiece end, so I can still use the screws at this end to align the finder. I had to remove one of the screws at the objective end because it hit the mounting fork in its new position. The result is that I now have a finder with a larger aperture, lower magnification, and the finder's eyepiece is now a couple of inches back from the eyepiece end of the ETX. Guide stars which were invisible in the original finder are now easy to see in the 6x30, and I can use both eyes. Because the cut I made is underneath the finder, it is invisible, and the plastic of the mount seems quite strong enough to function without any problems, though I may try to fill the gap to make the structure stronger. Meade's finder is available in either blue or white; I chose the blue as it's closer to the ETX' tube color, but either should do. The Meade 6x30 finder cost me $69.95 Canadian, so I suspect it's about $50 in the US." | |||
| ETX Right Angle Finder Conversion | Pocono Mountain Optics | N/A | $56 |
| Larry Janowicz (ljanowicz@metrohealth.org) reports: "I recently ordered an Apogee ETX finder right angle conversion kit from Pocono Mountain Optics. The price was $56 including shipping. Their service was great and shipping speed set a new record in my book. Since the kits were recent arrivals they would not accept my order until they had tried the product themselves. The kit utilizes the objective and eyepiece from the original finder. I had no trouble reassembling the optics into the conversion tube. I was worried that it might not work as well as I wanted because I am left eye dominant. I was concerned that if I used the finder with my left eye the main eyepiece would be an obstruction. No problem. By rotating the finder a little in the mounting rings it was easy to see that it could be used by both right eye and left eye folks even with taller eyepieces. I tried the finder last night and wondered why Meade did not use a right angle finder as part of their original design. When I pointed the scope overhead to Epsilon Lyra my back and neck both thanked me for making the finder change. It's great to be comfortable again! One potential problem exists for those individuals who have more severe cases of nearsightedness. If you use the finder without glasses (because of its short eye relief) it might not focus at infinity. I am fairly nearsighted and the finder finally came to focus (without my glasses) at the very end of the threads. This potential problem could be probably be eliminated if the manufacturer decreased the tube length by about 2mm. I had no problem bringing the finder to focus with my glasses on. I told Glenn, the owner of PMO, and he said he would pass this info on to the manufacturer. Overall, I'm a much happier camper with this gadget in place!"
Jim Firth (firthj@pacinfo.com) reports: "I just got the Apogee 90 degree finder modification kit. It's available from Pocono Mt. Optics and Shutan for $50 + shipping. I have to admit to being very frustrated with the original finder (what was Meade thinking?), and so I was delighted to see a modification available. The conversion is very simple to install and fits well. The original finder's objective lens and eyepiece are retained. The tube and porro prism are not used. My first night out: Aligned on Polaris in seconds. It's a real convenience having the ETX eyepiece and finder eyepiece adjacent to each other. It also seems to make focusing the finder a much easier process. This could just be my imagination, but for some reason the quality of image in my finder seems improved (i.e. from lousy to just mediocre). Star hopping is now a simple process. No more crawling around on the ground to try to use the finder to locate objects overhead. I was able to locate Epsilon Lyra easily (and split both doubles). This is an excellent product and greatly enhances the use of the ETX for those who are inclined to rely on their finders for locating objects." Alex Gibson (alexgibson@sympatico.ca) adds: "I experienced the same problem with focusing. I found that by removing the locking ring, I was able to give the objective lens another turn or two and that brought me to a perfect focus. This suited me fine as I had a bit of a problem getting the locking ring on the tube and succeeded with a bit of effort. The objective lens was easy to screw on the tube and this makes the removal and insertion of the Apogee finder from the ETX a simple matter as I no longer have to fiddle around with the locking ring. I found that the final couple of turns on the objective necessary to bring to a focus were much tighter as you move down the tube and I have had no problem with the objective loosening in the absence of the locking ring. This might be old hat to you but I thought I would bring it up in case anyone else may experience the same problem." Wayne Hale (WayneH7974@aol.com) adds: "Returned my Apogee Right Angle Finder adapter kit to them last Saturday with the complaint that the lens would not focus with the locking ring behind the objective mount. They returned the unit today with the objective/locking ring in place and focused at infinity. Unfortunatley the cross hairs in the eyepiece are now almost totally invisible. Looking at the end of the eyepiece, I can see the crosshairs on the small lense and see that the lens elements may be adjusted or moved. I suspect that instead of cutting the threads in the finder tube a little longer to allow the locking ring to move back far enough for the objective to come into focus, some clever tech "tweaked" the rear lens element of the eyepiece instead, not realizing he has totally thrown the focus of the cross hairs so far out that they are essentially invisible. I just sent an email to Apogee advising them of the new problem and hope to hear from them soon." Wayne Hale (WayneH7974@aol.com) has provided some additional information: "After taking a much closer look at the problem, I finally figured out that the cell containing the crosshairs themselves was installed upside down, or so it appears. As I got the unit back from Apogee, the crosshairs were completely out of focus to the point of almost being invisible against a bright background. I tried screwing the cell further into its socket but it seemed to bottom out to soon. I figured I didn't have anything to lose so I unthreaded the cell, flipped it over which obviously would put the hairs much closer to the lense inside the finer barrel and low and behold, they are now in focus again and very prominent against even a fairly dark background. I'm not sure why this happened, haven't gotten a reply to my note to Apogee but will let you know what they have to say." Brian Nakata (bnakata@cybcon.com) comments: "This is a great piece. Good polar alignments are really easy with this. Everything went together just fine, and I have no complaints against the quality of the product, except that it is somewhat overpriced for being a piece of "machined" nylon (although nicely done). The image is no longer right side up, but this is not really a problem for me." |
|||
| 6x30 Archromatic Finder Scope | Orion | 13023 | $44.95 |
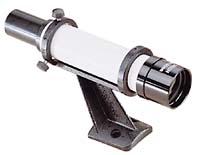 Tom Gideon (tomg@icat.com) reports: "I just acquired a 6 x30 finder for my ETX from Orion Telescope. This is a standard imported finder. Cost was about $48. A few pointers to note about this unit: 1- The finder with the standard mount sits high enough for you to use it with the scope pointed at Polaris. This alone makes it a much more affordable choice, I believe, than the right-angle mods available. 2- Depending on where you mount it, the finder base will require modifications (removing plastic) to allow the mounted assembly to clear the fork. Double sided foam strips were recommended by the salesperson, however, I spent extra time making this a removable mounting so I can still put the finder (and telescope) in the case. If anybody has questions about the details I can answer them further." Tom Gideon (tomg@icat.com) reports: "I just acquired a 6 x30 finder for my ETX from Orion Telescope. This is a standard imported finder. Cost was about $48. A few pointers to note about this unit: 1- The finder with the standard mount sits high enough for you to use it with the scope pointed at Polaris. This alone makes it a much more affordable choice, I believe, than the right-angle mods available. 2- Depending on where you mount it, the finder base will require modifications (removing plastic) to allow the mounted assembly to clear the fork. Double sided foam strips were recommended by the salesperson, however, I spent extra time making this a removable mounting so I can still put the finder (and telescope) in the case. If anybody has questions about the details I can answer them further." |
|||
| QuikFinder | Rigel Systems | N/A | $39.95 |
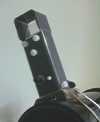 The QuikFinder is a finderscope replacement and another product from Rigel Systems (see the Starlite and Skylite LED flashlights comments below). It has no optics other than that necessary to reflect the illuminated reticle to your eye. It comes with full mounting instructions and some adhesive strips to actually mount it to the telescope tube. No drilling or other modifications to the ETX are required. In fact, I left my Meade ETX Finderscope attached. The QuikFinder is a finderscope replacement and another product from Rigel Systems (see the Starlite and Skylite LED flashlights comments below). It has no optics other than that necessary to reflect the illuminated reticle to your eye. It comes with full mounting instructions and some adhesive strips to actually mount it to the telescope tube. No drilling or other modifications to the ETX are required. In fact, I left my Meade ETX Finderscope attached.  As a temporary mount, I attached the QuikFinder using rubber bands (strong ones) at the objective end of the ETX (opposite the eyepiece end). I was able to align the reticle easily using the three adjusting screws (the white knobs at the top). Since adjusting was so easy I may just continue to use the temporary mounting since I can remove the QuikFinder when finished observing so that I can cover the ETX (using a home made cloth cover) and then reattach and easily realign. Using the QuikFinder was easy. Just point the ETX in the general direction of what you want to As a temporary mount, I attached the QuikFinder using rubber bands (strong ones) at the objective end of the ETX (opposite the eyepiece end). I was able to align the reticle easily using the three adjusting screws (the white knobs at the top). Since adjusting was so easy I may just continue to use the temporary mounting since I can remove the QuikFinder when finished observing so that I can cover the ETX (using a home made cloth cover) and then reattach and easily realign. Using the QuikFinder was easy. Just point the ETX in the general direction of what you want to  observe. Look through the QuikFinder with your eye near the eyepiece end of the ETX (about 10" away from the QuikFinder) and then move the ETX in RA and DEC until the reticle is aligned around the desired object. Once you get used to seeing the reticle (full bright in this picture), it is easy to align objects. The intensity of the reticle is adjustable (the black knob just visible near the bottom of the QuikFinder) and can even be made to blink (the small white knob at the bottom). I found the blinking an annoyance so I just dimmed it down except when pointing it at the nearly full moon when I turned it to full bright. At the full bright setting the reticle was easily visible surrounding the moon. The QuikFinder is simple to mount and use. If you are looking for an easier way to point your ETX than using the regular ETX Finderscope, investigate the QuikFinder. observe. Look through the QuikFinder with your eye near the eyepiece end of the ETX (about 10" away from the QuikFinder) and then move the ETX in RA and DEC until the reticle is aligned around the desired object. Once you get used to seeing the reticle (full bright in this picture), it is easy to align objects. The intensity of the reticle is adjustable (the black knob just visible near the bottom of the QuikFinder) and can even be made to blink (the small white knob at the bottom). I found the blinking an annoyance so I just dimmed it down except when pointing it at the nearly full moon when I turned it to full bright. At the full bright setting the reticle was easily visible surrounding the moon. The QuikFinder is simple to mount and use. If you are looking for an easier way to point your ETX than using the regular ETX Finderscope, investigate the QuikFinder.The QuikFinder is a jewel to have for locating objects near the zenith where the standard ETX finderscope is essentially useless unless you have the ETX mounted on a tripod. Since I have the ETX mounted on a portable table I could not get my eye into any position that would allow me to locate M57 (the Ring Nebula) in Lyra. I knew where to look for M57 but trying to point the ETX to that position was impossible since M57 was essentially straight up at the time I was looking. So I re-attached the QuikFinder on the right side of the ETX (using rubber bands), did a quick alignment, moved the ETX to point in the general direction of Lyra, sighted through the QuikFinder to the approximate location of M57 and looked through the 26mm eyepiece. And there was the Ring Nebula! I then decided to look at the M13 globular cluster in Hercules. It was slightly west of the zenith but still essentially straight up as far as the ETX finderscope was concerned. So I moved the QuikFinder to the left side of the ETX (using rubber bands allows it to be easily repositioned), sighted to the approximate location of M13, and looked through the eyepiece. I was slightly off but only had to move around in R.A. and Declination a small amount to locate M13. The more I use the QuikFinder the more I appreciate its simplicity and usefulness. I highly recommend it. I also recommend you consider not mounting it permanently but try using strong rubber bands to secure it. This makes it very easy to move from one side of the ETX to another position, depending upon the ETX orientation needed to find the desired object. Rigel Systems has now released a new model of the QuikFinder.
Many people have commented that the QuikFinder looks out-of-place sticking up from the ETX. But there is a simple modification you can make to attach it horizontally against the ETX tube |
|||
| 90 Degree Finder Kit | JMI | N/A | $79 |
| Paul J. Boudreaux (boudreau@eng.umd.edu) provided the following comments: "I thought your readers would be interested in some of the details of my latest acquisition for my ETX. Two weeks ago I ordered the 90 degree finder conversion kit from JMI for $79.00 plus $4.00 shipping. Since we all agree that the standard ETX finder is useless for polar alignment, I hoped this right angle finder kit would change that situation. The plastic replacement tube arrived and the conversion is, in principle, simple. However, it was immediately apparent that the quality control was very poor in its manufacture.
The second objection I have to this new finder is the attachment method for the eyepiece assembly. Instead of threading into the plastic so that it could screw into the 90 degree barrel, it used a set screw ot small thumb screw to hold the eyepiece in place. This screw gouges into the fine threads of the eyepiece such that it may make it useless if you wanted to reassemble the original finder at a later date. Perhaps it was the poor quality control that made JMI opt for a set screw attach instead of a threaded assembly. The mirror in the right angle barrel was quite dirty and covered with some type of residue, apparently from the gluing process that held it in place. After a bit of careful cleaning of this mirror, all is well. I certainly would not recommend that anyone attempt this cleaning without first seeking a professional's help. At my laboratory, where a number of optical physicists work, I could get this kind of help. The residue was also apparent on the outside of the barrel. A simple rubbing removed it. Well, after all that, how did it work? Fabulously! Two nights ago I spent some time aligning the cross hairs with the optical axis of the ETX. I use a heavy duty camera tripod to do the equitorial mount. Polaris is now easily sighted through the right angle finder. Of course, it is not the same as through the original finder, since the correcting prism is not there, so an inversion is present in the field of view because of the mirror. However, it is now a very simple task to polar align the ETX from my location in Washington, DC. Is it worth the price? That is a tough call considering all the corrective action that I had to take to get it to work. Unless the quality improves, I would not recommend this kit to anyone who did not feel that they had the kind of mechanical skills that I mentioned. If the the threads for the objective lens were of good quality and there were threads instead of a set screw/thumb screw for the eyepiece, I would have no hesitation in recommending this accessory. As it is now, I can't." Gregory Randall (Greg_Randall@msn.com) provides the following additional comments: Another problem that can come up: don't drop the eypiece end!!! I did and broke one of the crosshairs - they are right on the inside end of the eyepiece and very vulnerable.Can be fixed with a VERY fine thread or hair. Hair from my head was about twice as big in diameter as the original. Otherwise the JMI kit is great and the finder is actually usable! Having lots of fun with the ETX - had it about a year now. |
|||
| EZ Finder Reflex Sight | Orion | 7075 | $40 |
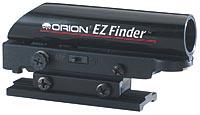 Ray Wartinger (Ray_Wartinger@wb.xerox.com) reports: "I mounted my Orion EZ Finder on my ETX and, boy, what an improvement! Its mounted about halfway up the tube just to the right of the eyepiece holder. I modified the existing mounting brackets by bending the bottoms of the brackets to match the round ETX tube and stuck the fuzzy side of some self stick velcro patches to it to protect the tube. Then I used plastic tie wraps to hold it in place. It is sooooo much easier to aim the scope now. I can use it to polar align too since it sticks up high enough so as to be usable in the 90 degree position. Just point it at Polaris with the tripod's altitude and azimuth adjustments then fine tune it by rotating the R.A. back and forth and adjusting the tripod's tilt until it stays centered." Ray Wartinger (Ray_Wartinger@wb.xerox.com) reports: "I mounted my Orion EZ Finder on my ETX and, boy, what an improvement! Its mounted about halfway up the tube just to the right of the eyepiece holder. I modified the existing mounting brackets by bending the bottoms of the brackets to match the round ETX tube and stuck the fuzzy side of some self stick velcro patches to it to protect the tube. Then I used plastic tie wraps to hold it in place. It is sooooo much easier to aim the scope now. I can use it to polar align too since it sticks up high enough so as to be usable in the 90 degree position. Just point it at Polaris with the tripod's altitude and azimuth adjustments then fine tune it by rotating the R.A. back and forth and adjusting the tripod's tilt until it stays centered."
Tom Price (tompr@csi.com) reports the following: "My long-awaited Orion EZ Finder arrived yesterday and it was worth the wait. Along with the EZ Finder I also got the optional Schmidt-Cassegrain mounting bracket for it (Cat #2330, $5.95). This was so I could mount the finder high enough so that I could use it even with the ETX set for 90 degrees declination. Using the supplied double-sided adhesive tape, I mounted the finder bracket on the scope tube itself, on the right-hand side and just forward of the black housing that holds the 90 degree eyepiece and finder scope. This provides a solid mounting that won't interfere with eyepieces or anything else I might insert into the eyepiece holder, such as the Meade camera adapter. The finder aligns easily and works well, with none of the clumsiness of the virtually useless ETX finder scope. For those who prefer to use Polaris for polar alignment of ETX, the EZ Finder, mounted this way, makes it easy to aim the ETX at Polaris, an impossible task with the supplied finder. My own preference is to do an approximate polar alignment with a compass and spirit level, which I can do before sunset and then refine it as necessary with the star drift method after it gets dark. I've found this to be quick and easy, allowing me to track and view bright objects like the moon, Venus, Mars and Arcturus, long before it gets dark enough to even see Polaris. Also, a couple of my best viewing locations don't have a line-of-sight to Polaris anyway. My chief use of the EZ Finder will be for aiming the ETX at bright, known objects from which I can then use the setting circles to star-hop accurately to objects that are even too dim to see in the ETX finder scope." Cliff Newman (cnewman@inforamp.net) reports the following: "In the Fall I attached an Orion EZ Finder 1x finder to the scope (like a Telrad). That really simplifies finding objects, although because I store the scope in the bag, it is forever getting knocked out of alignment, not a big deal to realign but a nuisance. I just received a a new catalog from Orion and the price on the EZ Finder has been reduced to $40. Orion's web page has a good description of the EZ Finder." Ray Porter (dragon@email.unc.edu) adds: "I recently purchased and Orion EZFinder and a JMI Wedge for my ETX. Let me say right up front that I am very pleased by these products. The combination makes polar alignment a breeze. I am most pleased with the Orion EZFinder. I also purchased the optional SCT mounting bracket which I used to mount the finder on the ETX. I used a pair of pliers to slightly bend the mounting flanges on the SCT bracket to more closely match the curvature of the ETX tube. I attached the EZFinder to the SCT bracket then I then used the included double-sided tape to mount the SCT bracket just in front of the ring that holds the eyepiece holder and just to the right of the eyepiece. In that position the EZFinder doesn't interfere with anything else and the SCT bracket sets it high enough that it can be used for polar alignment. I attempted to mount the finder using just the dove-tail mounting bracket that is included. However, I quickly discovered that, unless the EZFinder is mounted further forward on the tube, the ETX fork makes accessing the alignment screws and the dovetail mounting screws difficult or impossible. Using the optional SCT bracket eliminates this problem. Aligning the EZFinder with the ETX main tube only takes a couple of minutes. You need a phillips head screwdriver to adjust the alignment screws and that's really my only complaint about the EZFinder. I wish Orion had made the alignment adjustments hand-turnable, like the brightness control. It is a bit of a pain to carry a screw driver around along with all the rest of my equipment and the phillips heads can be a little tricky to find in the dark. The red dot projected by the EZFinder is not as nice as the bulls-eye of the Telrad but the EZFinder mounts easily on the ETX tube. The Telrad on the other hand is, IMHO, too long to mount on the ETX. At $39.95, I think the EZFinder is probably the most useful and cost effective accessory I've purchased for my ETX." |
|||
Go back to my ETX Home Page.