 |
Posted: 31 August 2011 Updated: 16 December 2014 |
![[Home!]](../../../images/mighty_etx_logo_orig-sm.jpg) |
|
SkySafari Pro for Mac OS X v1.0.2
Southern Stars
$49.99
Jump to the start of today's update.
Southern Stars provided a review copy of "SkySafari Pro for Mac OS X", one of three new versions of SkySafari. Besides the "Pro" version, there is a "basic version" ($4.99) and a "Plus" version ($19.99). These new SkySafari applications are based on the SkySafari apps for iOS, previously reviewed here: "SkySafari 3", "SkySafari 3 Plus", and "SkySafari 3 Pro".
As described by Southern Stars, here are the main differences in the three Mac versions:
SkySafari: 133 MB. Our introductory version, with 120,000 stars and the 220 Messier/Caldwell deep sky objects.
SkySafari Plus - 357 MB. Adds 2.5 million stars, 30,000 deep sky objects, and wired or wireless telescope control.
SkySafari Pro - 794 MB. Adds 15 million stars, 740,000 deep sky objects, 550,000 solar system objects, and telescope control.
All versions contain the encyclopedic descriptive content and astronomical image gallery found in our iPhone apps. SkySafari Plus and Pro add wired and wireless telescope control.
Southern Stars has a web page with a more complete comparison of the version differences.
SkySafari for Mac OS X requires 10.6 or 10.7, and supports many Lion (10.7) features, including multitouch gestures. It needs a screen resolution of at least 1280x720. I used the Pro version on my MacBook Pro 17", 10.7.1, 1920x1200, with a wireless Magic Mouse. I was unable to test the telescope control with my ETX and LX200-ACF telescopes using the Wi-Fi capabiities as my SkyFi Wi-Fi is being repaired by Southern Stars. I hope to test it with my very old Keyspan USB-Serial adapter once I install the latest drivers for the adapter. I will update this review when I have done these additional tests.
I had a glitch trying to purchase a serial number, which is done from within the Pro version. Initially I tried purchasing the serial number from within a non-admin account, but the purchase would always fail. When I used an account with administrator privileges, the purchase went through easily. Once the application was "activated" in the admin account, I still had to manually enter the serial number from my user account. Southern Stars has updated their web site to include this important point. The serial number can be used on up to three computers. There is a "deactivate" function if you need to remove one of the computers so that you can run it on a new computer.
Once I got the serial number, I went through all the settings to configure the application for my way of using it. As with the iOS versions, you use buttons on a toolbar (at the top of the screen on the Mac). Here you can see Location selected and the pane that appears:

With v1.0.1, there was a crashing problem (reported by me and others) when entering data in the Location pane. That has been fixed in v1.0.2. I then continued setting up the appearance for the app. All settings can be set from the Settings menu:
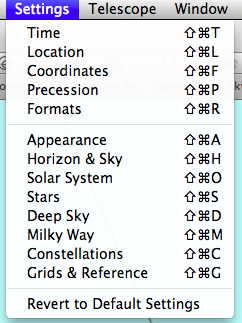
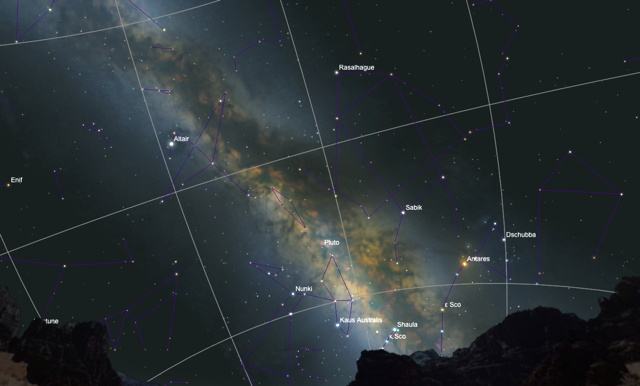
Some settings can also be done from the toolbar buttons. With the setups now done, I began exploring the application. The first thing you may notice is the strikingly realistic visible display:
You can animate the motion of the display to show movement of the sky and objects. You can also "jump" to specific events:

You can enter a specific time for the chart display (fields at the bottom):

I discovered a bug here. With 24-hour time selected, entering an hour greater than 12 would yield unepected results. For example, if 20 was entered for the Hours and you pressed Tab, the display would jump to 8 AM. Re-entering 20 and pressing Tab would get 8 PM. Each time an hour was entered and the Tab key pressed, the AM/PM setting would toggle and the display would jump from daytime to nighttime or back. This has been reported, along with the suggestion to hide the AM/PM buttons when in 24-hour time display.
You can update Solar System data in the Solar System pane. Once you do that, you get a report of what was updated:

There is an extensive list of searchable objects:
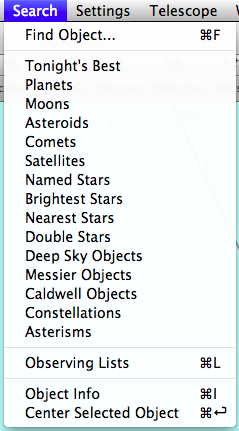
 You can also just enter some text in the Search field at the top right of the display, as seen to the right. When you start typing in the Search field, you immediately see matches, which narrow down as you type more:

What may not be obvious is that selecting "Find Objects" from the Search menu will select this search field. It does not bring up a search dialog box. When you select something from the Search menu, a pane opens with those objects, with currently visible objects highlighted, as seen here for Planets:

When you click a planet (or any search object), whether or not the object is highlighted, the display will slew to center that object (which may be below the horizon at the current time). I reported a minor display formatting bug in v1.0.1; it has been fixed in v1.0.2.
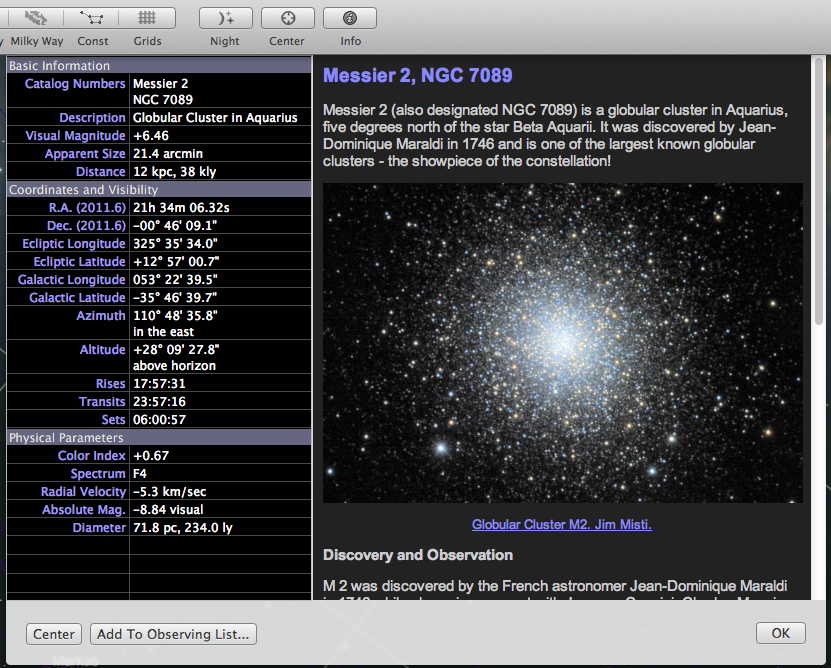
You can show very detailed information and a photo for any object. You can center that object and/or add it to an "Observing List":
 Observing Lists are handy. The Observing Lists pane at right shows your lists (you can have more than one), and the objects in a selected list. You can check off when you have observed an object and enter some notes about the observation. You can export a list:

I was curious about the Import Observing Lists capability, so I brought up the SkySafari Help. I searched the Help for "observing lists" and after a few seconds, the Help page appeared. Here is the Help on the Import and Export functions:

SkySafari Help has a lot of excellent information and will take the place of a printed manual. However, when I selected Keyboard Shortcuts or Basic Concepts from the Help menu I would get a "The selected topic is currently unavailable" error. The Keyboard Shortcuts topic is available via the main SkySafari Help page. Minor bug reported.
Moving around in the star chart display is very easy, especially if you have a trackpad or Magic Mouse that supports gestures (with Mac OS X 10.7). You drag the displayed view by holding the mouse button down. That lets you see other portions of the sky. With a gesture-supported trackpad (or Magic Mouse), a one-finger swipe up zooms in and a one-finder swipe zooms out. Very handy! If you don't have a gesture-supported device, you can zoom in and out by using the "+" and "-" buttons at the lower right and left, respectively, on the display. Zooming in allows you to "magnify" the view. For example, here is Saturn and many of its moons seen by zooming in:

As you zoom in or out, the current Field-of-View (FOV) shown by the chart is shown in the upper righthand corner. This allows you to match the chart FOV to what you might see with an eyepiece. Moving the display around and zooming in/out is very smooth, even with the very large database of information to be displayed. As I did with SkySafari 3 on my iPhone 4, I zoomed in on Pluto to get a star chart for use at the 26mm eyepiece. Here is how SkySafari Pro for Mac OS X prints the chart, showing the background stars (PDF, levels edited to bring out the stars for web display):

 There is a night mode, which adds a red overlay to the screen (all screens if you have more than one display) for use while at the telescope. And speaking of use at the telescope, what about controlling the telescope from SkySafari Pro for Mac OS X? The list at the right shows the current telescopes that can be controlled. As I mentioned at the beginning, I can not currently do this, but there is a "demo" mode that lets you see the controls:

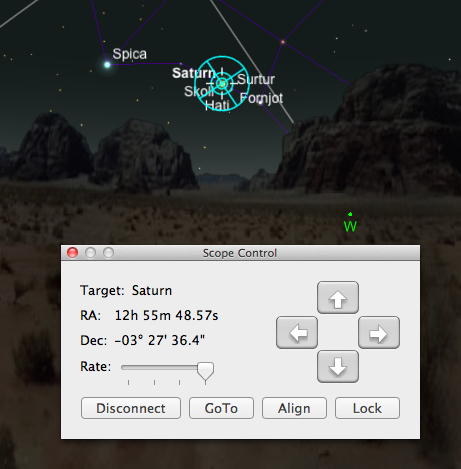
I selected Saturn in the Planets search pane and clicked the GOTO button on the telescope controller. The display (and virtual telescope) slewed to Saturn:
Which SkySafari for Mac OS X version is right for you? Check the version comparison on the Southern Stars web site to see what capabilities you need. As with SkySafari 3 for iOS, for me the Pro version is a must. I have been a long time user of Carina Software's Voyager program (starting with version 2 in 1997) and currently use version 4.5. SkySafari brings all the functionality I use in Voyager to a new application with an updated user interface that takes advantage of the latest Mac OS X version. Obviously, after such a long experience with Voyager, I am very comfortable with that application. But as I have used SkySafari (various versions) on my iPhone for over two years now, switching to SkySafari on the Mac was an easy transition. If you don't already have a star charting planetarium application on your Mac, and if your computer meets the requirements, you should take a good look at SkySafari for the Mac OS X. And if you already use SkySafari on your iOS device, using it on your Mac can be handy for those times when you need a larger display or want to control the telescope from the computer.
I will update this review as I use SkySafari for Mac OS X more. Stay tuned.
[Update: 18 September 2011]
On 10 September, thanks to a tip from Dick Seymour, I downloaded keyspanUSAdrvr_v2.6.b5 (beta for 10.7) from the Tripplite web site. The readme said that my old USA-28XB was not supported and might not work. I installed the driver anyway. My old Keyspan serial adapter was recognized. I connected the MacBook Pro (with 10.7.1) to my ETX-105PE. I did an Auto Align (indoors), and then a GOTO Mars using the AutoStar #497. I then launched SkySafari for Mac OS X to see if the adapter communicated with the telescope. After setting up the telescope control options in SkySafari, I clicked the "Connect" button; the display slewed to show Mars centered. I used the slewing controls in SkySafari and the telescope moved appropriately. I then clicked on Mercury and did a GOTO from the telescope control panel; the ETX slewed to where Mercury should be. It seems that my old Keyspan adapter is usable again!
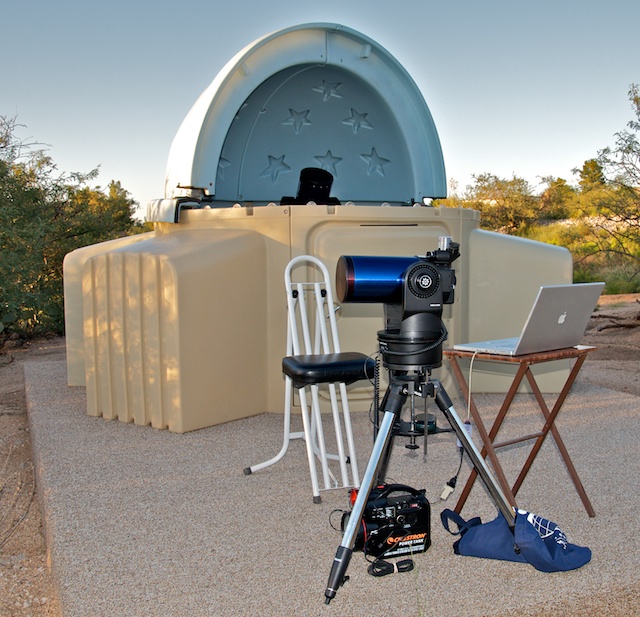
Unfortunately, due to monsoon season clouds and storms, I had to wait until 17 September to test SkySafari Pro for Mac OS X at night with my ETX-125AT and 8" LX200-ACF. During the daytime, I added some objects (M101, NGC7331, and NGC6826) to the Observing List. That would give me some objects to test using GOTO from the Observing List. Shortly before sunset, I set up the ETX-125AT with the MacBook Pro outside my SkyShed POD observatory:
About 30 minutes after sunset, I aligned the ETX and did a GOTO Saturn using the AutoStar. I then connected SkySafari to the telescope and voila:

Next, I turned on Night Mode, which turns the display red (for all apps) and searched for Albireo:

By the way, the illuminated keyboard on the MacBook Pro is really a nice feature for use at the telescope. I clicked the GOTO button in the telescope control panel and the ETX slewed to Albireo:
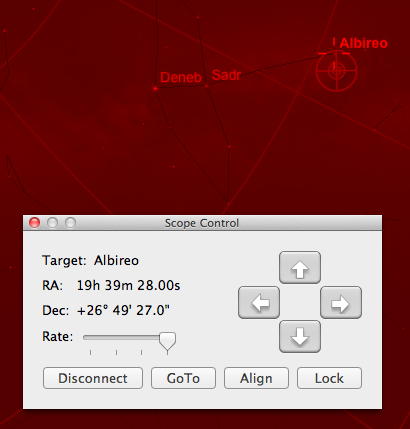
Albireo was in the finderscope FOV and just slightly outside the 26mm eyepiece FOV. I did GOTOs to several stars from SkySafari and using the AutoStar. No matter which was used, GOTOs were in the finderscope but not in the eyepiece. Since it had been a long time since I'd used the ETX-125AT, I decided I should do a CALIBRATE MOTOR and TRAIN DRIVES (using Polaris). I then did another Easy Align. After that, objects were in the eyepiece using the AutoStar or SkySafari. I then did GOTOs using the objects in my Observing List. I even saw the supernova in M101 with the ETX-125AT and 26mm eyepiece. Very bright. Searched for Comet C/2009 P1 Garradd and did a GOTO. It was placed just outside the FOV. Nice view in the ETX-125.
Next, I connected the MacBook Pro to the 8" LX200-ACF. It connected and I could select objects in SkySafari and GOTO them. Objects were always placed in the 26mm eyepiece FOV.
It was fun and useful controlling the ETX and LX200 from the MacBook Pro using SkySafari. If you have an appropriate USB-serial adapter (and I recommend Keyspan models), using SkySafari for Mac OS X at the telescope will enhance your observing pleasure.
[Update: 16 December 2014]
Simulation Curriculum, the new owner of the Mac, iOS, and Android SkySafari applications, provided me with a redeem code for SkySafari Pro 4 for Mac OS X. I had been using version 1.8 and now have version 4.1. The old version continued to work fine in Mac OS X Yosemite (10.10), but I learned that it was no longer being updated. Version 4 has many significant changes to bring it inline with version 4 of the iOS and Android versions. And unlike the older versions, all three versions of SkySafari for Mac OS X are available on the Apple Mac App Store (Basic $9.99, Plus $29.99, and Pro $59.99).
The current version is still very much like the older version that I came to love and so most of the above review is still current. Not mentioned in the above review is that you can use your specifically designed horizon file from your iOS version (if you did one) on the Mac. To me, the best new feature in the current version of both the Mac and iOS versions (and probably the Android version) is this:
New "measurement mode" to measure distance between objects. Double-tap the screen to show a line from the selected object to any other object or point on screen, labelled with angular distance (in degrees) and physical distance (in AU or light years) between objects.
On a touchscreen (like the iPhone using a finger), it is difficult to be precise seeing where you drag the second point to. But on the Mac using a mouse you can be very precise when selecting objects and do very accurate measurements between two objects. Love it!
If you have an Intel Mac and want an excellent and well supported planetarium application, check out SkySafari for Mac OS X. If you use the iOS or Android version, you will feel right at home with the Mac version.
Go to the ETX site.
Go to the Cassiopeia Observatory site.