SkyShed POD Air Conditioner Installation
Posted: 22 June 2017
Updated: 28 May 2020
In late June 2017 southern Arizona experienced an extended heat wave with ambient air temperatures near and above 110°F for several hours in the daytime here in Oracle (elevation 4350'). This resulted in temperatures over 130°F inside my observatory. Such high temperatures had never been seen before in the previous almost 8 years of use. I decided it was time to install an air conditioner inside the SkyShed POD. I purchased a Frigidaire 8,000 BTU Portable Air Conditioner (~$300) from a nearby Best Buy store.
On Thursday, 22 June 2017, I went to the observatory about sunrise (0520 MST) to install the AC unit in one of the SkyShed POD bays. I went out so early to get started on the project before the current heat wave made it too hot to work outside.
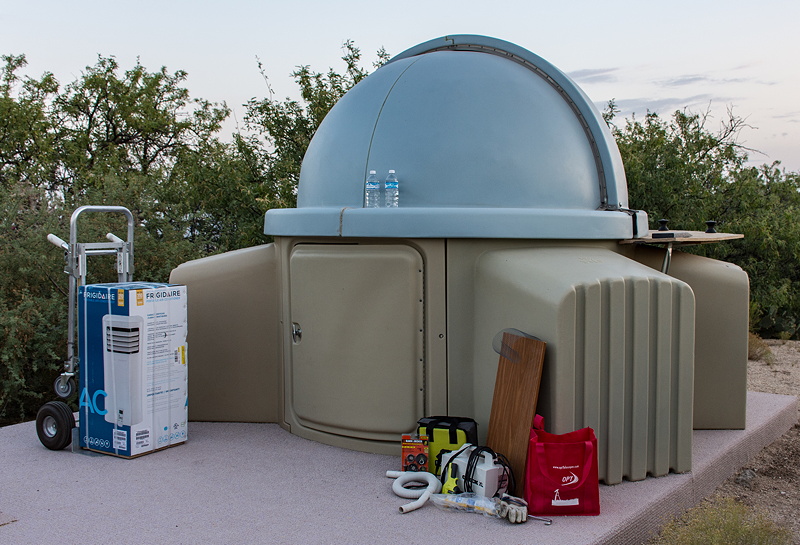
Here is the AC unit and my tools outside of the observatory before I began the work:
I unboxed the air conditioner, plugged it into the observatory power, and did a quick check that the unit worked. As expected it worked fine.
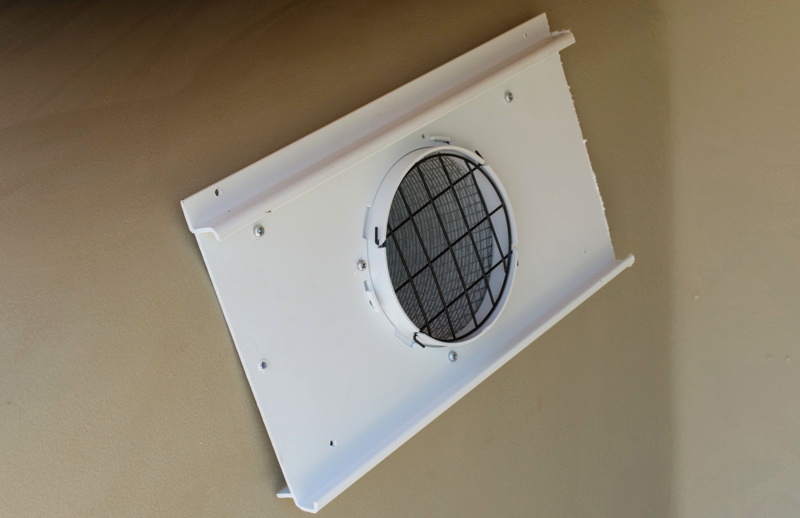
I then removed a shelf unit from one bay and reconfigured it so that it would fit next to the AC unit. I moved another shelf unit to the bay just vacated. Next, I moved the AC unit into the now empty bay to check the position where I would make the hole for the hot air duct. I removed the AC unit from the bay and drilled out a large hole in the bay wall for the duct. Here is the resulting hole, seen from the inside and outside:

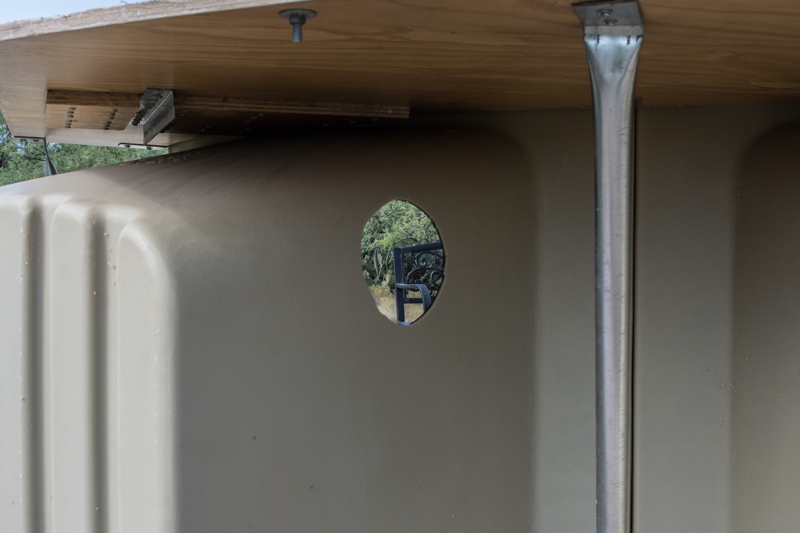
0800 MST: finished making the hole. The outside air temperature was 98°F.
I used a bay for the AC unit that was partially under the POD Zenith Table (PZT) and made the hole high on the bay wall so that the PZT table would provide some protection from rain for the duct opening on the outside.
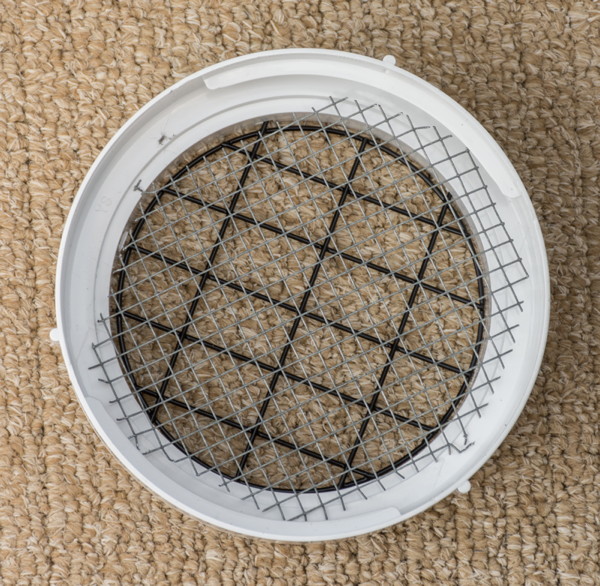
I added an extra screen with a finer mesh to the duct to keep critters out:
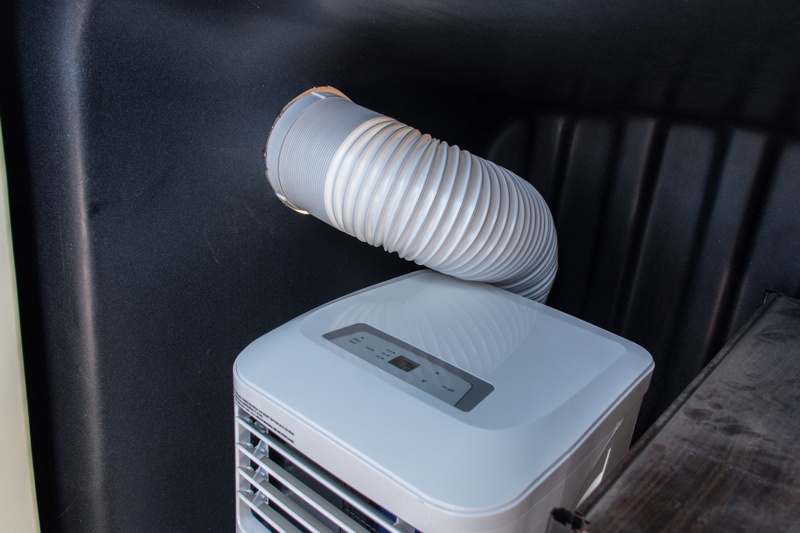
With the hole now made the supplied duct was connected to the AC unit and the AC unit moved into the bay. It was placed on a small piece of wood (the unit has castors so a flat surface was needed). Then the duct was routed to the hole:
I then cut the supplied "window sliding kit" to be the length I wanted and mounted it to the exterior bay wall:
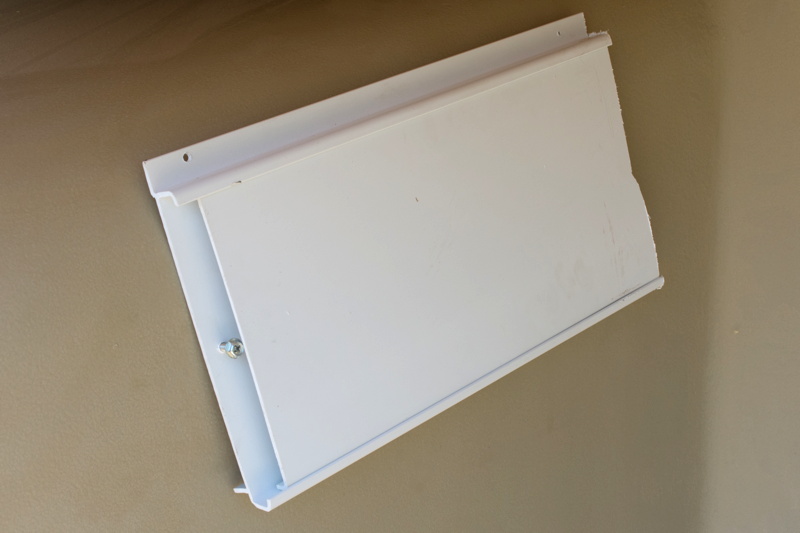
The bottom photo shows the duct closed to provide additional protection from rain and snow. The closed position will only be used when the AC is not needed.
1006 MST: installation of the air conditioner was completed. I turned the unit on and left it set for 72°F. Wow, did that feel good! The outside air temperature was 105°F.
By this time and with the heat, I was too pooped to continue working in the observatory and seal the duct opening. I would finish those later in the day. I put my tools away.
1150 MST: closed the observatory with the AC running.
1426 MST: returned to the observatory to check on the "cooling". The AC was running. The outside air temperature was 108°F and the inside temperature was 102°F. That's about 30 degrees cooler than it would have been without the AC.
1810 MST: went back to the observatory to finish up the installation. The outside air temperature was 99°F. I added sealant on both the inside and outside of the hot air duct hole. I then set up the shelf next to the AC unit with the observatory clock, shortwave radio receiver, and some other items. That completed the installation.
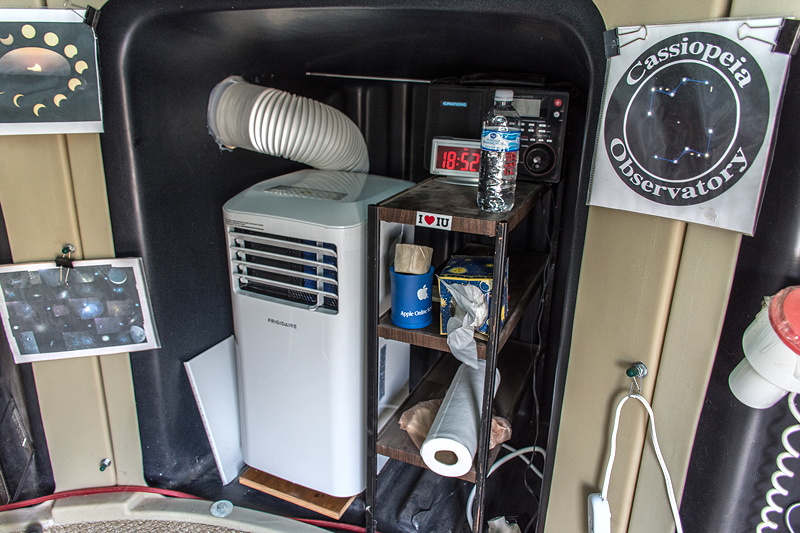
The last thing I did was to set the AC temperature to 85° to avoid the unit running all night long during this heat wave as the minimum outside air temperature currently would get down to 80°F.
I am glad I installed an air conditioner in Cassiopeia Observatory. It will really help with this new hotter trend in southern Arizona.
Update 29 June 2017
At the recommendation of SkyShed Observatories I purchased a 20' section of 3/4" backer rod ($7) from Home Depot:

The backer rod is pushed into the narrow air gap between the top of the POD walls and the bottom of the dome, as seen in these photos:
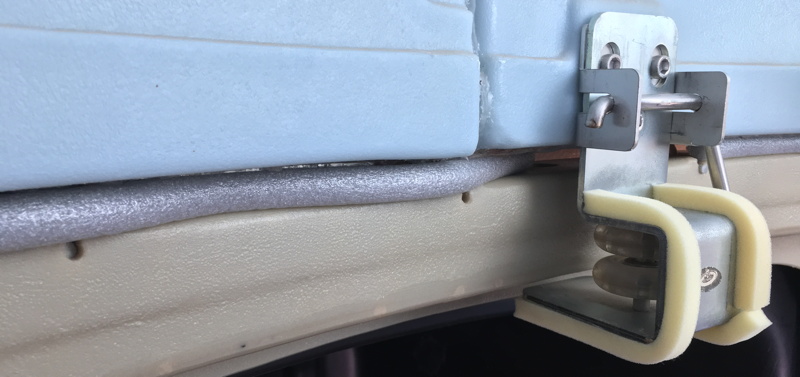


It only took a couple of minutes to insert the rod all the way around the dome.
The purpose of the rod is to keep the cooled air inside of the observatory. Otherwise, the air conditioner will be overworking trying to cool down the entire neighborhood.
One 20' section was enough to go almost entirely around the dome circumference. Since the rod had to go over the dome brackets and lock knobs, as seen in the photos above, there was a 3" wide gap not filled by the rod at the end of the rod, as well as the open gaps at the brackets and knobs. Cutting the rod into smaller sections would likely eliminate all of these gaps. I may do that eventually.
So did the backer rod improve the cooling inside the POD or reduce the workload on the AC? Hard to say on either. Certainly the theory behind using the backer rod is sound: keep the cool air inside. I will continue to monitor temperatures this summer to see if I can determine any specifics.
Update 15 June 2018
Since installing the Air Conditioner in June 2017, it has certainly been cooler in the observatory during those days when the outside air temperature has been over 100°F. While the cooler temps may prolong the life of the equipment in the observatory, the biggest benefit I have noticed is the dramatically reduced cool-down time for the telescope to reach "thermal equilibrium" after opening the observatory in the evening. It used to take 2-3 hours for the 12" telescope to cool-down to show the best, most stable views. Now that time is essentially ZERO.
One minor nuisance I have had with this AC unit is that the built-in thermostat would not shut the AC off at night. I always had to turn the unit off when entering the observatory. So I have been going out to the observatory mid-morning when the temperatures were forecast to go over 90°F for that day and turn the AC unit ON. Then I would go back out to the observatory around sunset and turn the AC unit OFF, even if I was not going to open the observatory that night. Of course, I could not do this power cycling when I was gone.
The CFO (wife) finally asked me about adding a timer to the power outlet to turn the AC unit ON and OFF at selected times. Initially I did not think this would work due to the unit's ON/OFF switch not being a physical toggle switch that I could leave in the ON position. The switch on this AC unit is a "push to turn ON, push to turn OFF" type. But then I did a test: with the unit ON I disconnected it from the electrical outlet. When I reconnected it the AC came back ON. That meant that I could indeed control the ON/OFF using an electrical timer between the AC unit and its power outlet.
I did some research on timers. Two requirements were being able to handle the power requirements of the AC Unit (8 AMP, 895 Watts) and having a battery backup for the settings. The one I decided to get is the "TOPGREENER Plug-In Digital Light Timer" ($10). I actually got two so that I would have a backup timer in case the first one failed for any reason.
I plugged one of the timers into a power outlet inside the house to start the built-in battery charging and to setup the ON/OFF programming. Although there are many programming options with this timer I set it to just turn ON the AC every morning and turn it OFF every evening on every day of the week. This would work fine during the hottest time of the year here in southern Arizona. When the outside temperatures are forecast to stay below around 90°F for extended period of days I will just go out to the observatory and turn the timer OFF. There are 18 program slots available to be set up but as it turned out I only needed to use one program slot since the day of the week can be set to be every day.
After a few hours of charging I moved the timer to the observatory and connected it to the electrical outlet and Air Conditioner:
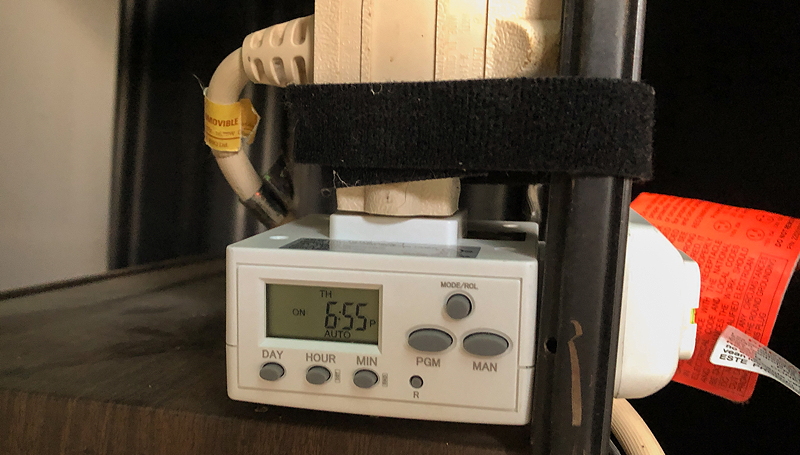
The Air Conditioner was ON when I added the timer. With the program running I waited to see if it would turn OFF the Air Conditioner automatically at the OFF time. It did. The next morning I went to the observatory to check that the Air Conditioner came ON as programmed. It did. I then checked it that evening to check that it turned OFF. It did.
The addition of the TOPGREENER Plug-In Digital Light Timer has relieved me of needing to go to the observatory twice a day to turn the Air Conditioner ON and OFF. It is a worthwhile and inexpensive addition to Cassiopeia Observatory.
When I turned on the air conditioner for the first time in 2020 it would not cool. I decided to run the three year old unit just using the fan to cool the observatory during the day. That helped, but with expected Excessive Heat Warnings coming in May I decided to replace it with a more powerful unit. I ordered the Whynter ARC-12S 12,000 BTU Portable Air Conditioner ($394) from Amazon. It finally arrived on 27 May. Shortly after sunrise on Thursday, 28 May, I went to the observatory to install the new AC unit.
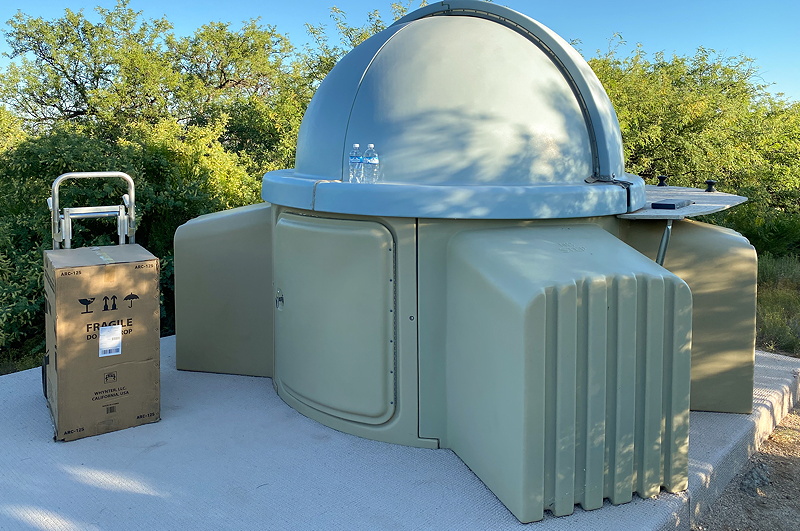
It took about 90 minutes to unbox the new unit, check it out, remove the old unit, and install the new air conditioner. I was able to use the existing exhaust hose, which was what I had hoped when I ordered the new unit.
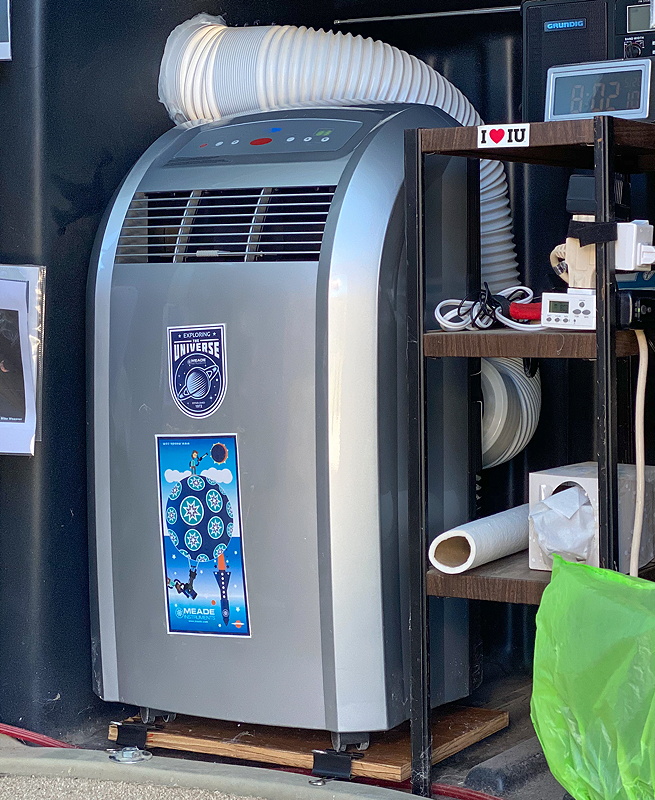
The new AC is somewhat larger than the old one. The online reviews for the new unit said that it sounded like a "jet engine" and was loud. After installation I ran the unit at each of the three fan speeds in cooling mode. It was not that loud and certainly not a bother. I will continue to use the AC with the TOPGREENER Plug-In Digital Light Timer described earlier. With hotter temperatures expected in the summer of 2020 the higher BTU will provide a welcome relief from the high heat.
Comments are welcome using Email. Twitter users can use the button below to tweet this report to your followers. Thanks.
Cassiopeia Observatory Home Page
Copyright ©2017-18, 2020 Michael L. Weasner / mweasner@me.com
URL = http://www.weasner.com/co/Reports/2017/06/22/index.html
