Review - Orion Dual Mount & 9x50 Illuminated Finder Scope
Posted: 12 October 2018
Updated: 8 October 2020
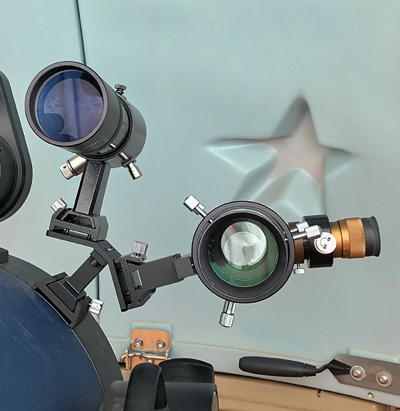
Dual Finder Scope Mount
$40
9x50 Illuminated Finder Scope
$83
Orion Telescopes & Binoculars
Vixen-Style Dovetail Finder Shoe
$12
TPO
R50D - 50mm Finderscope Rings On Dovetail Stalk
$49
Stellarvue
In 2013 I swapped the standard Meade 8x50 finderscope on the 8" LX200-ACF in my observatory for an Antares 7x50 Illuminated Crosshairs Right-Angle Finderscope. When I upgraded to a Meade 12" LX600 in the observatory in 2016 I continued to use the Antares finderscope. However, due to the increased tube diameter of the 12" telescope the finderscope was at a much higher height from the observatory floor. This made it difficult to view through, especially when aimed low in the sky. I really liked having illuminated crosshairs on the finderscope, particularly for tracking the International Space Station (ISS) when imaging and centering alignment stars in my dark sky. So I struggled with reaching the finderscope eyepiece many times.
In mid-2018 I began searching for a solution to the problem of finderscope eyepiece height. I could swap the Antares finderscope for a straight-through finderscope with illuminated crosshairs, but that would only be convenient when the telescope was aimed low. When pointing higher up I would have difficulty looking through the eyepiece. During ISS passes eyepiece accessibility would still be a problem at some point in the pass. The best solution seemed to be to have two finderscopes, one with a right-angle eyepiece and the other with a straight-through eyepiece.
I discovered that Orion Telescopes & Binoculars has such a dual finderscope mounting bracket. Wednesday afternoon, 15 August 2018, during a trip to California, I visited Orion's Watsonville Headquarters and Store. I discussed my plan with the sales representative there. Although they didn't have a dual mount available for me to look at, he did give advice on what additional components I would need to mount two finderscopes on my Meade 12" LX600.
After returning home from California I contacted OPT. We talked about my plan and it was suggested that I order the following:
Orion Dual Finder Scope Mounting Bracket ($40)
Orion 9x50 Illuminated Finder Scope with Bracket ($83)
TPO 50mm Finderscope Bracket with Base ($15)
TPO Vixen-Style Dovetail Finder Shoe ($12)
Here are all the components received from OPT, removed from their boxes and plastic bags:
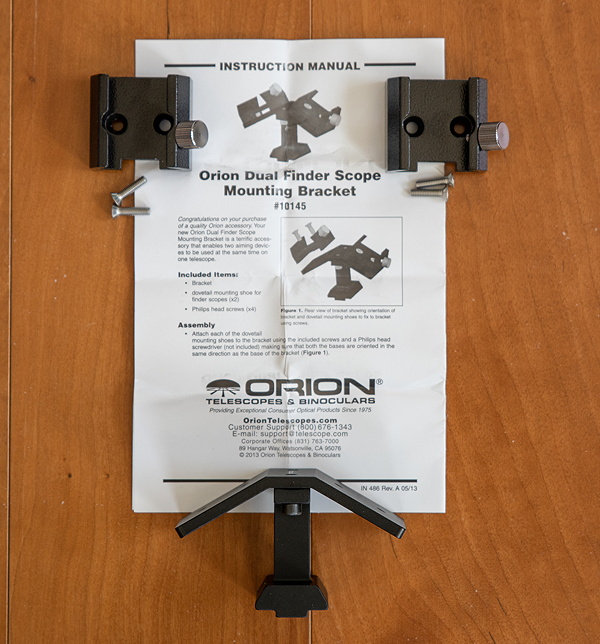
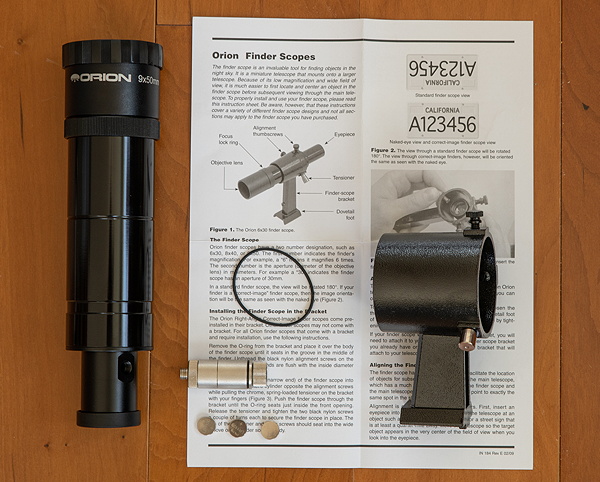
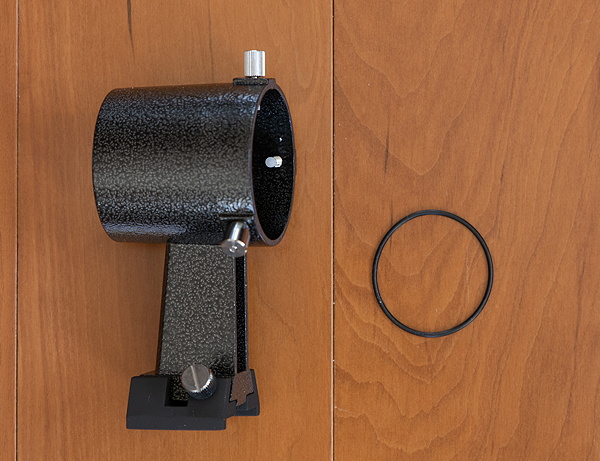
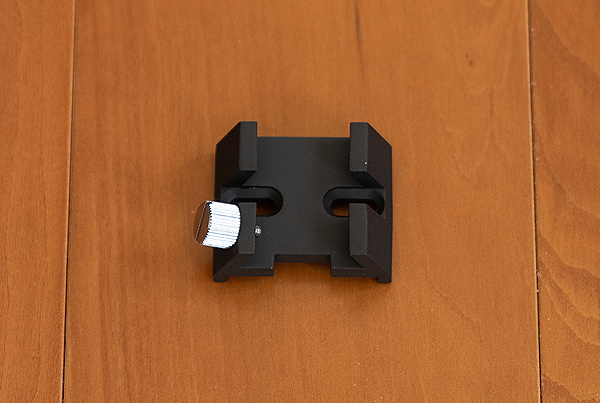
The TPO 50mm Finderscope Bracket with Base included an O-ring and a shoe (base) which was not needed. The bracket that came with the Orion finderscope looked very similar to the TPO bracket. The Orion illuminator came with three LR1130 batteries.
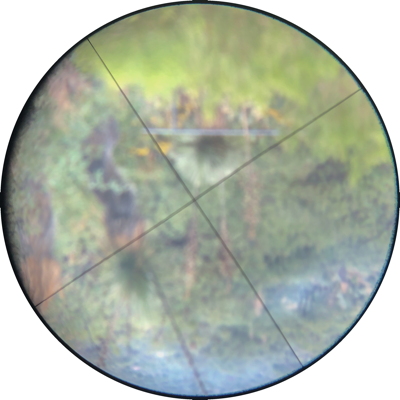
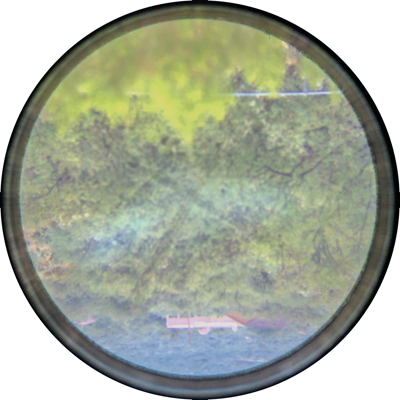
A daytime test of the Orion 9x50 finderscope showed that it was nicely infocus with good optical quality across its 4.5° field-of-view, but the dual crosshairs seemed to be way out-of-focus with the eye centered over the eyepiece. With the eye near the edge of the eyepiece field-of-view the crosshairs were a little sharper but still out-of-focus. The manual did not mention adjusting the crosshairs focus and there seemed to be no way to adjust the crosshairs focus. The finderscope objective lens can be focused. I tested the finderscope at night with the illuminator to see if the crosshairs looked more in focus when illuminated. In fact, the illuminator made the crosshairs look almost a solid smear instead of crisp lines. To rule out my eyes as the culprit, I compared the Orion crosshairs to the crosshair in the Meade 8x50 finderscope; the Meade was much sharper. I took these handheld photos of the crosshairs to show the difference. The camera was focused at infinity, as the eye would be. The Meade finderscope is on the left and the Orion on the right. The Orion dual crosshairs are so blurry as to be almost invisible.
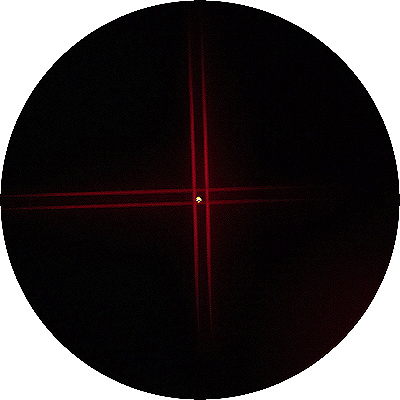
I sent an inquiry to Orion. They responded in less than 24 hours and sent me instructions for adjusting the crosshairs focus. Basically, you remove the eyepiece from the main tube and then carefully rotate the crosshairs retaining ring in one direction or the other until you have a focus. I was able to get the crosshairs in focus, as seen here, with the red illuminator turned ON:
There were several steps to getting dual finderscopes on my 12" telescope. First I removed the Antares finderscope and the Meade bracket. Next I removed the Meade finderscope shoe that came with the telescope and replaced it with the TPO Vixen-Style Dovetail Finder Shoe, which was needed to hold the Orion Dual Finder Scope Mounting Bracket. Here is the Meade shoe on the left and the mounted TPO shoe on the right:
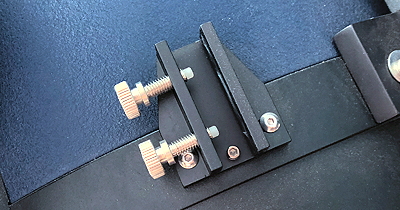
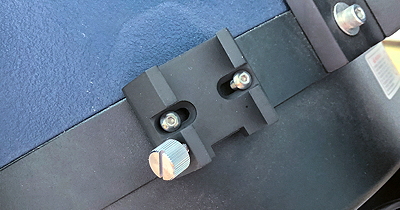
I then mounted the Orion Dual Finder Scope Mounting Bracket to check clearances from the fork arm and StarLock telescope:
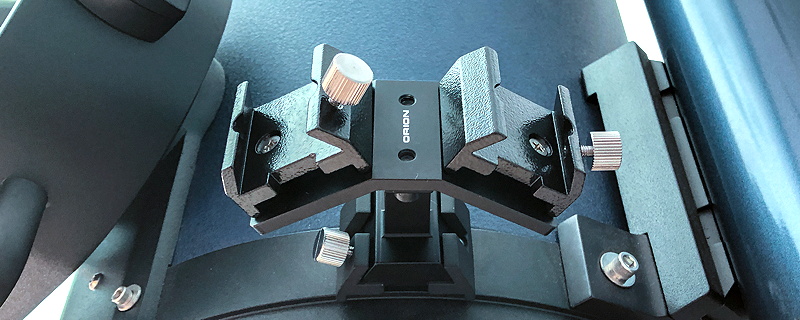
Now it was decision time; which side of the Dual Mount would each finderscope go on. I decided to put the Antares right-angle finderscope on the left and the Orion straight-through finderscope on the right. That way I could stand beside the telescope to use the right-angle eyepiece and behind the telescope to use the straight-through eyepiece. I mounted the bracket for the Orion 9x50 Illuminated Finder Scope on the right and the TPO 50mm Finderscope Bracket on the left of the Dual Mount. I then began to worry that the finderscope mounted on the left side would hit the fork arm when the telescope was slewed to Declination +90°. So I checked it and there was no clearance issue.
I placed the Orion finderscope into its bracket and attached the illuminator. After removing the right-angle adapter from the Antares 50mm finderscope I tried to slide its tube into the TPO bracket; oops, the tube was too large (by about 1mm) to fit into the 50mm bracket. I contacted OPT. The TPO bracket was returned and a Stellarvue R50D - 50mm Finderscope Rings On Dovetail Stalk ($49) was ordered and received within a couple of days. The Stellarvue rings accept up to 60mm diameter tubes, which was adequate for the Antares finderscope.
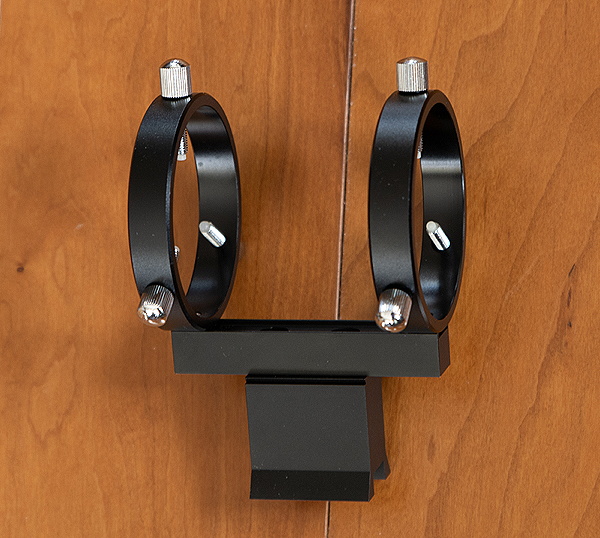
I attached the Stellarvue rings to the Dual Mount and noticed that its dovetail was slightly less wide than the Orion (or TPO) dovetail. The bolt to secure the dovetail was therefore a little too short to make a snug lock (left photo below). I once again checked clearances, including at Dec +90°. While I was checking the clearance the Stellarvue bracket moved backwards in the shoe. I added two pieces of thin rubber insulation along the dovetail to provide some extra tightness (right photo below). I hope it will be sufficient.
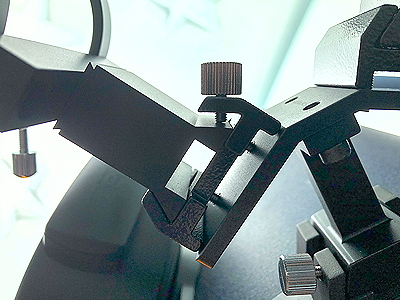
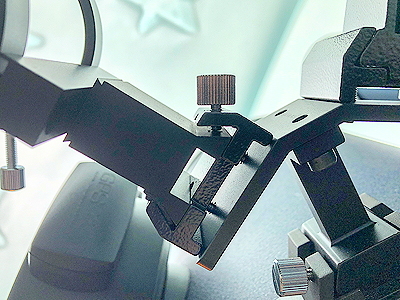
I then mounted the Antares finderscope in the Stellarvue rings. Here is my 12" LX600 with both finderscopes mounted:
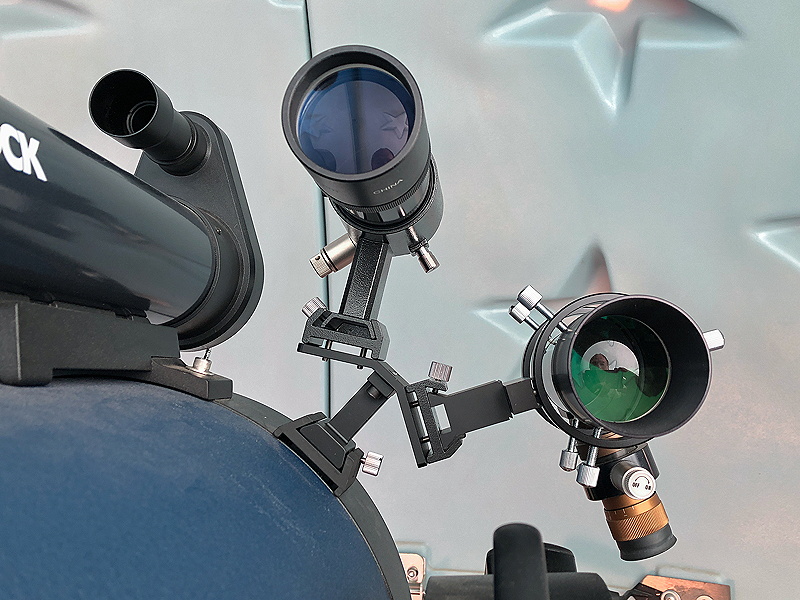
I checked the telescope balance and it was acceptable.
I like to use the finderscope mount to secure my DSLR camera by looping the camera neckstrap around the mount. Here you can see the strap from D850 DSLR inplace.
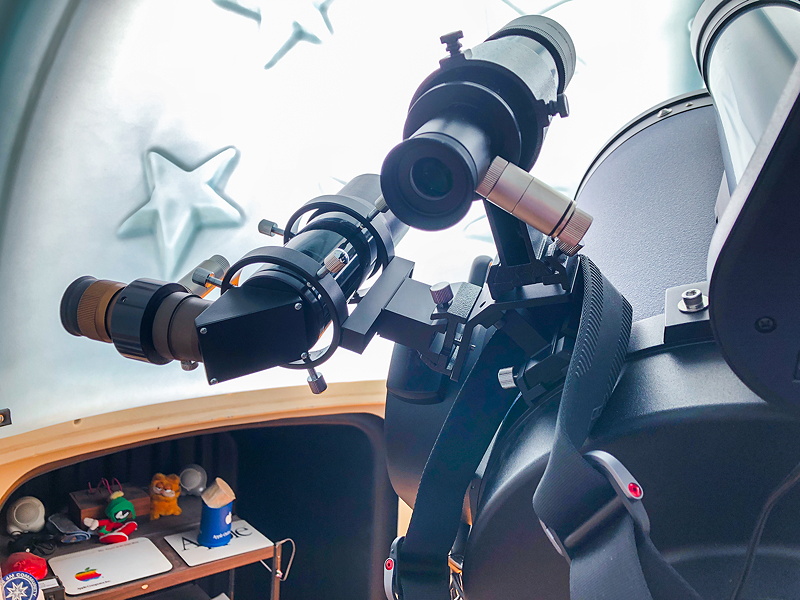
I aligned the finderscopes to the main telescope at night and began using them. As I was slewing from planet to planet the alignment of both finderscopes to the main telescope eyepiece would shift slightly. I suspect that the single bolt on the TPO shoe is insufficient to provide an unmoving mount. I did the same test during another session at the telescope; that time there was no alignment shift in either finderscope. How much of a nuisance this becomes will be determined as I use the finderscopes more, especially for ISS tracking.
Summary
The Orion 9x50 finderscope has excellent optical quality. The views through the Orion finderscope of M31 (Andromeda Galaxy) and M13 (Great Globular Cluster) were very sharp and bright.
Personally, I think that the TPO shoe and Orion dovetail brackets mount backwards. There is a "foot" that keeps the brackets from sliding in the dovetail shoe, but the foot is at the rear when the telescope is pointed upwards. This provides no "stop" to prevent the dovetail from sliding backwards due to gravity if the single bolt becomes loose. The Meade shoe has a small protrusion at the end that goes up into the finderscope mounting bracket base to prevent this from happening. And the Meade shoe has two bolts for added security. The apparent backward design of the Orion and TPO dovetail shoes can put your accessories and a camera (if you loop its strap around the brackets like I do) at risk. As this seems to be a common design used by many manufacturers, I have to wonder if the original designer of this type of dovetail actually used a telescope. It is also worth noting that the Stellarvue rings dovetail does not have a stop on either end to prevent the mount from sliding out. All of this makes me a little concerned about the mount security.
The security concern aside, it is great having two finderscopes on my 12" telescope. Other users may prefer to have a finderscope and small guidescope, a finderscope and a laser pointer, or a finderscope and small camera piggybacked simultaneously. The Orion Dual Finder Scope Mounting Bracket can provide that flexibility.
Finally, many thanks to Orion and OPT for the excellent support in my endeavor to increase my telescope's functionality.
Although I never had any issues with security of the finderscopes, when I purchased a ScopeStuff Camera Mount to piggyback a camera on the telescope using the Orion Dual Mount, I did wonder about trusting just the locking bolt to hold a heavy expensive camera securely. I took another look at the TPO bracket used for the Orion finderscope and the mounting shoes. I discovered that it was possible to reverse the TPO bracket to move its security "foot" to the front and that I could reverse the shoe on the telescope tube as well. The TPO bracket fit was not perfect on the Orion finderscope, but it seems like it should be OK. I now feel better when mounting the camera on the telescope.
The original of this review appeared in Astronomy Technology Today magazine, Volume 14, Issue 2.
Comments are welcome using Email. If you are on Twitter you can use the button below to tweet this review to your followers. Thanks.
Cassiopeia Observatory Home Page
Copyright ©2018, 2020 Michael L. Weasner / mweasner@me.com
URL = http://www.weasner.com/co/Reviews/2018/Orion_Dual_Mount/index.html
