Review - Astrophotography with Final Cut Camera app
Posted: 20 March 2025
![]()
Final Cut Camera
Apple Inc.
Free
For many years I have used the Apple Camera app with various iPhone models to do afocal imaging of some planets using the 240fps video frame rate. The high frame rate allowed 2000+ exposures in just 10 seconds. I would then stack the video frames into a single image. The app generally worked OK, but getting a good exposure was tricky due to the app's exposure adjustment limitations and focus was finicky since there was no good way to set the focus to Infinity when doing afocal astrophotography. After Apple released its Final Cut Camera app in 2024, which is intended to be a companion app to Final Cut Pro on the iPad, I decided to try it for afocal imaging as a replacement for the Camera app video recording with my iPhone 15 Pro Max.
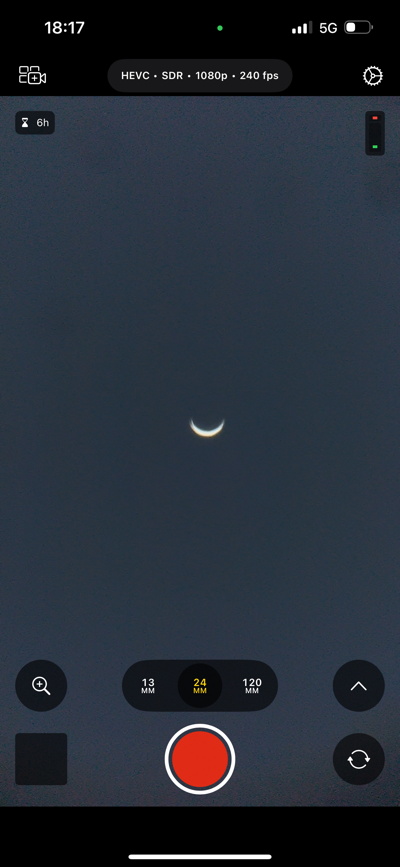
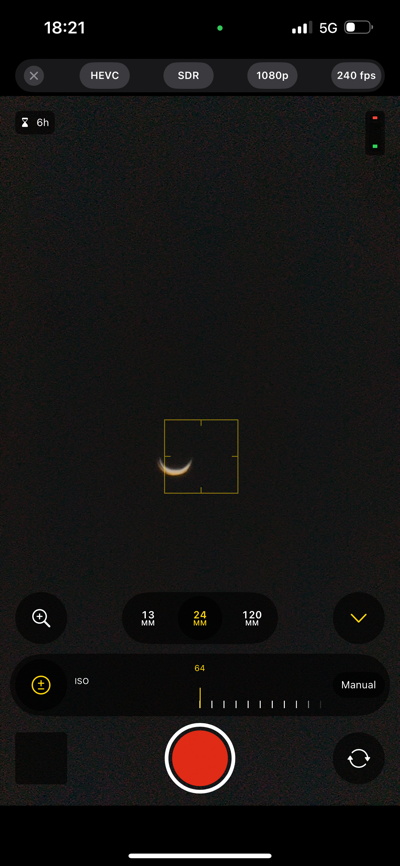
Unlike the Camera app, Final Cut Camera has full manual control of exposure and focus. The following screenshots show the User Interface (UI). The main screen shows some current settings at the top and bottom (left image). Tapping on the frame rate button opens a menu to select the frame rate. Tapping on the other buttons at the top open their respective menus to adjust the settings. Tapping on the focal length buttons at the bottom selects the camera to use. Normally you will want to use the "1X" or normal camera lens (24mm for the iPhone 15 Pro Max).

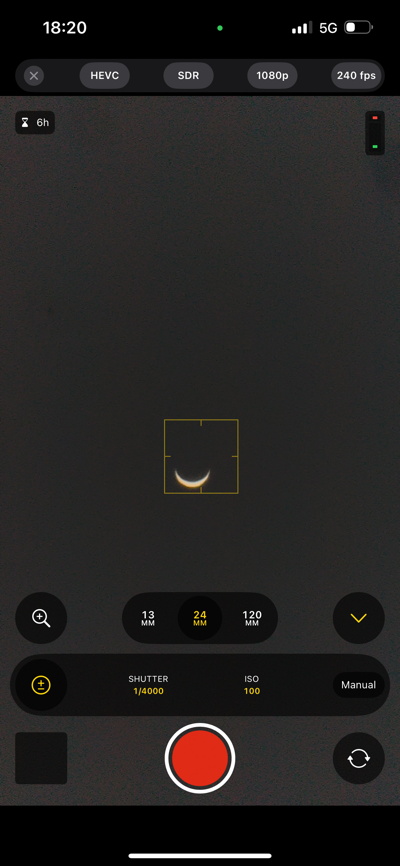
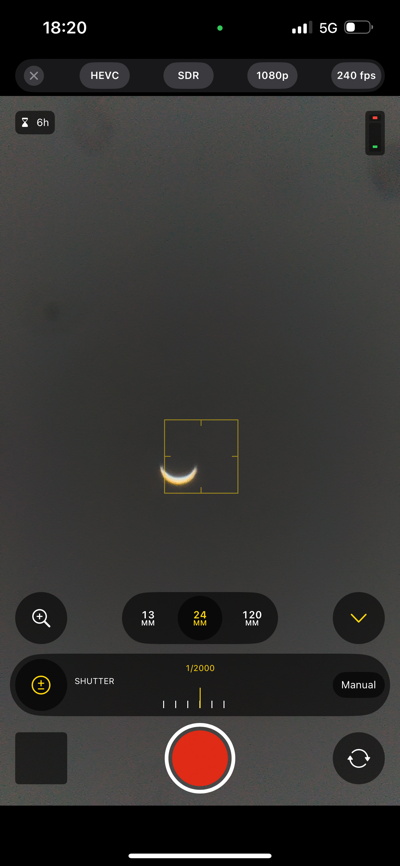
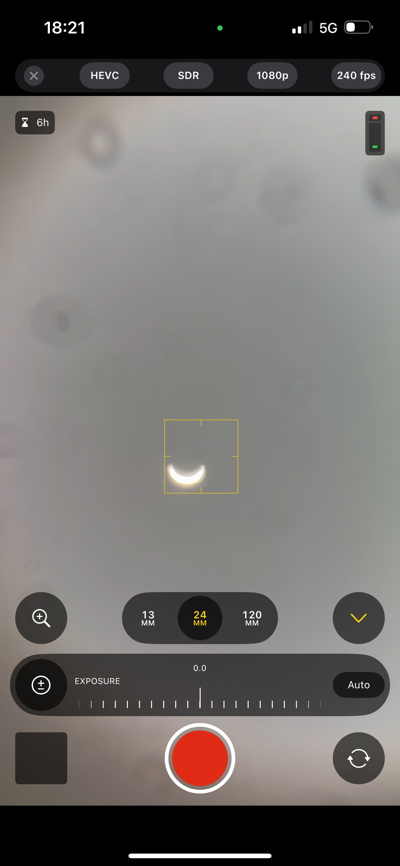
Tapping on the up arrow at the lower right displays more settings. The +/- bottom lets you adjust the shutter speed and ISO exposure settings. You can also toggle the Manual/Auto Exposure setting by tapping that button. Always use Manual for afocal imaging. Sliders are used to set the shutter speed and ISO (both dependent on the frame rate selected). Shutter speed range: 1/250-1/8000sec (240fps), 1/24-1/8000sec (24fps). ISO range: 64-2000 (240fps), 64-5000 (24fps). Adjust these values while watching the live view on the screen. A slight underexposure is best if you plan to stack images later. In Auto mode you can adjust the Exposure Value (EV). Tapping the AF button opens a slider to adjust the focus or toggle between Auto Focus and Manual. Again, always use Manual Focus and watch the live view until you see a good focus. You can "pinch-to-zoom" to zoom in on the image while focusing.
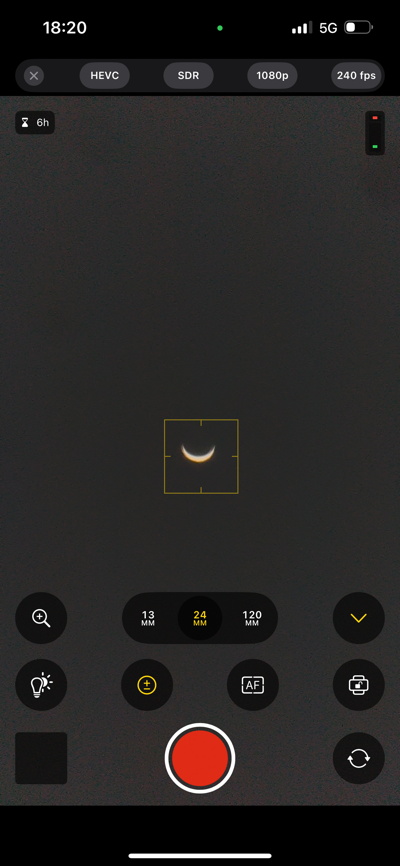
You can adjust the White Balance using the Light Bulb button. The orientation mode (landscape/portrait) can be locked using the Lock button. All the settings are saved and will be used when opening the app for future imaging.
Tap the red Shutter button to start/stop a video recording. At the top of the screen a timer will appear during the recording. I typically use a 10 seconds recording length at 240fps. A Bluetooth remote or wired earbuds volume control will work as a remote shutter release. I strongly recommend using a remote shutter release to avoid image vibrations from touching the shutter button on the screen.
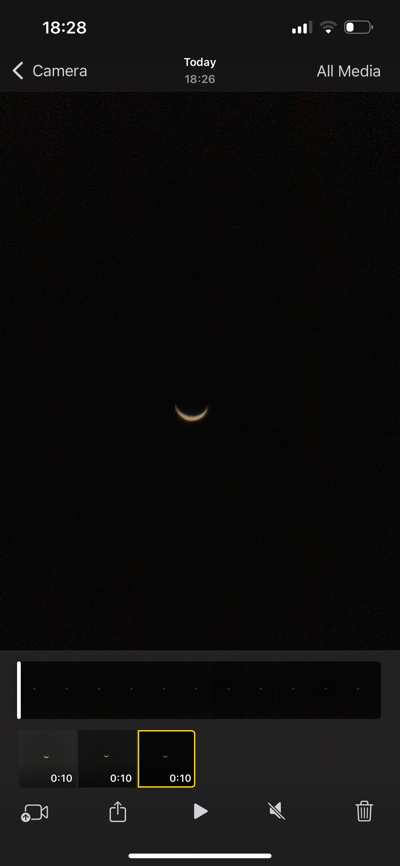
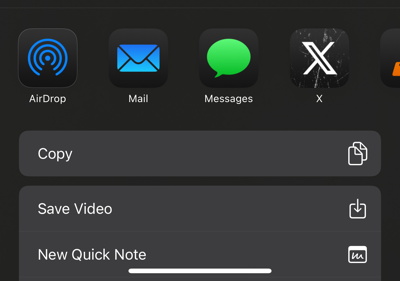
After you take a video recording, or preferrably several at different exposure settings, tap the thumbnail image that appears in the lower left corner of the screen. All of your Final Cut Camera videos will appear at the bottom of the screen. Tap one to preview it or delete it. However, in order to use a video with another app (on the device or a computer) you will need to tap the Share button and click "Save Video". That will save the video (in .mov format) to the iPhone Camera app and allow importing the video to your computer. You can also AirDrop videos to your computer. If you tap the "All Media" at the top of the screen you can select multiple videos and delete or share them.
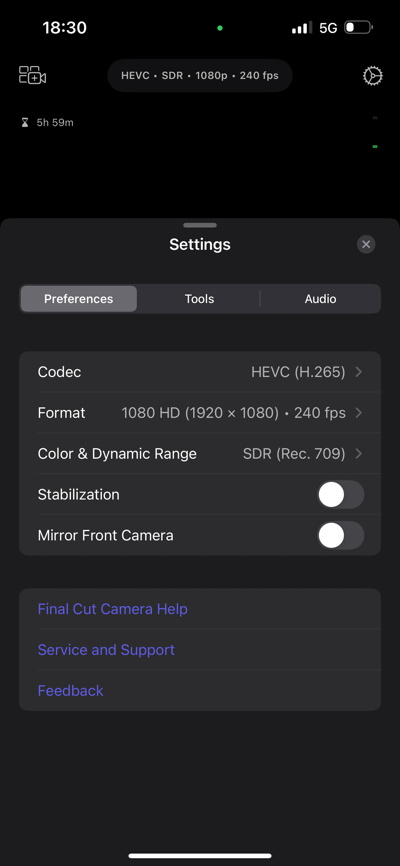
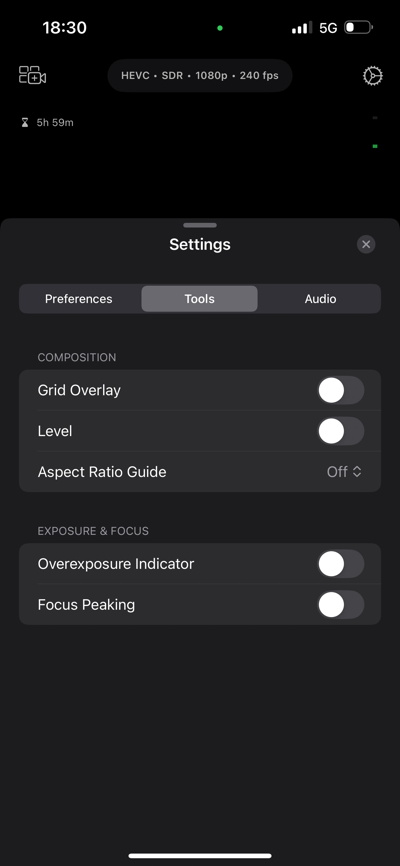
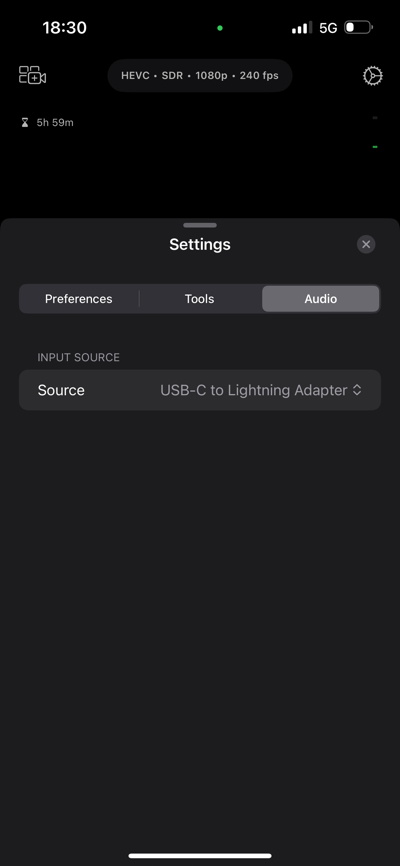
At the top right of the app main screen is a Settings button where you can set some app Preferences, Tools, and Audio.
Go to Afocal Imaging and Summary.
Comments are welcome using Email.
Cassiopeia Observatory Home Page
Copyright ©2025 Michael L. Weasner / mweasner@mac.com
URL = http://www.weasner.com/co/Reviews/2025/Final_Cut_Camera/index.html