 |
Posted: 21 September 2011 |
![[Home!]](../../../images/mighty_etx_logo_orig-sm.jpg) |
|

AstroPlanner v2
iLanga, Inc.
$45 ($25 upgrade)
Back in 2004 I reviewed AstroPlanner v1. iLanga provided me with an upgrade code for version 2. My earlier review was done with an Apple PowerBook G4 with OS X 10.2.5; this review was done on a MacBook Pro running OS X 10.7.1. I used a Keyspan USB-serial adapter for telescope communication for both versions. AstroPlanner is available for Windows and Mac OS X. iLanga has a web page showing the requirements for both OSes and listing the telescope mounts which are compatible. I'm obviously reviewing the Mac version.
The first time you launch AstroPlanner ("AP", for short), the "Setup Wizard" is run, allowing you to set up the basic configuration of the application. You can also edit these settings later, if necessary. You can also import settings from version 1 if you are not running Mac OS X "Lion". If you are using Lion, you have to recreate your settings; using the Setup Wizard makes that straightforward. To give you an idea of the extensive flexibility of AP, here are the screens that appear in the Wizard:


Obviously, you can configure AP with all your observing sites, telescopes, eyepieces, and how you want to use the application to plan your observing sessions. Planning your observing sessions is the main purpose of AstroPlanner. Once you finish with the Setup Wizard, you are presented with the main window:

The main window is where you will do all your planning and view your observing lists. Shown in the main window is info about sunrise/sunset, twilight, moon phase, and a lot more. But before proceeding with the main window, I opened the Preferences to configure some other options in AP:

As you can tell, there are many configurable options in AP. Don't be overwhelmed by all the customizations available; you can just start with the default settings, which will be appropriate for most users. One point about AP: it is NOT a "planetarium" application like Voyager or SkySafari (or any of the other available applications). However, you can tell AP which planetarium program to use to display a full sky chart:

Unfortunately, this is a very limited list. You can also setup "resources" that you will use for your observing sessions (available in the Edit menu):

Back at the main window, there are four tabs that you use to display and enter/view object information: Objects (shown earlier), Observations, Field of View, and Sky. Here are the last three tabs:


Having finished with configuring AP, I started to add a few objects to be observed. It was here that I found a bug; I tried searching for NGC6826 but it was not found. I opened the NGC catalog and discovered that the ID field was blank for all the NGC objects in the catalog. I could add Messier objects without any problem. I reported this bug to the developer and he quickly confirmed it and made an updated NGC Catalog (and the IC Catalog, which also had the problem) available. You download the updates via File > Catalogue Manager:

Once I downloaded the updated catalog, finding NGC objects by ID worked as expected. When you add objects and then select one, the main window shows some excellent info about the object:

On the left is a graph showing the best viewing times of the selected object along with the moon for the current date (which can be changed to reflect another date/time). Next is a graph showing the best viewing dates over the next 12 months. The third display shows the azimuth and altitude of the selected object at the current date/time (changeable). On the right is a simple star chart showing the location of the object. If you won't have your computer at the telescope, you can print your observing list details with all manner of options:

Here is an example of a printout, with all object data fields selected:

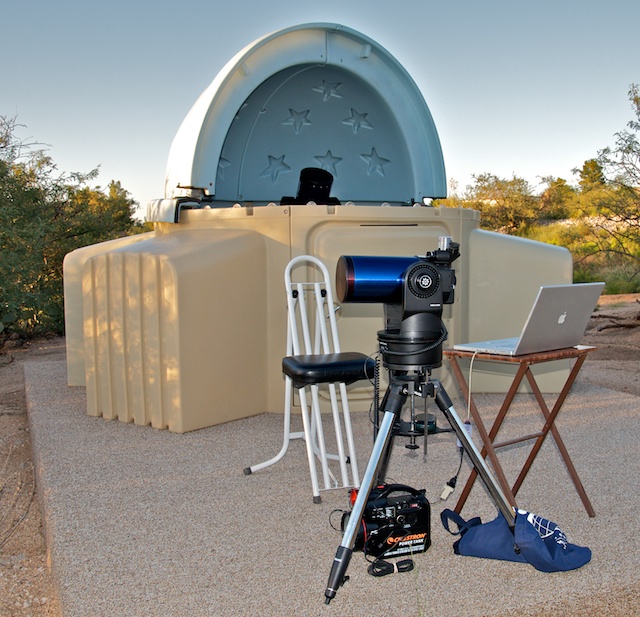
If you connect your computer to your telescope, you can control it using AstroPlanner. To test this, shortly before sunset on Saturday, 17 September 2011, I set up the ETX-125AT with the MacBook Pro outside my SkyShed POD observatory:

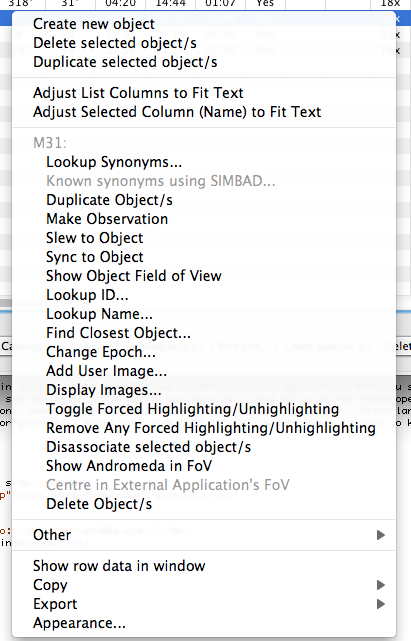
I configured AP to use my Keyspan USB-serial adapter (using a beta driver for 10.7) for the ETX. AP then connected to the ETX-125AT. I turned on Night Vision Mode (which affects all apps), selected M31 in my observing list, and selected "Slew to Object" from the contextual menu:

M31 was placed in the field-of-view of the 26mm eyepiece. I then added Albireo to my list and did a GOTO; it was placed just slightly outside the eyepiece FOV. I opened the Telescope Control Panel to use the slewing arrow keys to center the object:

A nice feature is that this control panel is a floating window and will appear on top of any application windows. Controlling the telescope using AP was just as expected. It just works. I then connected the MacBook Pro to the 8" LX200-ACF. Once I configured AP to use the serial connection for the LX200, it connected to the telescope. GOTOs were good. The only problem I had with the LX200 connection (but not the ETX) was that after the GOTO was completed, the AutoStar II would beep but AP would not realize that the slewing was finished. I always had to manually abort the slewing by clicking the "Abort Slew" button in the main window:

Other than that, no problems were experienced connecting to and controlling either the ETX or the LX200-ACF.
You can import a lot of astronomical data from various sources and export data in various formats:


There are way more capabilities in AstroPlanner v2 than I've touched on here. The menus will give you an idea of what else is available in the application:

Fortunately, there is an extensive manual and online help system within the application:

An abbreviated user manual (PDF) is also available online. I recommend you read it before delving into the application.
If you like to plan out your observing and imaging sessions in advance, then AstroPlanner is definitely an application that you should consider using. If you don't currently plan your sessions, doing so can increase what you see and image while making you more efficient while at the telescope. AstroPlanner v2 is a "pro-level" application that provides all the tools needed to plan sessions, even if you are still a beginning amateur astronomer. AstroPlanner v2 remains shareware (like version 1) and you can download a fully-functional version to try out for yourself. Spend some time with it and I'm sure you will want to keep it in your inventory of astronomical tools.
Go to the ETX site.
Go to the Cassiopeia Observatory site.