|
|
D7000 Spectroscopy Tests;
Posted: 24 September 2011 |
|
| Follow @mweasner | Welcome | Photos | Videos | Equipment | Links | Data |
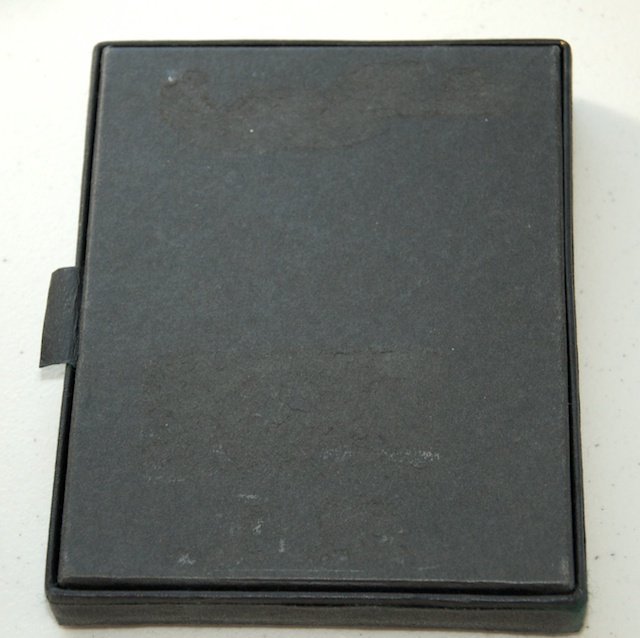
After 4 clear nights in a row, clouds returned on Wednesday, 21 September. The monsoon weather pattern is not gone quite yet. I took advantage of the cloudy skies and made a diffraction grating holder for my D7000 DSLR. After reading the "Astronomical Spectroscopy for Amateurs" book, I decided this was a good time to start this little DIY project. I remembered that I still had a holder that I had made for my Pentax Spotmatic back in 1969 or 1970 while an undergraduate astrophysics student at Indiana University. I located it (yes, I still have it; and I still have the Pentax Spotmatic, although it is no longer used). I modified the holder to fit the lens of the D7000. The holder was made from a box that held Kodak 4x5 glass plates which I used at the 12" refractor telescope at IU's Kirkwood Observatory.

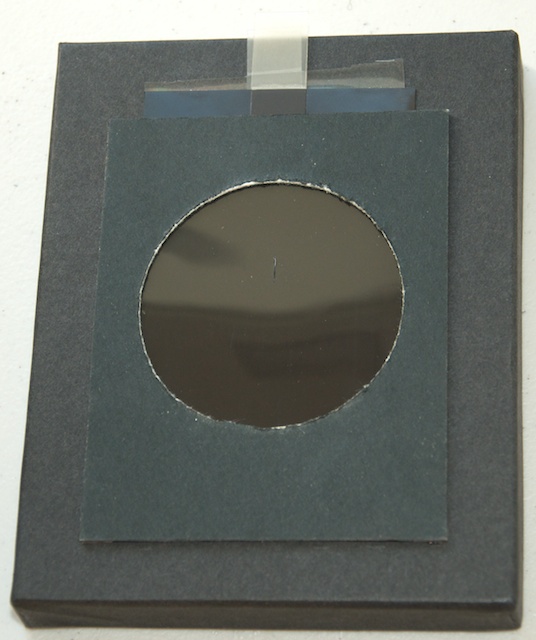
I have a diffraction grating (unkown lines/inch) and "sun filters" (made from exposed negative film). One filter (on the right) has a "slit" cut into it.

The grating and filter slip into a slot on the holder:

Thursday morning, 22 September, the sky was mostly clear. I decided to try a test with my "spectroscope". I attached the holder to the D7000 DSLR camera lens and pointed the camera at the sun. I moved the sun away from the slit in the filter to focus the image:

I then moved the camera around until the solar spectrum appeared in the viewfinder. I rotated the holder until the spectrum was horizontal and zoomed until it almost filled the FOV:

I took several exposures. Here is the best solar spectrum, same as above, but cropped:
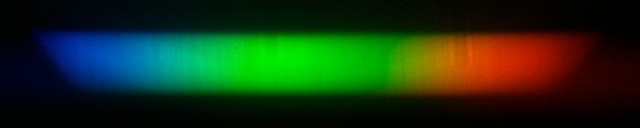
The solar spectrum shows some Fraunhofer Lines, albeit, not clearly. I need to make a better slit. Also, I took the images through a window. I wonder if the Argon gas that is between the panes shows? Now that I knew that the mount worked, I will have to try to improve the resolution (by making a better slit and not photographing the sun through a window). I had intended to do some star spectra attempts that night but clouds kept me away from the observatory.
Friday, 23 September, dawned clear, so I did some more solar spectrum imaging. I did the imaging outside to see if the images were improved by not shooting through a window. The lines are little more clear in this image:

But I still need to make a sharper slit.
Friday evening, the sky was mostly clear with just a few clouds. I opened the observatory at 1810 MST, 94°F. At 1818 MST, viewed Venus low in the western sky at 77X. This was two minutes before sunset. I then tested the wired AutoStar II to see if it had the same MODE key problem as the Wireless AutoStar II has begun experiencing (see the previous report). The wired handcontroller worked flawlessly and would always show the MODE display when the key was held down for 3 seconds. I will do some more troubleshooting on the wireless handcontroller to see if I can correct the problem.
At 1838 MST, viewed Saturn low in the western sky at 77X. I then took this iPhone 4 photograph of some crepuscular rays:

At 1905 MST, I began setting up for D7000 piggyback imaging of M51 and M101 using the 18-105mm lens. I set the focal length to 70mm to try to image both galaxies in the same field-of-view (FOV). I did a test exposure to verify framing at 1915 MST; then began waiting for the sky to darken. I began imaging at 1922 MST but the results were not good. The still-bright twilight sky would overexpose, making the galaxies difficult to see in the final images. Now that these galaxies are so low in the northwestern sky after sunset, I will have to wait a few months for them to be higher in the sky at night.
 I then set up for some star spectra test imaging. I mounted the D7000 on my "monoPOD" (click photo for larger version) and attached my DIY spectroscope. Beginning at 2000 MST, I did some test imaging of Sagittarius. I did 2 and 5 minute, ISO 6400, exposures. Post-processing of the images showed no spectra. I had let the stars trail in the image since I was not using the slit. But apparently the spectra were just too faint. Will have to do more testing.
At 2025 MST, I began setting up for D7000 piggyback imaging of M31 using the 70-300mm lens. Beginning at 2038 MST, I did some framing test images, finally deciding on setting the lens to a focal length of 300mm. At one point in the imaging, I must have bumped the focus ring; I refocused using a Nikon viewfinder eyepiece magnifier. I then did 5, 10, and 15 minute, ISO 6400, exposures. The 15 minute exposure was too overexposed to be useful, but the 10 minute exposure turned out good:

I then slewed to M33 and repeated the imaging with 5 and 10 minute, ISO 6400, FL=300mm, exposures. The 5 minute exposure was the best:

One problem I had while doing guiding with the illuminated reticle eyepiece on the star diagonal was that my head would sometimes bump the camera during the exposure, causing slight wobbles in the star images. I should have used the visual back for the eyepiece.
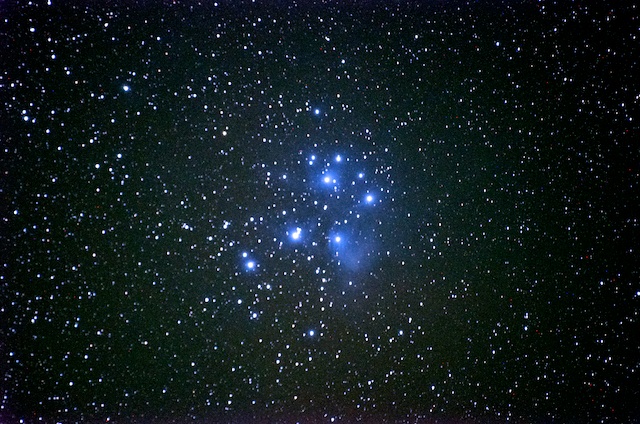
At 2228 MST, slewed to M45, the Pleiades, my next piggyback imaging target. I did a focus test exposure and then began waiting for M45 to rise higher in the sky. I begin imaging at 2305 MST with 2, 5, and 10 minute, ISO 6400, FL=300mm, exposures. The best was this 5 minute exposure:
I ended imaging at 2336 MST. Viewed M45 at 77X; some nebulosity was just barely visible. I then did a tour of DSOs in the constellation of Perseus: M76 (Little Dumbbell), Double Cluster, M34 (open cluster), NGC1245 (open cluster), NGC1275 (small faint galaxy; difficult but saw with averted vision), NGC1342 (open cluster), IC348 (large faint diffuse nebula; barely could see a portion at 77X; tried the O-III filter but didn't help), NGC1499 (California Nebula; very large but faint; O-III didn't help), and NGC1528 (open cluster).
At 0012 MST, viewed Jupiter at 77X; the four Galilean Moons were nicely arranged. Then used the 5.5mm (364X) eyepiece; all four moons showed distinct disks. Added the moon filter to reduce glare from the planet's brightness. Details in Jupiter's atmosphere became very clear. The moon filter also improved the view of the moon disks. Switched to the 9.7mm (206X) with moon filter; excellent view of the planet's atmosphere. Using the 15mm (133X) eyepiece + moon filter yielded incredibly detailed views of the many cloud bands.
At 0038 MST, viewed M1, the Crab Nebula, at 77X. Nice view. Switched to 133X; good view, with some structure still visible. Took a last look at Jupiter at 0053 MST.
The observatory was closed at 0105 MST, 75°F.
Go to the previous report.
Return to the Cassiopeia Observatory Welcome Page.