Review - Netatmo Weather Station
Posted: 20 February 2015
Updated: 17 May 2016
Go to the Wind Gauge update (05/17/16)
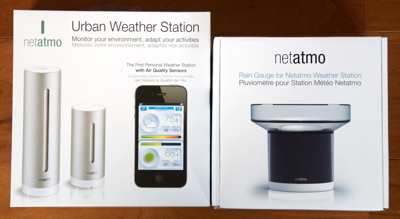 Weather Station with Rain Gauge
$258
Netatmo
In January 2012 we purchased a La Crosse weather station. I reported on it here: Cassiopeia Observatory Weather Station. It worked reasonably well for providing indoor and outdoor temperature and humidity data, air pressure, rain amounts, and wind speed and direction. Unfortunately, in late 2014 the anemometer stopped reporting wind speed and direction. And in early February 2015 it stopped reporting outdoor temperature, humidity, and rain data, even after installing fresh batteries and resetting the system. So it was time to get a new weather station. I considered purchasing a full-blown professional system, but that would have been overkill for my purposes. In 2014, a friend had purchased a Netatmo Weather Station and really liked it. He was able to view the data on his iPad and have it posted to his web site. These were definitely things I wanted to do. So I began considering the Netatmo station as well, eventually deciding to go with the Netatmo as a replacement for the La Crosse station. I purchased both the main unit (indoor and outdoor data; $179) and the separate Rain Gauge ($79). The Netatmo anemometer is scheduled to begin shipping in mid-2015 (price has not been announced; I'll update this review when I get it).
The Units
The main weather station comes with an indoor unit, 1 outdoor unit, cabling (indoor unit), an AC-USB power adapter (indoor unit), batteries (outdoor unit), and mounting materials (outdoor unit):
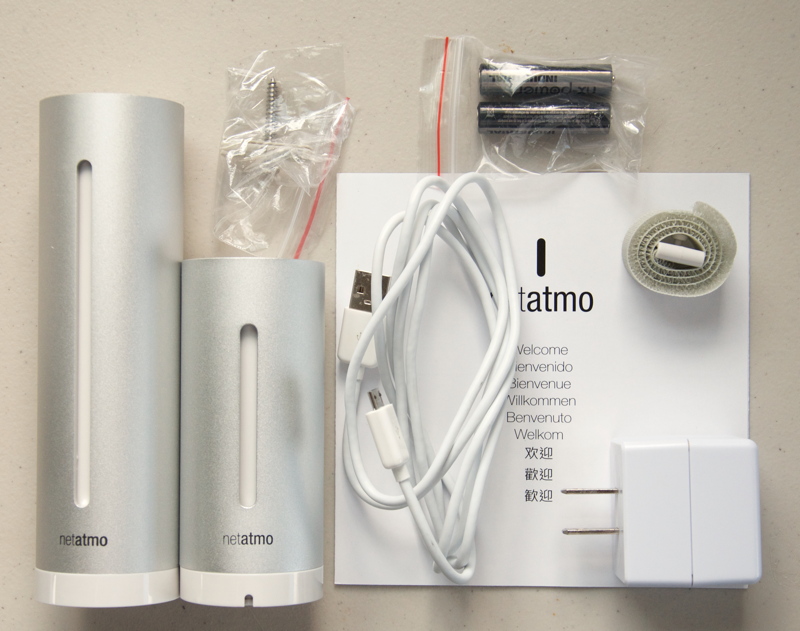
There is a piece of paper in the box that tries to pictorially show how to install the units. The paper provides a URL to get the manual (but doesn't).
The optional Rain Gauge (seen below)
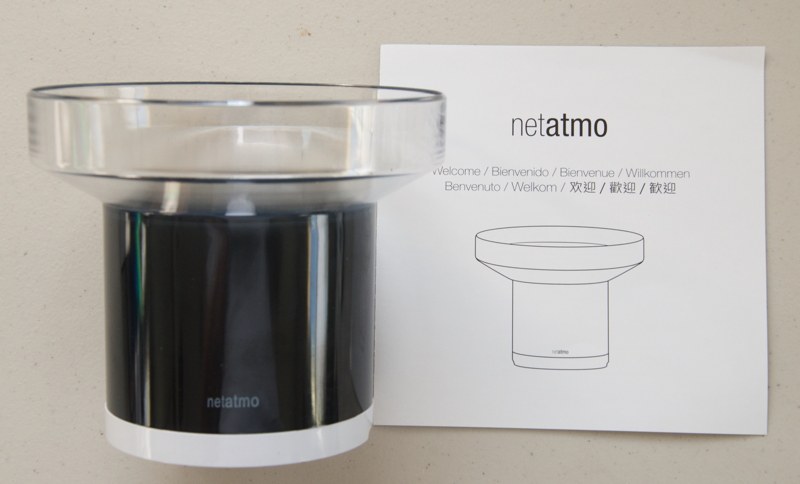
also comes with a paper and it also said to go to the support web page at netatmo.com to get the manual. I went there but no manuals appeared. The page just allowed you to email an inquiry. So I did that. A couple of days later I received an email with an attached FAQ document. The same FAQ document is included with the smartphone app. Unfortunately, the FAQ had no Rain Gauge installation information, nor any indication about where its batteries are installed or how to access them. You can find a PDF manual online that provides more and better information about the main unit, but it has very little information about the Rain Gauge. I finally discovered that the base of the Rain Gauge twists then snaps off. Unlike the outdoor unit, there are no instructions stamped on the Rain Gauge to tell you that. Once you have removed the base you discover that there is a plastic sheet that must be removed to activate the installed AAA batteries:

Seems like the user should be told that before installing the Rain Gauge and discovering that the main unit can't receive rain data. Getting the base back on requires that four tabs be properly lined up, but there are no markers to indicate the initial position. I accidently discovered what I guess was the proper position since it finally went back on. The included paper says the unit must be 10 feet from a house although the box says the wireless range is 100 meters. So I assumed that 10' is a minimum distance. The Netatmo FAQ document has this interesting comment about the Rain Gauge: "The rain gauge cannot measure snowfall and it is recommended not to let it outside by very low temperatures." Nowhere (that I've found) do they specify what they mean by "very low". (I never had low temperature problems with the La Crosse rain gauge. Once any snow on the unit melted it was measured as water.)
Unlike other weather stations, there is no display unit where you can view your weather data. You will use the app or a web page to view all the Netatmo Weather Station data. For some users the lack of a display unit that shows weather data will eliminate the Netatmo Weather Station from consideration. For me, it was not a deciding factor.
Since the main hub is AC powered, I will probably connect it eventually to my UPS so that it will continue to provide data during power outages.
Hardware Installations
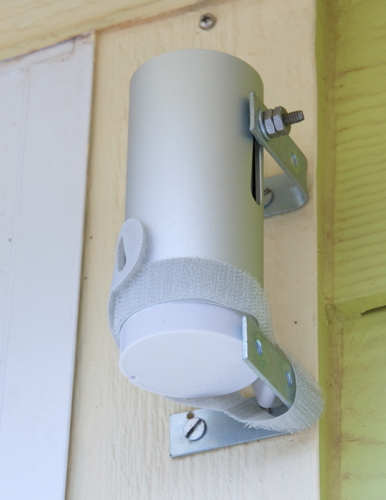
Outdoor unit: I planned to use the same mounting location as I had with the La Crosse weather station, but there is only one mounting point on the side of the Netatmo unit and that is just a groove where a screw head slides into. That didn't seem very secure to me and I worried that it would allow the unit to swivel in the wind and possibly even fall off. I was able to use a single small bolt, tightened down, to hold the unit. I added the supplied Velcro strip for extra security. Here's how I mounted the outdoor unit:
Rain Gauge: This unit attaches to wherever you want it mounted using a standard camera tripod 1/4" bolt (not included). I located a 1/4" bolt in my toolbox that fits the Netatmo Rain Gauge. I drilled a new hole in the mounting board that I had used for the La Crosse rain gauge. I removed my La Crosse rain gauge (and anemometer) from my weather mast and mounted the Netatmo Rain Gauge as seen here:


Note: I expect to mount the Netatmo anemometer on the same mast.
Indoor unit: After I completed the outdoor installations I set up the indoor unit on a shelf and connected its AC power supply. Its green light came on, indicating it was powered on.
Setup
After I completed the hardware installations, I began configuring my system. To initially configure the weather station you connect the main unit to your computer via the supplied USB cable or use your smartphone or tablet. I initially tried to use the free Netatmo iOS app on my Phone 5s. There are also Android and Windows Phone versions of the Netatmo app. Using a smartphone with GPS supposedly allows the weather station to get its location. (If necessary, you can manually enter this information as well.) The indoor unit, which acts as the hub for all weather data, uses Wi-Fi to connect to the Internet, so you do need a Wi-Fi router to use the Netatmo Weather Station.
According to the FAQ, when using a smartphone for the initial setup, the phone connects to the indoor unit via Bluetooth, but that seemed to be wrong. I checked the Settings: Bluetooth screen on my iPhone. No Netatmo device appeared. So I launched the iOS Netatmo app and created an account. After I created an account it showed a screen telling me to connect the iPhone USB cable to the main unit. But wait, the power supply USB cable was connected and the unit was on. The image shown in the iPhone app has TWO connections: one power and one USB. Sheesh. The only option on this screen was to Exit.

There was a "Watch video" option in the iOS app. So, hoping that it was an installation video, I watched it. Unfortunately the 1 minute video is nothing but an advertisement for the Netatmo Weather Station. OK, so Bluetooth doesn't work. Connected the indoor unit to my Mac using the USB cable. I went to https://my.netatmo.com and logged in using the ID/password I created in the iOS app. From there I had to download a Setup Wizard that is used to configure the unit's Wi-Fi connection. When the Setup Wizard was run, it detected the USB-connected unit and installed the latest firmware (which fixed a security issue). I selected my Wi-Fi network in the Wizard, entered the network password, and then got this error:
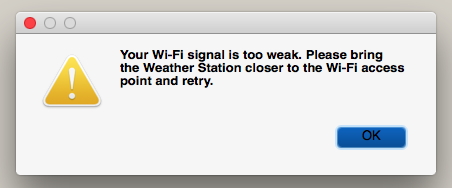
Too weak? The unit was next to my Mac that showed a full-strength signal, about 12' away from the Wi-Fi router and in the same room. I moved the unit from about 12' away from the Wi-Fi router to 6' away; that worked. Once I entered a name for the Weather Station the Wizard reported success and said to connect the indoor unit to the power supply and use the app (I assumed it meant the smartphone app) to access it. It also created a shortcut to the web app on my Mac desktop.
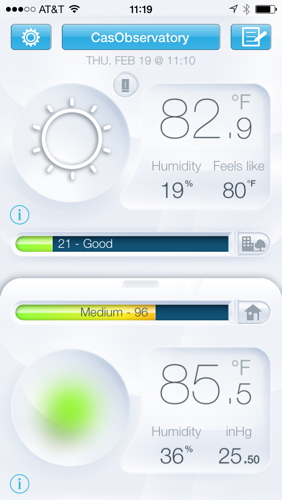
I launched the iOS app and it connected to my weather station and showed the indoor and outdoor readings:

I did have to change the location of the station from Illinois to Arizona.
Once the indoor and outdoor units were setup, I began trying to add the Rain Gauge to the weather station configuration using the iPhone. Went to the Add Module section in the iOS app and followed its steps. It finally said to insert the batteries in the Rain Gauge, or if already inserted, to remove them and wait 20 seconds. Seems like some documentation should have told me that before I installed it on the mast. Went back outside and removed/inserted the batteries. That required that I remove the unit from the mast and then re-attach it. I then clicked "Next" in the app; it then said to bring the Rain Gauge to within 2 feet of the main unit. Gee, Netatmo, why didn't you tell me all this before I started? So I brought the Rain Gauge inside and set it close to the main unit. It tried to find the Rain Gauge but couldn't this time. Argh. It found it when it was outside! (The frustrations were growing.) The app told me to touch the top of the main station until it was blinking blue. But it was a solid blue and didn't change to blinking. I powered it off then back on. This time it let me continue. After searching for about a minute, no Rain Gauge was found. Removed/reinserted batteries. Found it. Whew!
This was my weather data as then seen on my iPhone:

And on the iPad:

The iOS app gives you easy access to information about each of your units, including name, signal and battery strengths, and more:


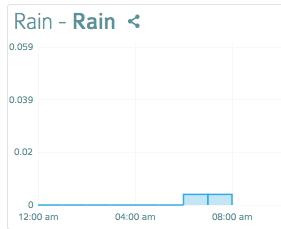
With everything seeming to be working OK, I remounted the Rain Gauge on the weather mast. Just need some rain to confirm the Rain Gauge is working correctly. The 2015 rain total from the La Crosse weather station was 2.23". Unfortunately, there is no way to manually set a rain total for the Netatmo when moving from a previous weather station or if you have a total rain amount from a nearby station. You could slowly add water to the Rain Gauge until you got the right total, but I elected to not do that.
Viewing Your Weather Data Online
Once you have set up and registered your system, you can view your weather station via a web app. You can also view your weather data using the smartphone and tablet apps. You don't need to connect to your local Wi-Fi network; you just need an Internet connection.
Besides the web app and smartphone/tablet apps there are some other ways to view your weather station data. The Netatmo Weather Station has become popular enough that there are web browser extensions/add-on's and computer programs. I installed a free Safari extension from PGWorks in Safari. When you click it you see your current data:

There are similar add-on's for Firefox and Chrome web browsers.
I searched the Mac App Store for "Netatmo" and found four Macintosh menubar add-on's ranging in price from $1.99-2.99. I haven't yet tried these. I suspect there are Windows programs as well.
You can register your station with the Netatmo worldwide Weathermap. This will allow others to see your weather data.
My friend used a free service from MeteoWare to get his weather data posted on his own web site. I registered my Netatmo weather station with MeteoWare and I was able to have my data online, as seen here in this view of real-time data:
The Cassiopeia Observatory weather data from my Netatmo weather station is now live on my webcam page.
You can also register your Netatmo weather station with Weather Underground, as well as wetter.com and psweather.com (using the MeteoWare service) and view your data via widgets on your (or their) web page. For some unknown reason, the Meteoware site gave me an "Internal error" when I tried to enter my Weather Underground station info. After waiting about an hour, I tried again and this time it worked. Weather Underground then knew about my weather but was not initially reporting any data from it. After waiting a few minutes Weather Underground had the data from my Netatmo Weather Station. This Weather Underground widget shows my data:
Of course, solutions that use a 3rd party require that your weather station be visible on the Internet and that the 3rd party services are available. Netatmo provides Developer Solutions if you want to write your own code (PHP, Java, Objective-C, etc.) and there is a Netatmo Forum available for users and developers.
Summary
It took me about 4 hours to install and complete the setup of the Netatmo Weather Station and Rain Gauge. This was longer than a typical user would experience since I was documenting everything as I went along for this review. It was also longer than it should have been due to the poor and oversimplified documentation and the Netatmo main web site, which seems more for advertising than support. For the price of the Netatmo Weather Station, especially if you add the Rain Gauge and the yet-to-be-released anemometer, the lack of good documentation really hurts this product. Buyers should not have to rely on this review to learn how to use it. Netatmo needs to release new manuals for its products that provide complete installation and setup instructions and have good troubleshooting information. Their iOS app should also be updated to fix the problems I noted in this review.
The indoor and outdoor units are plastic (as was the La Crosse weather station). It will be interesting to see how well the outdoor units handle a southern Arizona summer. I really don't expect any problems due to the heat. Hail might be more of a problem. I did have some hail damage to the La Crosse anemometer in 2014, although it continued to work for awhile.
Once I got the Netatmo Weather Station working, it really is convenient, easy to use, and provides a lot of useful weather information. I look forward to adding their anemometer mid-2015.
Update 24 February 2015
Finally had a little rain this morning. The Netatmo web app showed this:

Even got a Netatmo Weather Station notification on my iPhone:

No, that is not a typo where it says "in in". The first "in" is actually "inch". Probably would look better if it was not abbreviated.
The MeteoWare widget on my live webcam page showed this a few minutes later:

The Safari web browser extension (as well as the Firefox add-on from the same developer) was not reporting any rain amount:
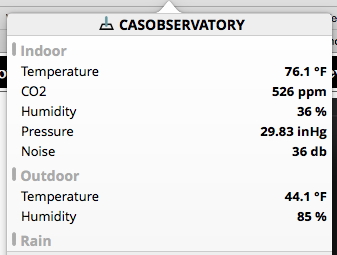
This is probably due to the amount of rain being less than 0.1" total.
Although the amount of rain received was hardly significant, it did demonstrate that the Netatmo Rain Gauge was measuring and reporting rainfall data. And it closely matched what was being reported by a nearby high-end weather station.
Update 2 May 2016
Comments are welcome using Email. If you are on Twitter you can use the button below to tweet this report to your followers. Thanks.
Cassiopeia Observatory Home Page
Copyright ©2015-16 Michael L. Weasner / mweasner@me.com
URL = http://www.weasner.com/co/Reviews/2015/Netatmo_Weather_Station/index.html

