
Review - Starry Night Pro Plus 7 - Page 2
Posted: 14 January 2015
Using Starry Night Pro Plus
Upon launch this is the default look that comes up, as seen on my iMac 27":

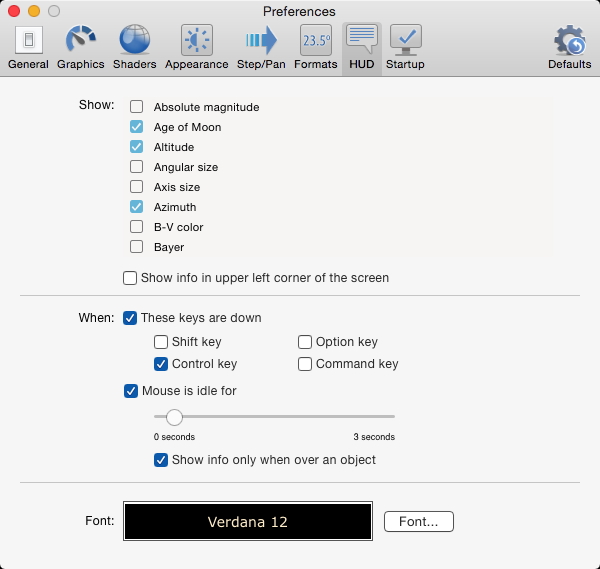
The horizon is still using the default and the Side Pane (on the right) is still showing its default views. The text "Near Mount Lemmon IR Observatory, USA" is still showing even though I selected to View From my Home location. Next, I modified a few of the various settings and looks. I did discover a bug when setting the HUD (Heads Up Display) preference:
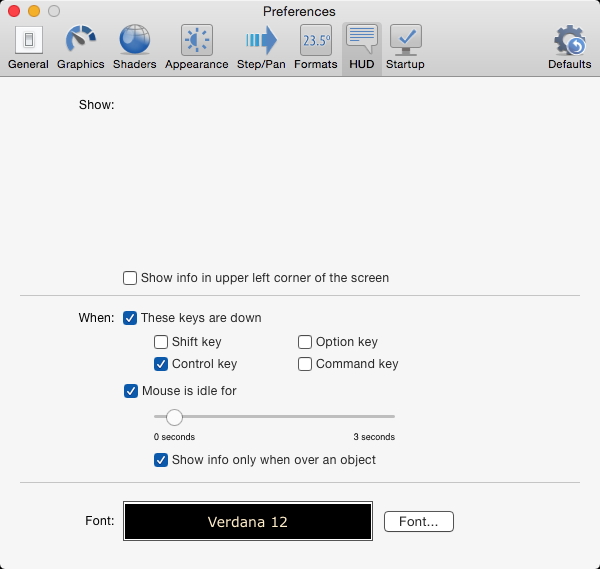
There are missing checkboxes at the top which only appear if you mouseover the blank area:
Starry Night has many user-configurable settings that control what information is displayed and how that information is displayed. Most users may just want to do some initial setups for some of information, deferring other configuring until actually using those parts of the program. The reason I suggest this is that Starry Night Pro and Pro Plus are very powerful programs with so many features and capabilities that it may be awhile before the user needs to use some of the more advanced features. When making changes to the various settings, it is important to remember that these changes are NOT automatically saved. They are specific to just that session with the program. If you want the changes to be applied on every launch of the program you have to explicitly save the changes as a new "default". I went through many dialog boxes and options displays which are located in many different (but logical) places in the program before I had Starry Night Pro Plus configured based on how I have used other desktop planetarium programs. Once I had set all these configurations, I saved a new "default" settings file. You can also save settings files for specific purposes and load those settings when you need them.
Once I had Starry Night initially configured for my use, I began exploring the program. The Side Pane displays a lot of useful information and some that is less useful (to me). The top portion of the Side Pane is seen here:
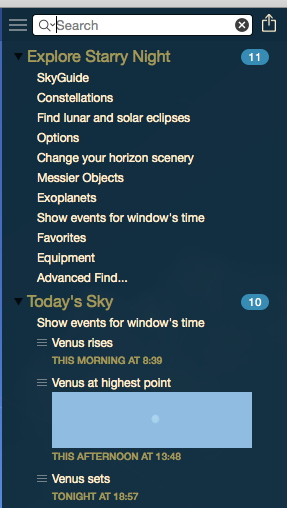
You can collapse major sections, but you can not remove or rearrange the order of items in the Side Pane, which when expanded is very long and requires a scroll to see it all. Also, the expanded/collapsed state of "Explore Starry Night" at the very top is NOT saved when you save the program settings to a new "default" file. That section is not something I will frequently use, so having it take up screen space (even on my iMac 27”) is annoying.
A handy "Status" window is available in the menu of the Side Pane:
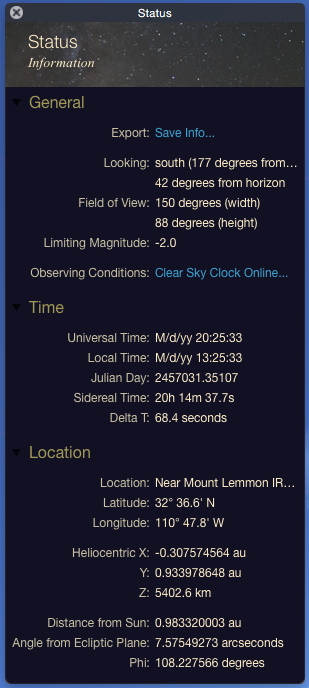
Unfortunately, if you move and resize the Status window, its new location is not saved when you save a new "default". You can choose to hide the Side Pane, however that state is not saved to the default and the Side Pane reappears on the next launch. I hope these Side Pane problems are corrected in a future update.
And speaking of the Status view, that is the only place where you can find your saved Home location information to confirm you entered it correctly on the first program launch. I did find out how to change the name of my current viewing location, which defaulted to "Near Mount Lemmon IR Observatory, USA" since I manually entered my Lat/Long on initial startup. I had to create a new observing location by manually entering my location again and saving that location with a name (i.e., "Cassiopeia Observatory") and selecting that location as my viewing location. Saving a new "defaults" file allows Starry Night to always open with that location (and name) used.
You can specify how bright or how far objects have to be to be displayed. A project I did back in 2009-10 was to view all G-type stars within 30 Lightyears of the Earth and that were visible from my observatory. I had to look up that information online. With Starry Night Pro Plus I can set a distance limit here:
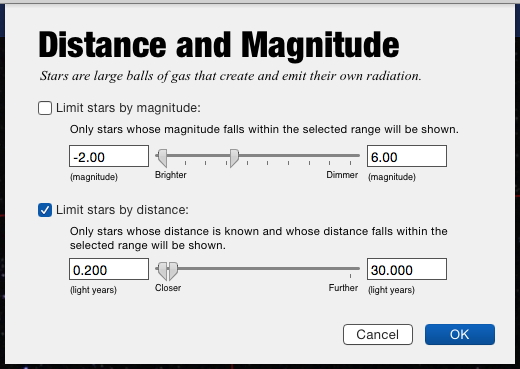
This is a very handy feature to use as you explore our galaxy. Unfortunately, you can not limit the star display to a specific spectral type. One caution: if viewing the star chart using the AllSky CCD Mosiac image (discussed later in this review), you will not see any change when trying to view stars at specific distances or magnitude ranges. That is because there is no distance/magnitide for stars in the photographic image. Be certain to turn off the All-Sky Image in the Side Pane Options; then your ranges will be applied.
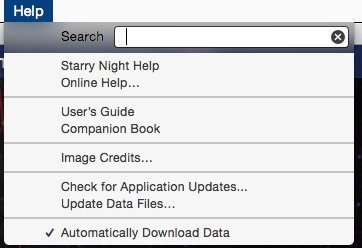
A word of caution for those who have a limited monthly Internet bandwidth allotment. If you have the program set to "Automatically Download Data" (in the Help menu):
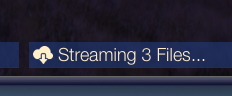
You may find that large files are being downloaded as you zoom in to show more details. I zoomed in and noticed the display at right above appear in the lower left corner of the Starry Night window. It started at 8 files and downloaded over 45 MB of data.
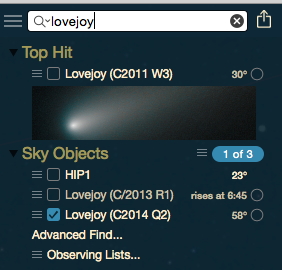
A typical operation I do (which you also probably do) is to determine where in the sky an object is going to be that night. You can type an object's name in the Side Pane. At the time I was learning Starry Night Pro Plus, Comet C/2014 Q2 (Lovejoy) was well placed for nighttime viewing. So how would Starry Night show it? I first typed "Comet C/2014 Q2"; nothing found. I then typed "C/2014 Q2"; again nothing found. OK, what about "Comet Lovejoy"? Not found. Well, what about just "Lovejoy"? Bingo!
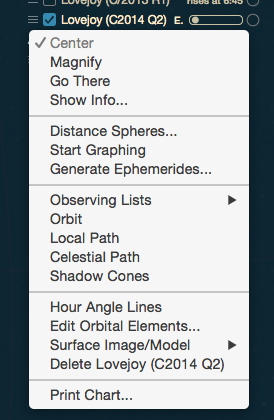
Using the object's menu at the left of its name, I could center it on the star chart:
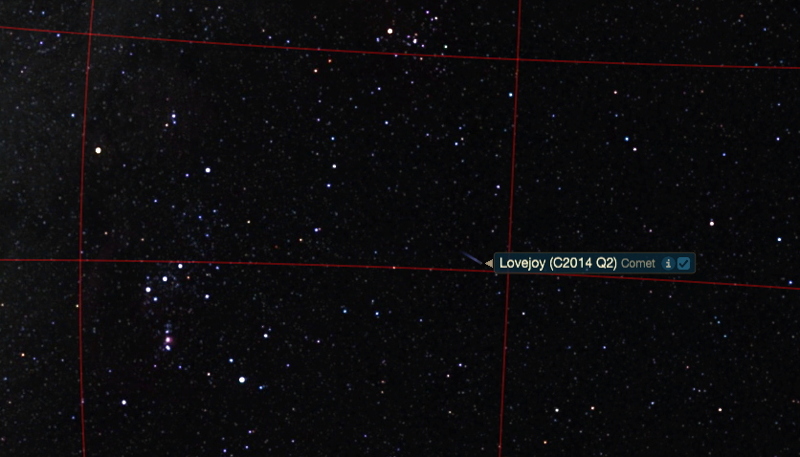
Did you notice WHY entering "C/2014" in the search text failed? This particular comet is labeled as "C2014 Q2" with no "/" before the year. So if your searches are failing, try different variations of its identifier or name.
If you click the "i" by the object's label on the star chart, you can display some information about the object:
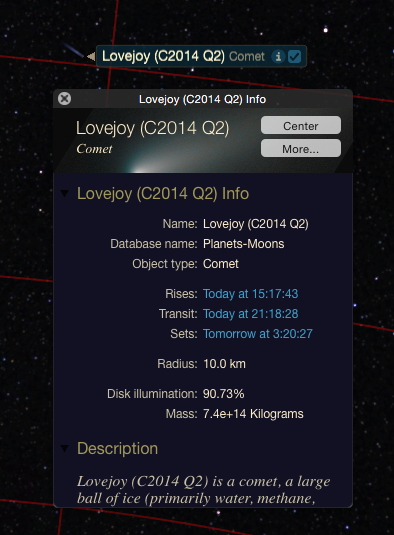
Note that this Info window appears at the top left of the screen instead of appearing near the object. If you are using a large display, remember to look way over there!
Finding other objects works the same way. Simple, once you understand it.
I also like to move forward and backward in time to check how the selected object changes position during the night. You use the Time Flow controls at the top right of the main window. You can change the "steps" used via the dropdown menu:
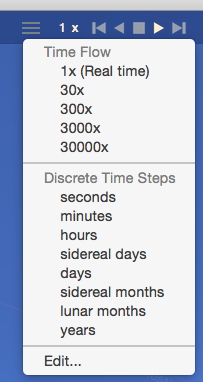
I frequently use hours as my preferred jump value, so I selected "hours" in the menu and saved a new "default" file. Oops, Starry Night Pro Plus doesn't save that either, so I have to re-select "hours" everytime I want to use Time Flow.
Go to Page 3.
Go back to Page 1.
Comments are welcome using Email.
Cassiopeia Observatory Home Page
Copyright ©2015 Michael L. Weasner / mweasner@me.com
URL = http://www.weasner.com/co/Reviews/2015/Starry_Night_Pro_Plus/index2.html