ASTROPHOTOGRAPHY TYPES
Last updated: 31 March 2011
I often get asked to explain the different types of astrophotography that can be done with a telescope, binoculars, or with just a camera alone. This article will explain what each type is, when and how to use it, and what types of cameras can be used with each type.
(This article will not discuss using dedicated astro-imagers, although some of the techniques discussed can be applicable to those imagers as well.)
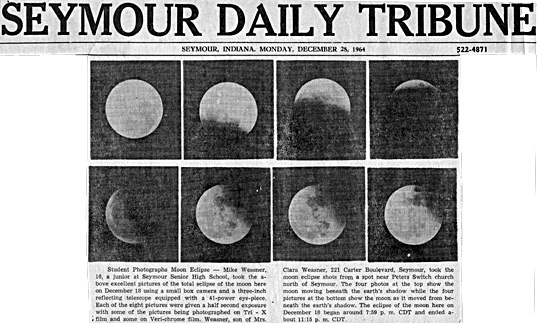
At some point, almost every amateur astronomer wants to take photographs through their telescope. Sometimes, it is to document a special event, like an eclipse and show the photos to others. Here is an example of some lunar eclipse photos that I took in 1964 using my old Edmund Scientific 3" Newtonian telescope and a small film camera:
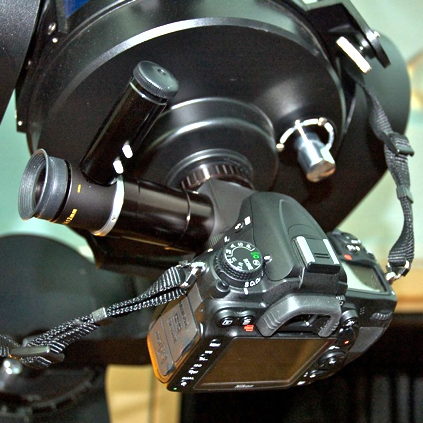
Sometimes, we want to show what we see through our telescopes. This photo was taken with a Nikon D7000 DSLR mounted on a Meade ETX-125AT at prime focus + 2X Barlow Lens.

Doing astrophotography with today's digital cameras is basically the same as it was back in 1964 (and even earlier), except the cameras are better (and with no waiting for film to be developed), and "inexpensive" telescopes are considerably improved, both in the optics and the mounts. Anyone can do some types of astrophotography with almost any of today's cameras. Some types are easy, with minimal hardware requirements, and yet will make for some interesting photographs. Some types are more challenging, with more extensive requirements, in order to accomplish good astrophotographs. But all types have their purposes and all are fun to do.
This article will discuss the following types of astrophotography:
The order is more or less according to difficulty, from the easiest to the most difficult. If you have a camera, whether it is film or digital, you can do astrophotography. For some types of astrophotography, the camera can be a simple point-and-shoot model, or a sophisticated DSLR. Even cell phone cameras can do some types of astrophotography.
At the end of this article, I'll briefly discuss some General Tips and Image Editing. They are followed by a brief Summary.
If you have a camera that can do exposures of about 30 seconds, has a moderately high ISO capability, or one that has a "blub" setting that will keep the shutter open until you close it, then you can take photographs of the night sky. This type of astrophotography is best suited to star trails, constellations, aurora, the Zodiacal Light, satellite passes, and even the heart of the Milky Way. Ideally you should have a sturdy tripod, although a tabletop tripod or even a "bean bag" can do the job. Using a remote release or self-timer for the camera will avoid image "jiggles" from pushing the shutter release on the camera body. Alternatively, you can use the "Hat Trick" Technique.
To take a photograph of the night sky, mount the camera on the tripod, focus the camera lens to infinity (manually if the Auto-Focus won't lock on to infinity), set the camera to a long exposure, wide-open f/ stop (if available), and a high ISO setting, point the camera at the portion of the sky you want to photograph, and begin the exposure. Experiment with different length exposures and ISO settings. Also, try differnent lens zoom settings or a telephoto lens. Depending on the camera, you may be amazed at what you will be able to see in your photographs. Star colors, brighter large nebula, planets (as dots), meteors, and more, are all possible.
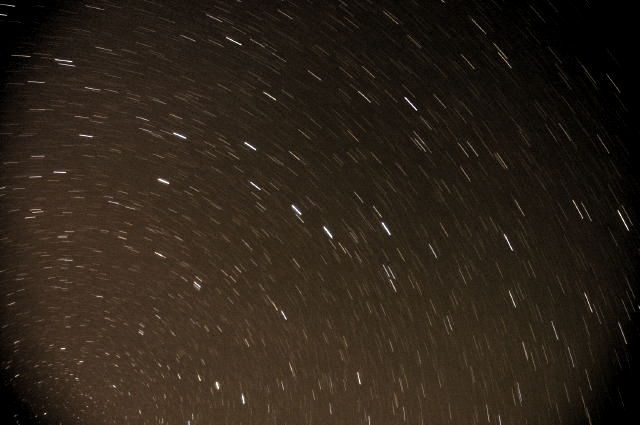
Here are some examples that I've done. The first photograph shows the "Big Dipper" of the constellation Ursa Major. This is a 10 minute exposure, hence the star trailing, and was taken with a Nikon D70 DSLR on a photographic tripod.
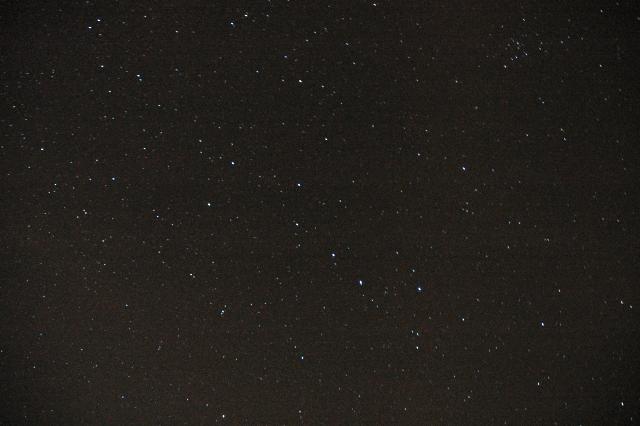
This is a shorter exposure with the D70 showing the Big Dipper.
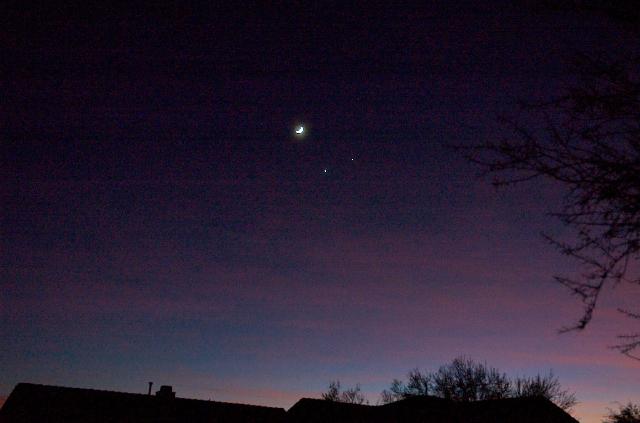
This next photograph shows a crescent moon, Jupiter, and Venus in the western sky after sunset. It was taken with a D70 DSLR.
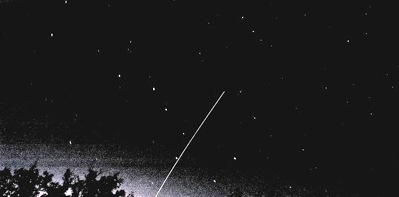
This photograph shows the International Space Station (ISS) passing through the Big Dipper. It was taken with a D70 DSLR.
So, get out at night and take photographs of the sky with your camera. While having dark skies is good, it is not required for photographing the moon and brighter planets. Your initial photographs may not be what you hope for but with some experience and trial-and-error, you will get many keepers!
The next step up in astrophotography is piggyback astrophotography. Typically, piggyback astrophotography is used for wide-angle photographs of the night sky, although it can be used to photograph some larger objects while using a telephoto lens. Mounting the camera on the telescope allows the telescope to track the movement of the night sky, compensating for the Earth's rotation. This avoids the star trailing that will occur in long exposures with a camera on a tripod.
I did my first piggyback astrophotography in the early 1960s by mounting a 35mm film camera onto the tube of my (then new) Edmund Scientific 3" Newtonian telescope.

(Yes, that is me and my telescope in 1962.)
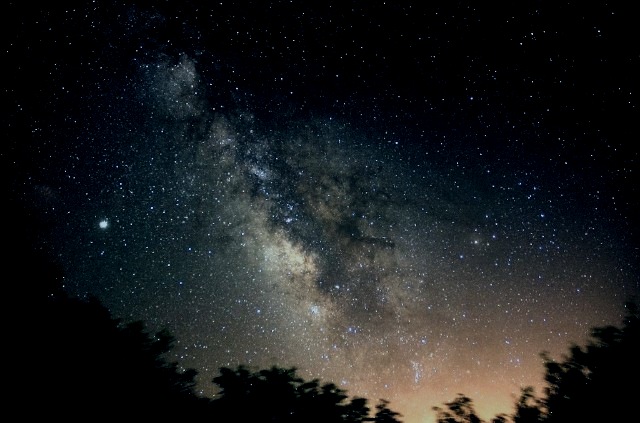
I pointed the telescope at the constellation of Orion, centered a star in the telescope eyepiece, opened the camera shutter, and began a 15 minute, ASA 160, exposure. I kept the star centered in the eyepiece for the entire 15 minutes by slowly moving the telescope by hand (the telescope had no electric drive). Considering that the photograph was being taken on a very cold winter night in southern Indiana, the resulting 35mm color slide came out very well. Today, many telescopes have electric drives and will track the sky movement for you, making piggyback astrophotography easy and rewarding. For example, this is a 3 minute, ISO 1600, photograph of the Milky Way taken with a DSLR piggyback on my Meade ETX-90RA:
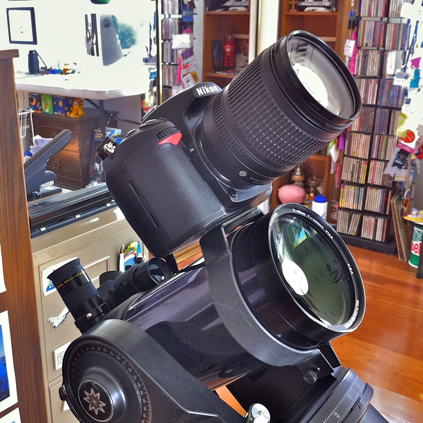
I used a commercially available piggyback adapter, as seen here mounting a Nikon DSLR on my ETX-90RA:
However, you can easily make an adapter for your telescope. There are many such tips on the Helpful Information: Astrophotography page on my ETX Site.
To take a photograph of the night sky using the piggyback technique, you do essentially the same steps as with simple night sky astrophotography. But first, align your telescope mount and start the telescope tracking (if the telescope is so equipped). Then mount the camera on the telescope tube, focus the camera lens to infinity (manually if the Auto-Focus won't lock on to infinity), set the camera to a long exposure, wide-open f/ stop (if available), and a high ISO setting, point the camera at the portion of the sky you want to photograph, and begin the exposure. Use a remote release, self-timer, or the "Hat Trick" Technique to begin and end the exposure. Experiment with different length exposures and ISO settings. Also, try different lens zoom settings or a telephoto lens.
If your telescope will handle the extra weight, you can use a telephoto lens on your camera and take amazing images of some objects in the night sky. This is M31, the Great Andromeda Galaxy, photographed with a Nikon D7000 DSLR using a 300mm lens. It is a 10 minute, ISO 6400, exposure. The camera was mounted piggyback on my Meade 8" LX200-ACF.

Most amateur telescopes will not accurately track the sky movement for more than 2 or 3 minutes. When doing piggyback astrophotography with normal or telephoto lenses, this usually is not a problem as the image scale is small enough to make tracking errors minimal. However, because you are not using the telescope optics for the astrophotography, you can help the telescope track the sky by manually keeping a star centered in a high power eyepiece. Using an eyepiece with an illuminated reticle, such as the Meade 12mm MA Illuminated Reticle Eyepiece, accurate guiding is made easy.
Some astrophotographers have mounted their camera directly onto a telescope tripod (with the telescope removed). If the tripod can track the night sky unaided using electric drives, then no telescope is required to do some great night sky astrophotography.
If you have a telescope and a camera, you definitely want to do some piggyback astrophotography. It is simple and you will get many excellent photographs. It doesn't matter what type of telescope you have as long as it is on a stable tripod (or other mount) and it can track the night sky, either electrically or by moving the telescope by hand. The camera doesn't matter too much either, as long as you can keep the shutter open for several minutes.
Prime Focus Astrophotography uses the telescope as the lens for the camera. It requires a camera with a removable lens (typically a SLR or DSLR). The telescope becomes a "telephoto lens" for the camera. The term "prime focus" refers to the focal plane where the telescope first focuses light from the mirror or objective lens. No eyepiece is used, however, it is sometimes desireable to add a Barlow Lens (or telenegative) or a focal reducer to the telescope to lengthen or shorten the focal length. Increasing the focal length yields a magnified view of the object and reduces the field-of-view (FOV). Decreasing the focal length yields a smaller magnification and a wider FOV. Using a focal reducer has the side benefit of making the telescope optically "faster" by decreasing the f/ ratio, which can allow fainter objects to be photographed. Any astronomical object can be photographed by imaging at prime focus, including objects that are too faint to be seen with your eye. But there are some requirements in order to get good images. Using the telescope as a "telephoto lens" means that the magnification is going to be high, and that requires a very stable mount for both the telescope and the camera. To photograph brighter objects like the moon, some planets, and some bright nebula, the telescope does not need an electric drive, but having one makes imaging easier since you don't have to keep moving the telescope by hand to track the object while photographing it. For faint objects, unless you plan to "stack" images (briefly discussed in the Image Editing section further down this page), you will want to mount the telescope in equatorial (or polar) mode (instead of in Altitude/Azimuth mode). I'll discuss photographing faint objects shortly, but lets start with an easy object, like the moon.
This photo was taken with a Nikon D7000 DSLR mounted on an ETX-125AT at prime focus:
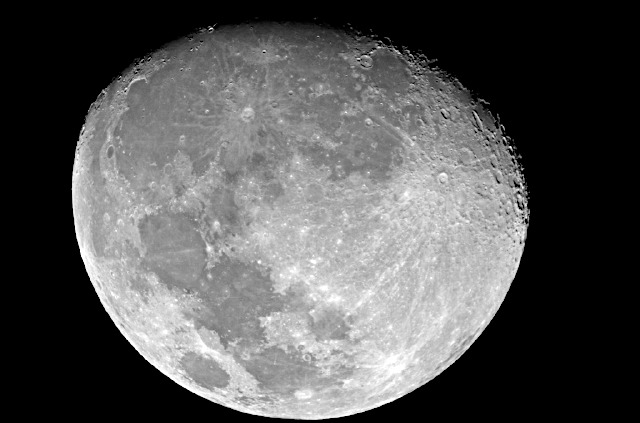
This photo was taken with the D7000 mounted on an ETX-125AT at prime focus + 2X Barlow Lens:
The moon is an easy object and a camera's auto-exposure settings may yield a properly exposed image. If not, experiment with settings around 1/160sec at ISO 200. Depending on the phase of the moon, longer or shorter shutter speeds and/or lower or higher ISO settings may be required. Again, you will want a remote shutter release or use the camera's self-timer. If your camera is a SLR or DSLR, the movement of the camera's mirror will cause vibrations to be induced into the telescope, potentially blurring the images. Some cameras have a "mirror lockup" mode; use it if available. If your camera does not have a mirror than moves, then this is not a concern. Digital cameras have electronic shutters, so no vibration is induced when the shutter is opened and closed. But film cameras have mechnical shutters, which will induce vibrations. To avoid vibrations, no matter the source, use the camera "bulb" setting and the Hat Trick" Technique. With practice you will be able to do very short exposures.
What about planets? Well, you will likely be disappointed in prime focus images of the planets. There are several reasons for this. The main reason is that planets are very small as seen from the Earth. Without a lot of magnification, you won't see any details; the planet will just be a bright dot on your photograph. Planets look bright, but photographically, they are not so bright, hence longer exposures may be required. But the longer exposures will result in blurring out of the details due to our atmosphere. The best results will be obtained from the Afocal method or Eyepiece Projection (discussed further down this page).
You can easily photograph bright nebulae at prime focus. The best target will be M42, the Great Nebula in Orion (the bright fuzzy patch located in the "sword" below Orion's belt). This 30 second, ISO 6400, image was taken with a D7000 DSLR at prime focus of an 8" telescope. (Smaller telescopes will do almost as well on this bright nebula.)

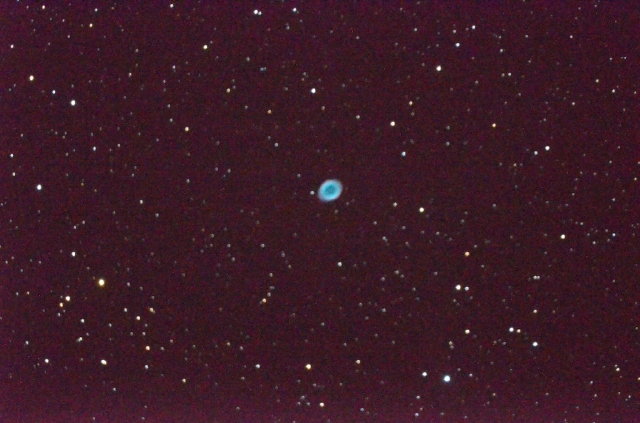
This photograph of M57, the Ring Nebula in the constellation of Lyra, is a 30 second, ISO 25600, D7000 photo at prime focus of the 8" telescope.
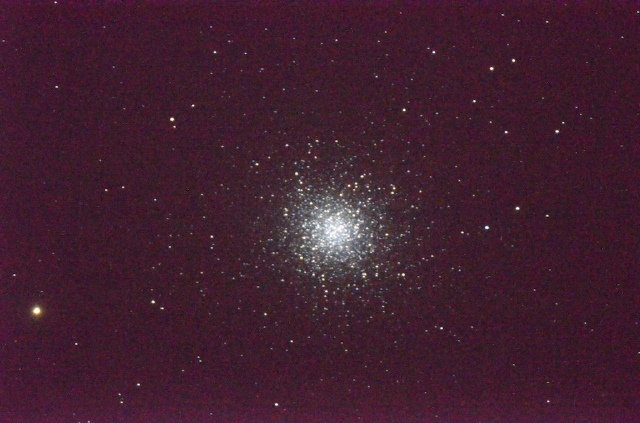
You can also photograph star clusters at prime focus with some telescopes and some cameras. This photograph of M13, the Great Globular Cluster in the constellation of Hercules, is a 30 second, ISO 25600, D7000 photo at prime focus of the 8" telescope.
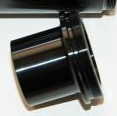 So, how do you mount your camera on the telescope for prime focus astrophotography? You use a T-Ring adapter with a prime focus adapter, as seen in the photo at the right (which is one of the components in the OPT Camera Adapter). The ring screws into the SLR or DSLR camera body and the adapter screws into the ring. The adapter is inserted into the eyepiece holder on the telescope (without an eyepiece).
As mentioned previously, exposures of up to 2-3 minutes may be possible in an equatorially mounted telescope, depending on the accuracy of the motor drives. If you want to make longer exposures and avoid star trailing, you need to assist the telescope in tracking the stars during the exposure. There are three ways of doing this. The first is to use an Off-Axis Guider (OAG).
The OAG attaches between the telescope prime focus (at the rear SCT port, not the eyepiece holder) and the camera. A small mirror inside the OAG directs a small portion of the light from the telescope to the side where an eyepiece is used to track a "guide star". Using the telescope to make small "guiding corrections", you keep the guide star centered in the eyepiece. Using an eyepiece with an illuminated reticle, such as the Meade 12mm MA Illuminated Reticle Eyepiece, can help you keep the star centered.
But there is a difficulty when using an OAG; you have to be able to find a suitable guide star. Many times there won't be one available in the FOV. So, an alternative to using an OAG is to use a separate "guide scope" mounted on the main telescope. The small finderscope that most telescopes have is not suited to this as the magnification is too small to allow for accurate guiding. A larger (but still small) telescope is typically used. You then look through the guide scope and make the guiding corrections while photographing the object through the main telescope. You can also reverse these roles; use the main telescope for guiding and the small telescope for imaging.
The third way of guiding is to use an "auto guider". This is a specialized imager and software that monitors a guide star and sends guiding commands to the main telescope to keep the star centered in the imager. There are many variations of auto guiders and they are beyond the scope of this article. Personally, I use the OAG with my 8" telescope and have successfully accomplished guided exposures of up to 15 minutes.
Afocal and Eyepiece Projection Astrophotography are very similar in that they both take photographs of objects through an eyepiece that is on the telescope. Afocal is the easiest of the two types in that you can take afocal photographs of bright objects without even needing an adapter (although using one helps tremendously). All that is required is a telescope (or binoculars) and a camera with a lens, including cell phone cameras. This technique works best on the moon, sun (with a proper solar filter on the telescope), and brigher planets. You simply center the object in the eyepiece, focus the eyepiece with your eye, focus the camera lens to infinity, set an appropriate exposure setting (or try the auto-exposure setting), and then hold the camera lens over the eyepiece where your eye was and take your photograph. The camera photographs what your eye saw in the eyepiece. Simple, huh? If the object is small or you just see a circle of light from the eyepiece, zoom the camera lens some to increase the magnification. Don't zoom too much if using "digital zoom" as the image quality will be lowered due to pixelation.
As three examples of what almost any camera can do with afocal imaging, consider these showing the moon and Saturn:
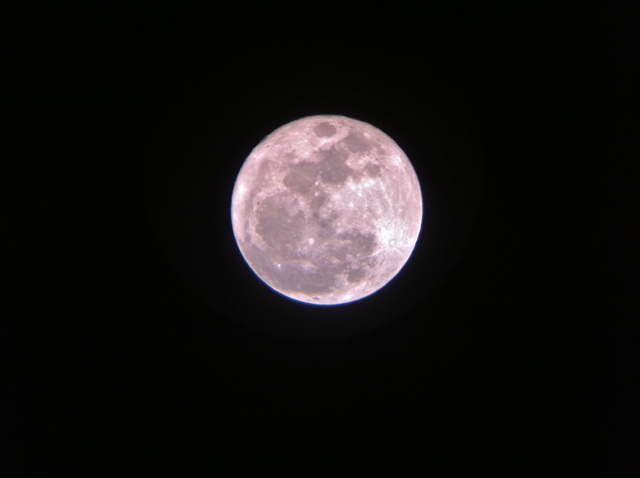
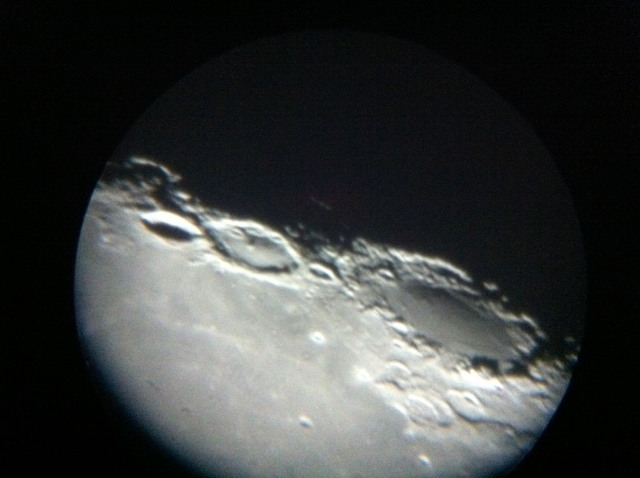
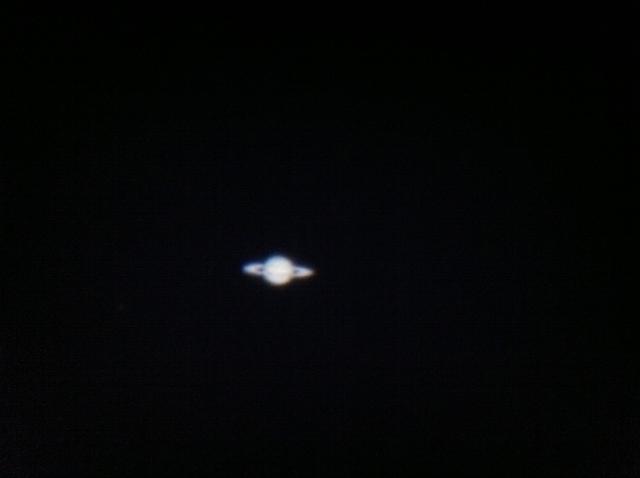
The first image was taken with a spotting scope, and the second and third with a Meade 8" LX200-ACF telescope (with a 9mm eyepiece + 2X Barlow Lens). The camera used was the one on the Apple iPhone cell phone. Talk about point-n-shoot astrophotography!
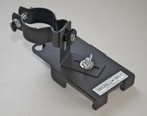 While I have handheld the iPhone over the eyepiece to photograph the moon and planets, the above examples were taken with the iPhone attached to the eyepiece using the Magnilux MX-1 Afocal Adapter, seen in the photo on the right. Afocal adapters are also available that attach to a camera's tripod mounting hole. So almost any camera you have can be used for afocal astrophotography.
You can image fainter objects as well if your camera has a "bulb" setting. Use a high ISO setting and a remote release, self-timer, or the Hat Trick" Technique. For the moon and brighter planets, you can use a range of eyepieces that provide low, medium, and high magnifications. For faint objects, the best photographs will be obtained using low power, wide-field eyepieces. As with other types of astrophotography at the telescope, using your telescope's drive will help keep the object centered in the eyepiece during the set up and imaging. However, as with prime focus astrophotography, and even more so with afocal due to the higher magnifications used, accurate tracking is required when taking exposures longer than about 1 second. But for photographs of the moon, sun, and brigher planets, this is not normally a concern as the exposure times will be very short.
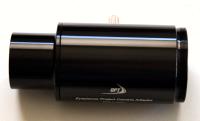 As mentioned in the previous section, Eyepiece Projection Astrophotography is very similar to Afocal Astrophotography. However, it is more difficult and it requires a camera with a removable lens. You can image the same objects as when doing afocal astrophotography. It uses a different adapter than the afocal adapter, as seen in the photo on the right (which is another part of the OPT Camera Adapter). The eyepiece is inserted into the large tube of the adapter, and then the adapter is inserted into the eyepiece holder on the telescope. The camera is attached to the adapter using a T-Ring. The image from the eyepiece is "projected" onto the camera film or sensor. Objects tend to be fainter when imaged with this technique, due to the projection. This makes finding, centering, and focusing the object very difficult except for very bright objects like the moon and brighter planets. And long exposures will be required for faint objects, so use the "bulb" setting and a high ISO setting, and the remote release, self-timer, or Hat Trick" Technique.
I have done only a small number of eyepiece projection astrophotographs, typically because the results I get with other techniques provide equal or better results with less difficulty. But sometimes the results make the effort worthwhile, as seen in this photograph of Mars taken in 2005 with an 8" telescope, 15mm eyepiece + a telenegative, and a Nikon D70 DSLR:

Dr. Clay Sherrod of Arkansas Sky Observatory has written a short article on piggyback astrophotography with small telescopes. It is available on my ETX Site.
One thing I didn't mention in the sections above that discuss through the telescope astrophotography is how you focus the image. If the camera doesn't show you a "live" image of what it "sees", like you get with a SLR or DSLR, then you can't focus the object while looking through the camera viewfinder. And whether or not it provides a live view in the viewfinder (or on a LCD screen), some objects will be too faint to be seen. If using a SLR/DSLR and the moon is visible at the time you are photographing other objects, mount the camera on the telescope and focus using the moon. If there is no moon, you will have to focus on another object, perhaps a bright star, and then slew the telescope to the object to be photographed. But even using a bright star may not give you a precise focus. And if you are not using a SLR/DSLR, then you will have do the focusing by trial and error, looking at each photograph after you make a focus adjustment and take the photograph. There are focusing aids available and they work especially well with SLR/DSLR cameras. The most popular (and easiest to use) is a Hartmann Mask or Bahtinov Mask. You can find several articles on making and using a Hartmann Mask on the Helpful Information: Astrophotography page on my ETX Site. I have been using a Bahtinov Mask for a few years and have found it very effective and simple to achieve precise focus with my DSLR cameras. An even more precise (and more expensive) focusing aid is the Stiletto Focuser. If you get really serious about doing astrophotography, you should definitely consider one.
Some cameras will be too heavy for some telescopes and cause a severe out-of-balance condition. If this happens with your equipment, you can mitigate it by adding a counterweight to the telescope tube. There are many articles on making and using a counterweight on the Helpful Information: Astrophotography page on my ETX Site.
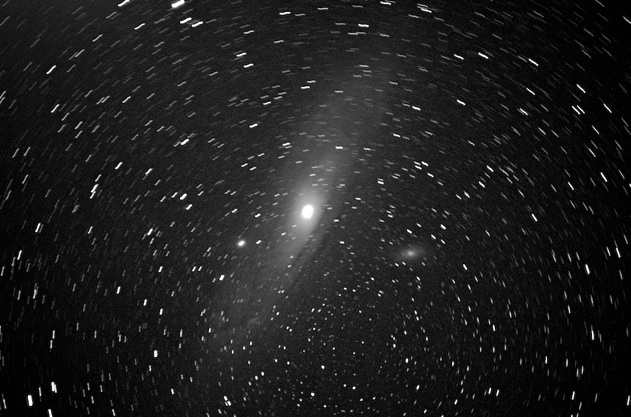
I previously mentioned mounting the telescope in equatorial (or polar) mode for doing long duration astrophotography. Today's GOTO telescopes are usually mounted in Altitude/Azimuth (or Alt/Az). Why does the mounting matter? For short exposure times, it doesn't. But for long exposures with a telescope in Alt/Az, there will be what is called "field rotation" as the telescope moves in both the horizontal and vertical directions to track the sky movement. This results in star trailing around the FOV, as evident in this 10 minute piggyback astrophotograph of M31 with a 300mm lens:
You can avoid field rotation by mounting the telescope in equatorial mode (when possible) or by using an expensive "field derotator" (available for more expensive telescopes).
For a lot more information on astrophotography with any telescope and camera, see the Helpful Information: Astrophotography page on my ETX Site. For some reviews of astrophotography accessories and camera adapters, see the Accessory Reviews: Astrophotography page. Also, check out the photo galleries on my ETX Site and Cassiopeia Observatory web site to see many astrophotography examples.
Most astrophotographs will benefit from some (or a lot of) editing on the computer. Image editing is beyond the scope of this article but I'll discuss a couple of basic techniques that can be easily applied to dramatically improve your astrophotographs. The first technique is to adjust the "levels" in your photograph editing software. Move the end pointers in toward the center of the graph to brighten and/or darken the photograph. This edit alone will normally improve your images quite a lot, even the underexposed images. The second technique is to apply "sharpen edges" (or the "unsharp mask" function). A small amount of sharpening will go a long ways to improving the image, especially images of the moon. Experiment with these two techniques until you achieve the improvements you like. Almost any image or photograph editing software on a Mac or Windows can be used. Personally, I use Apple Aperture 3 as my primary editing software, with some images being edited in LemkeSoft GraphicConverter.
Some astrophotographers don't do long single exposures (as I do) when imaging faint objects or even planets. Their equipment may not allow for long exposures so they take many (many, many, many) short exposures over a period of minutes, hours, or even days. Some even take videos and use the individual frames from the video as the short exposures. The individual images are then "stacked" (or combined) to make a single image that has considerably more detail, colors, and sharpness, than appear in any of the individual frames by themselves. There is specialized software that greatly assists in the stacking of images or video frames. Astrostack and Registax are the most popular (Windows only). Keith's Image Stacker is available for Mac OS X users. Stacking is beyond the scope of this article but the web sites for the software have a lot information.
For more on astronomical image editing, see the Helpful Information: Astrophotography page on my ETX Site.
This article has attempted to get you started doing astrophotography with your camera and optionally, your telescope. Some types of astrophotography are easy and everyone should try those. Other types can be challenging and may require some additional equipment, but when you see the results of meeting the challenge, you will be hooked. So, don't put that camera away just because the sun has set. Get out and photograph the night sky and the objects you see with your telescope. And have fun!
Go to the Helpful Information: Astrophotography Page.
Go to my ETX Home Page.
Go to my Cassiopeia Observatory web site.