MISCELLANEOUS ACCESSORIES
Last updated: 26 December 2023
Shutan Camera & Video has terminated operations as a dealer. Shutan accessories mentioned on this page may or may not be available from other sources.
| Accessory | Manufacturer | Model | Price |
| The Stars at a Click: 50 Lessons with ETX | Maxfactory | N/A | $40 |
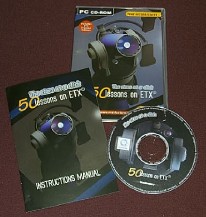 Jack Fox (jackfox@mindspring.com) reports: "A very professionally produced CD-ROM on the workings of the Meade ETX
model telescopes. The presentation is visually stunning, dynamic and
pleasing to the senses. The menu is organized so that you can begin operating the scope directly from the box after reviewing the CD. The instructions/lessons are both verbal and visual with either a QuickTime video or CGI graphics. The videos have stop, pause and start over functions. It covers how to use the Autostar and set the telescope in Alt/Az or Polar modes. It even has quizzes on the lessons to test your knowledge. It you have difficulty in understanding the Meade instruction manual, this will help clarify it.
The CD is broken down into chapters, some have quizzes to test your knowledge and many have hands on simulations that allow you to operate the ETX telescope such as doing a two star alignments in Polar or Alt/AZ modes. You become familiar with the scopes operations before you even take it out of the box for the first time. It shows you the inner optics and how they work and takes you inside the base and shows you the motors and gears. They warn you not to open the scope your self for fear of damage. There is a section on the 26mm eyepiece and what you can expect to see with it. A good explanation on the Autostar menu and how to navigate is included with how to use the EC Hand Controller as well.
It has a brief section on the new PE edition scopes and using it as a terrestrial scope. This CD is a great help to the beginner and a good refresher for the more experienced. It certainly beats the Meade Instruction Manual hands down. It is not a perfect instructional manual and does not cover every thing, but it is the best that I have come across. The designer of the CD, Massimo Uberti, has been very helpful with any questions I have had via email: muberti@maxfactory.com. To purchase this product go to the following website:
http://www.miotti.it/index.php/item/department/23/item/5602/sku/13933.html
The cost is 30 Euros (about $40.00). The company is in Italy and I received it in less than 2 weeks. System requirements: Win98, Pentium ll 64MB, Win2K, Pentium lll 128MB, WinXP, Pentium lll 128MB, 16x CD-ROM, mouse, Quicktime 6.x (included)"
Jack Fox (jackfox@mindspring.com) reports: "A very professionally produced CD-ROM on the workings of the Meade ETX
model telescopes. The presentation is visually stunning, dynamic and
pleasing to the senses. The menu is organized so that you can begin operating the scope directly from the box after reviewing the CD. The instructions/lessons are both verbal and visual with either a QuickTime video or CGI graphics. The videos have stop, pause and start over functions. It covers how to use the Autostar and set the telescope in Alt/Az or Polar modes. It even has quizzes on the lessons to test your knowledge. It you have difficulty in understanding the Meade instruction manual, this will help clarify it.
The CD is broken down into chapters, some have quizzes to test your knowledge and many have hands on simulations that allow you to operate the ETX telescope such as doing a two star alignments in Polar or Alt/AZ modes. You become familiar with the scopes operations before you even take it out of the box for the first time. It shows you the inner optics and how they work and takes you inside the base and shows you the motors and gears. They warn you not to open the scope your self for fear of damage. There is a section on the 26mm eyepiece and what you can expect to see with it. A good explanation on the Autostar menu and how to navigate is included with how to use the EC Hand Controller as well.
It has a brief section on the new PE edition scopes and using it as a terrestrial scope. This CD is a great help to the beginner and a good refresher for the more experienced. It certainly beats the Meade Instruction Manual hands down. It is not a perfect instructional manual and does not cover every thing, but it is the best that I have come across. The designer of the CD, Massimo Uberti, has been very helpful with any questions I have had via email: muberti@maxfactory.com. To purchase this product go to the following website:
http://www.miotti.it/index.php/item/department/23/item/5602/sku/13933.html
The cost is 30 Euros (about $40.00). The company is in Italy and I received it in less than 2 weeks. System requirements: Win98, Pentium ll 64MB, Win2K, Pentium lll 128MB, WinXP, Pentium lll 128MB, 16x CD-ROM, mouse, Quicktime 6.x (included)"
[05/19/06]
[11/13/07] | |||
| Xpower powerpack 150 | Xantera | N/A | $80 |
| Jack Dugan reports: "I checked ScopeTronix's Vector and Orion and Celestron offering but the best deal I found bar non is the Xantera Xpower powerpack 150. It can be bought on line or instore at Best Buy and at $79.99 it is a great buy with 12 amps and has a DC to AC inverter built in and a built in AC socket so you can run your lap top, use your DSI and use the 12 VDC cigarette socket to power the ETX-125. You get 5 more amps a built in light and an AC inverter plus it has a nifty handle and comes with an AC adapter for indoor charging and a DC adapter to charge from your car. And if it is cloudy you could plug in a 13 inch TV and watch TV or a coffee pot to warm yourself on a cold night. it also has car jumper cables too. Not bad for $20 bucks more then the Orion and Celestron packages." | |||
| Power Tank | Celestron | 12VDC 7AH | $60 |
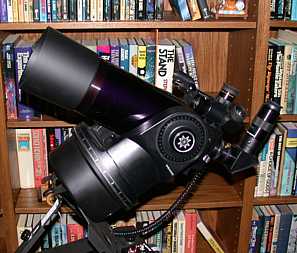
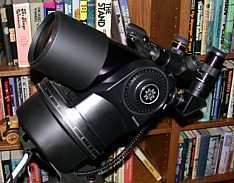
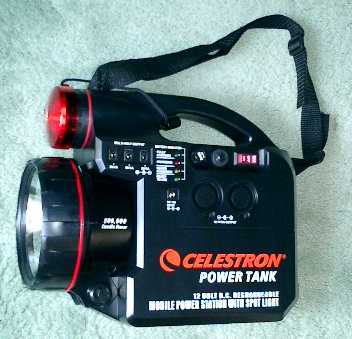 After debating for months and not finding anything better at a lower price locally, I finally decided to get a Celestron Power Tank from OPT. I wanted an external DC power source that would run the ETX-125 and LXD55-8"SC at the same time and this seems to fit the bill at a reasonable price. I connected both telescopes using the appropriate Meade DC power cords to the two power ports (above the word "Celestron" in the photo). I then used both telescopes for a period of six hours with no drop in performance. They tracked and slewed at high speed just fine. There are also ports for 3, 6, and 9V (all 1 Ampere rated), a red light (actually a white light with a removable red cover), and BRIGHT (800,000 candle power) spotlight. There is a carrying handle as well as the strap seen in the photo. The Power Tank 7AH model is lightweight and easily moved. It can be placed beneath a tripod assembly without problem. It includes both an AC Adapter for charging as well as a cigarette lighter charger. It will charge in just a few hours from AC but I have yet to run it down to need a full charge. It has fuses to protect itself as well as the equipment connected. All-in-all, a nice addition to my accessories.
[01/16/06] | |||
| Various | Scopetronix | N/A | $1-$30 |
|
Marcin Bruczkowski (marcin@bruczkowski.com) provides this extensive review on several Scopetronix accessories: "Here comes a Tale of Three Accessories (or so it was supposed to be, except that it evolved into Four accessories), joined by their common parentage (ScopeTronix) and common task - that of finally putting my ETX-125 flip mirror to some use...
1. ScopeTronix Visual Back ($29.95) As an ETX novice I always found it mildly irritating that I couldn't find any practical use for the flip mirror, which on most telescopes is an expensive add-on, while on any ETX we get it for free and nicely integrated into the scope design as well. First I tried to use the flip mirror with Meade 45-degree erecting prism so that I could have two eyepieces available at all times. However, I quickly discovered that there's no way to make such combination parfocal a flip of the ETX mirror required troublesome re-focusing. Then I got a digital camera and there was no way I could focus the faint objects that wouldn't even show on its LCD screen. To solve the problem I needed to focus visually through an eyepiece in one port, knowing that once focused, I could flip the mirror and the camera installed in the other port would also be in perfect focus.  ScopeTronix Visual Back to the rescue. It is an accessory that works in the same way as Shutan Visual Back reviewed here: (http://www.weasner.com/etx/shutan.html#scv_visual). However, Shutan's product costs more ($34), and, although in the photos on Mike's site it appears black, on Shutan web pages it is metallic red, which would appear grossly out of place on my ETX (don't tell anyone, but I do care how my telescope looks!) On the design side, Shutan's unit has a plastic set screw, which does not seem safe when asked to hold a heavy eyepiece or an even heavier digital camera, while ScopeTronix employs the safe, orthodox metal screw. There's only one advantage to Shutan's design: it accepts the original ETX rear port cover. ScopeTronix doesn't, but that's a minor inconvenience, because I will never leave any back port accessory permanently in place ETX won't be able to point to the Zenith, nor polar align, nor fit into its hard case with anything sticking out of its rear port that applies to Meade 45 degree prism as well.
The ScopeTronix Visual Back works exactly as advertised. It is very nicely made and it threads securely and easily onto ETX rear port. (Which is not something I can say about Meade 45-degree prism with its tendency to twist and turn, however hard I tighten its securing collar.) Once I had it in place, I quickly found several combinations of eyepieces that were parfocal, or nearly parfocal when used simultaneously in the top ETX eyepiece port and in the Visual Back, e.g. Meade SWA13.8 on top and ScopeTronix 40mm Plossl in the back. I tested it with my digital camera and finally got the result I wanted: I can focus through an eyepiece in the Visual Back and the camera on top of ETX will get a sharp picture. Success!
If you have neither the ETX 45-degree prism nor the Visual Back and you are wondering which one to get, I'd advise you to buy both, if the budget allows. The path through the prism is so much longer than straight up to the top ETX eyepiece port that flipping the mirror between two eyepieces or an eyepiece and a camera will practically always require re-focusing. However, viewing objects on high altitudes may be possible via an eyepiece in the prism, but not in the Visual Back. In my case I'm mostly interested in things that travel along the Ecliptic, and with my ETX polar mounted at 52 degrees North latitude I can see all of them through the Visual Back, although at times it requires me to perform some highly unusual bodily contortions, but that's where my training in Tai Chi helps to no end :-)
Any downsides to this product? None that I can see.
ScopeTronix Visual Back to the rescue. It is an accessory that works in the same way as Shutan Visual Back reviewed here: (http://www.weasner.com/etx/shutan.html#scv_visual). However, Shutan's product costs more ($34), and, although in the photos on Mike's site it appears black, on Shutan web pages it is metallic red, which would appear grossly out of place on my ETX (don't tell anyone, but I do care how my telescope looks!) On the design side, Shutan's unit has a plastic set screw, which does not seem safe when asked to hold a heavy eyepiece or an even heavier digital camera, while ScopeTronix employs the safe, orthodox metal screw. There's only one advantage to Shutan's design: it accepts the original ETX rear port cover. ScopeTronix doesn't, but that's a minor inconvenience, because I will never leave any back port accessory permanently in place ETX won't be able to point to the Zenith, nor polar align, nor fit into its hard case with anything sticking out of its rear port that applies to Meade 45 degree prism as well.
The ScopeTronix Visual Back works exactly as advertised. It is very nicely made and it threads securely and easily onto ETX rear port. (Which is not something I can say about Meade 45-degree prism with its tendency to twist and turn, however hard I tighten its securing collar.) Once I had it in place, I quickly found several combinations of eyepieces that were parfocal, or nearly parfocal when used simultaneously in the top ETX eyepiece port and in the Visual Back, e.g. Meade SWA13.8 on top and ScopeTronix 40mm Plossl in the back. I tested it with my digital camera and finally got the result I wanted: I can focus through an eyepiece in the Visual Back and the camera on top of ETX will get a sharp picture. Success!
If you have neither the ETX 45-degree prism nor the Visual Back and you are wondering which one to get, I'd advise you to buy both, if the budget allows. The path through the prism is so much longer than straight up to the top ETX eyepiece port that flipping the mirror between two eyepieces or an eyepiece and a camera will practically always require re-focusing. However, viewing objects on high altitudes may be possible via an eyepiece in the prism, but not in the Visual Back. In my case I'm mostly interested in things that travel along the Ecliptic, and with my ETX polar mounted at 52 degrees North latitude I can see all of them through the Visual Back, although at times it requires me to perform some highly unusual bodily contortions, but that's where my training in Tai Chi helps to no end :-)
Any downsides to this product? None that I can see.
2. ScopeTronix Eyepiece Port Plug ($1.25) Here's how my Tale of Three Accessories accidentally got a fourth hero. You see, after I have written the Visual Back review, I remembered yet another ScopeTronix accessory that would neatly address the issue of leaving the rear port open: the "Eyepiece Port Plug". This simple, plastic plug is of the exact size to close the eyepiece holder on top of ETX or the Visual Back (see it next to the Visual Back in the photo, also the review of the VisualBack has a picture of the plug in place).  You may look around till you find a medicine bottle cap of the same size, or invest $1.25 and get the Eyepiece Port Plug; the choice is yours.
Now I must humbly admit that I hate spending money if I don't have to, so I originally opted for the medical cabinet solution, but for the life of me I couldn't find a medicine cap that would fit all bottles seem to have fancy "childproof" cap systems these days. Besides, I don't mind DIY solutions on my ETX as long as they don't look make-shift and spoil the sleek, professional look of my beloved Blue Wonder. A medicine bottle cap might look out of place; the ScopeTronix plug looks like it's made exactly for the purpose.
Another benefit is that putting it in takes 0.5 seconds, easier and faster than attaching the original ETX rear port cover to Shutan visual back. So there goes the only advantage I initially saw in Bob Shutan's design.
Finally, a little suggestion for ScopeTronix: the plug requires giving the set screw (the thing that holds your eyepiece in place) a twist, while if it had ribbed sides like the caps of the old-style medicine bottles, it would never require touching that screw. Not that I mind, I LIKE twisting bits and pieces on my ETX... :-)
You may look around till you find a medicine bottle cap of the same size, or invest $1.25 and get the Eyepiece Port Plug; the choice is yours.
Now I must humbly admit that I hate spending money if I don't have to, so I originally opted for the medical cabinet solution, but for the life of me I couldn't find a medicine cap that would fit all bottles seem to have fancy "childproof" cap systems these days. Besides, I don't mind DIY solutions on my ETX as long as they don't look make-shift and spoil the sleek, professional look of my beloved Blue Wonder. A medicine bottle cap might look out of place; the ScopeTronix plug looks like it's made exactly for the purpose.
Another benefit is that putting it in takes 0.5 seconds, easier and faster than attaching the original ETX rear port cover to Shutan visual back. So there goes the only advantage I initially saw in Bob Shutan's design.
Finally, a little suggestion for ScopeTronix: the plug requires giving the set screw (the thing that holds your eyepiece in place) a twist, while if it had ribbed sides like the caps of the old-style medicine bottles, it would never require touching that screw. Not that I mind, I LIKE twisting bits and pieces on my ETX... :-)
3. ScopeTronix Eyepiece Extension ($12.95) If you want to get the Visual Back from ScopeTronix, spend another $12.95 and treat yourself to their Eyepiece Extension. Sooner or later you will want to use some combination of eyepieces in the two ports that can't be simultaneously in focus. The Eyepiece Extension will solve  this problem in most cases. It is a 1" long, black, metal tube that screws onto the end of your eyepiece, using the filter thread (assuming your eyepiece is threaded for filters). After tightening it becomes one with the eyepiece, as seen in the attached photo. You now have an eyepiece that can be securely attached to the scope in a position where the focus is reached and where a bare eyepiece would have to hang by the last millimeters of its barrel, or worse, levitate a few millimeters above the eyepiece holder...
The Eyepiece Extension fit perfectly onto my Meade SWA eyepieces and the ScopeTronix 40mm eyepiece, but I couldn't screw it onto the standard 26mm Plossl that comes with the ETX. A closer examination revealed a very poorly finished filter thread on the Meade eyepiece, it is over-chromed, with bits of shiny metal left over in the threads. My SWAs (made in Japan) did not have this problem, only the SP (made in Taiwan). I carefully "re-threaded" the eyepiece with a needle, applied a tiniest bit of Teflon lubricant and voila the Eyepiece Extension screwed on, with just a touch of resistance. Only after I removed it again I saw that it actually re-threaded my SP26, removing quite a bit of excess chrome from its internal thread! Fortunately the Eyepiece Extension appears to be made from a harder metal than the chrome on the SP26 barrel and did not suffer any damage in this operation, while my SP26 finally has a clean thread.
Here comes a place where I should find some faults with this product, but for the life of me I can't. OK, here's one: ScopeTronix should consider expanding their collection of eyepiece extensions to include several lengths, e.g. 0.5", 1". Kind of hard to predict which one you'd need with your scope and eyepieces combination, so it would make sense offering both as a set. You would then have a choice of 3 lengths: 0.5", 1" and 1.5" (the last one with the extensions stacked). More than 1.5" would not be useful, at least on an ETX, but I may be wrong here.
Finally, something I haven't tried yet, but may be worth looking into (pun not intended) is the following combination: Meade 45 degree prism in the back and an eyepiece with the Extension in the top port. I think I could make this combination parfocal as well, at least with some eyepieces.
this problem in most cases. It is a 1" long, black, metal tube that screws onto the end of your eyepiece, using the filter thread (assuming your eyepiece is threaded for filters). After tightening it becomes one with the eyepiece, as seen in the attached photo. You now have an eyepiece that can be securely attached to the scope in a position where the focus is reached and where a bare eyepiece would have to hang by the last millimeters of its barrel, or worse, levitate a few millimeters above the eyepiece holder...
The Eyepiece Extension fit perfectly onto my Meade SWA eyepieces and the ScopeTronix 40mm eyepiece, but I couldn't screw it onto the standard 26mm Plossl that comes with the ETX. A closer examination revealed a very poorly finished filter thread on the Meade eyepiece, it is over-chromed, with bits of shiny metal left over in the threads. My SWAs (made in Japan) did not have this problem, only the SP (made in Taiwan). I carefully "re-threaded" the eyepiece with a needle, applied a tiniest bit of Teflon lubricant and voila the Eyepiece Extension screwed on, with just a touch of resistance. Only after I removed it again I saw that it actually re-threaded my SP26, removing quite a bit of excess chrome from its internal thread! Fortunately the Eyepiece Extension appears to be made from a harder metal than the chrome on the SP26 barrel and did not suffer any damage in this operation, while my SP26 finally has a clean thread.
Here comes a place where I should find some faults with this product, but for the life of me I can't. OK, here's one: ScopeTronix should consider expanding their collection of eyepiece extensions to include several lengths, e.g. 0.5", 1". Kind of hard to predict which one you'd need with your scope and eyepieces combination, so it would make sense offering both as a set. You would then have a choice of 3 lengths: 0.5", 1" and 1.5" (the last one with the extensions stacked). More than 1.5" would not be useful, at least on an ETX, but I may be wrong here.
Finally, something I haven't tried yet, but may be worth looking into (pun not intended) is the following combination: Meade 45 degree prism in the back and an eyepiece with the Extension in the top port. I think I could make this combination parfocal as well, at least with some eyepieces.
4. ScopeTronix Parfocalizing Ring ($7.95) Unlike the Visual Back and the Eyepiece Extension described above, this is an accessory whose functionality can be approximated with simple DIY 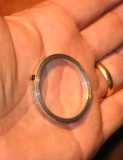 solutions, e.g. in form of a piece of colored tape. Pull up your eyepiece until it reaches focus, then tighten the set screw in the eyepiece holder and mark the position with colored tape on the eyepiece barrel. Or so I thought, until I tried it a couple of times when it was dark and cold... and until I had to change that tape because a different combination of eyepieces required different position. The Parfocalizing Ring marks the position when your eyepiece is parfocal with another one (e.g. in the Visual Back or the Erecting Prism) and once you tighten it at the right place, you just drop the eyepiece into its holder; it will come to rest at the exact focus point. If you ever need to move it, it takes 5 seconds with the supplied Allen key. It's just so fast and convenient that you'll never want to fumble with the tape again.
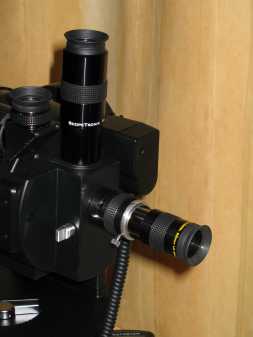 Here's a picture of all of the accessories giving me the long-awaited parfocal combination. Note how far the Meade eyepiece has to be pulled out: you can see the entire shiny part of the barrel. Without the Eyepiece Extension, it would simply fall out.
The ring is nicely made, like all ScopeTronix accessories, although if I had to find a fault with it, I'd like it to be of a slightly smaller diameter or equipped with 2 or 3 set screws instead of 1. Maybe some eyepieces have somewhat larger barrels than Meade, so a narrower ring wouldn't fit them. Nevertheless the ring works fine with all my eyepieces and certainly does its job.
Ah, yes, one more thing: an eyepiece with a parfocalizing ring attached will usually no longer fit in its original bottle. If I were to order that ring today, I'd also get one of ScopeTronix larger diameter "Bolt-style" eyepiece bottles.
Summing up, the four accessories described above deliver tremendous flexibility when juggling several eyepieces, especially in a scenario when there's some kind of camera or CCD on one of the ETX ports. They are thoughtfully designed, very nicely machined and, in my opinion, worth their price tag. Best of all, the four of them together cost less than Meade 45 degree erecting prism! ScopeTronix has an extensive international dealer network, but I like ordering from their web site: www.scopetronics.com. It was my second purchase from ScopeTronix and, as before, the service was perfect and the delivery (this time to Florida) within 4 days from placing the order. Highly recommended."
Here's a picture of all of the accessories giving me the long-awaited parfocal combination. Note how far the Meade eyepiece has to be pulled out: you can see the entire shiny part of the barrel. Without the Eyepiece Extension, it would simply fall out.
The ring is nicely made, like all ScopeTronix accessories, although if I had to find a fault with it, I'd like it to be of a slightly smaller diameter or equipped with 2 or 3 set screws instead of 1. Maybe some eyepieces have somewhat larger barrels than Meade, so a narrower ring wouldn't fit them. Nevertheless the ring works fine with all my eyepieces and certainly does its job.
Ah, yes, one more thing: an eyepiece with a parfocalizing ring attached will usually no longer fit in its original bottle. If I were to order that ring today, I'd also get one of ScopeTronix larger diameter "Bolt-style" eyepiece bottles.
Summing up, the four accessories described above deliver tremendous flexibility when juggling several eyepieces, especially in a scenario when there's some kind of camera or CCD on one of the ETX ports. They are thoughtfully designed, very nicely machined and, in my opinion, worth their price tag. Best of all, the four of them together cost less than Meade 45 degree erecting prism! ScopeTronix has an extensive international dealer network, but I like ordering from their web site: www.scopetronics.com. It was my second purchase from ScopeTronix and, as before, the service was perfect and the delivery (this time to Florida) within 4 days from placing the order. Highly recommended."
| |||
| Another Observing Table | Ozark Trail | N/A | $17 |
 Marcus A Parenti (maparent@duke-energy.com) reports on the "Ozark Trail Outdoor Equipment Aluminum Folding Camping Table". This
table is from Walmart in the camping section and costs around $17. It is
19.7" square and takes about 2 seconds to set up. Makes it real easy to
want to use.
Marcus A Parenti (maparent@duke-energy.com) reports on the "Ozark Trail Outdoor Equipment Aluminum Folding Camping Table". This
table is from Walmart in the camping section and costs around $17. It is
19.7" square and takes about 2 seconds to set up. Makes it real easy to
want to use.
| |||
| Astro-Glow Eyepiece Labels | Astronomy-Shoppe | N/A | $20 |
Astronomy-Shoppe sent me a set of the Astro-Glow (http://www.astronomy-shoppe.com/prod02.htm) eyepiece and filter labels. The labels and a small sheet of instructions come nicely packaged in an eyepiece bottle as seen in these two photos: 
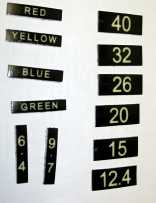
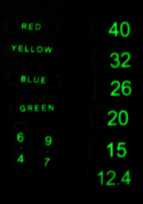 Once you open the bottle and separate the labels you get to see how they look unmounted (see photo on the left). This "Meade" set included the labels for the $99 Eyepiece Deal plus four filter case labels. You notice that the 9.7mm and 6.4mm labels are vertical. This allows for mounting on those shorter eyepieces.
You "charge" the labels by exposing to light (even a bright flashlight) for a few minutes and the charge will last for hours (up to 10 hours according to Astronomy-Shoppe). The photo on the right shows the look after charging.
Once you open the bottle and separate the labels you get to see how they look unmounted (see photo on the left). This "Meade" set included the labels for the $99 Eyepiece Deal plus four filter case labels. You notice that the 9.7mm and 6.4mm labels are vertical. This allows for mounting on those shorter eyepieces.
You "charge" the labels by exposing to light (even a bright flashlight) for a few minutes and the charge will last for hours (up to 10 hours according to Astronomy-Shoppe). The photo on the right shows the look after charging.
I decided to attach the labels to the eyepiece bottles instead of the eyepieces themselves. The labels are designed to work best on the metal of the eyepiece tube but I keep my eyepieces in bottles when not in use and carry my case outside with the telescope so for my purposes this mounting on the bottles works better. Here you can see the case with the labels attached, both in the light and the dark. 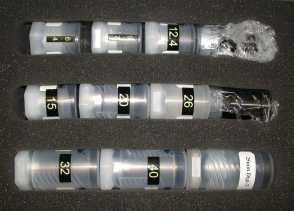 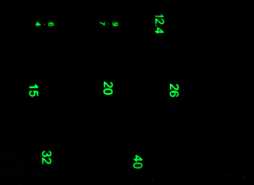
My first reaction to the product was what I thought was the lack of a separator between the labels. Some of the glue had adhered to the visible side of the labels, creating a sticky surface. Then I discovered that there were separators but that the glue did run. It has been very hot here lately and sitting inside the mailbox in the sun for several hours probably didn't help. I tried to rub it off after mounting the labels but we'll see how effective I was over time. I have mentioned both of these concerns to Astronomy-Shoppe. Mounting the labels was easy. Just peel the backing off and press the label onto the surface of the eyepiece or bottle. I didn't use the filter case labels. The labels are large and bright green when seen in the dark. This will make it easy to find the right eyepiece without affecting your night vision. So, how long does the "charge" last? I checked them after 10 hours of being in the closed Meade eyepiece case and they were still faintly glowing! Not enough so that they were readable but still glowing. This is a nice inexpensive product to have if you keep grabbing the wrong size eyepiece in the dark or just want to speed up the process of finding the right eyepiece. Only time will tell how well the glue holds up but for now I'm glad I'm trying the Astro-Glow Delineators. [06/27/04] Allen Sellick (sellick@uci.net) adds: "ASTRO-GLOW form Astronomy Shoppe, I called Tony with Astronomy Shoppe and he was very helpful and knowledgeable and has a lot of astronomy related stuff. I received a custom set of ASTRO-GLOW for my eyepieces and filters and he trough in a set of TRI-LINEATOR for my tripod for free. All and all a great product for a good price and a pleasure to do business with." | |||
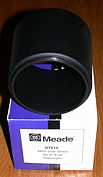
| Dew Shield | Astrozap | N/A | $40-50 |
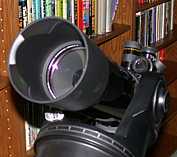
Astrozap sent me their slide-on aluminum dew shield for the ETX-90. Unlike other dew shields for the ETX series that either slip or screw-on to the OTA, the 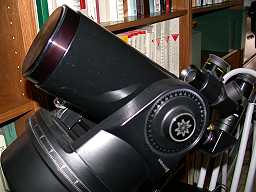 Astrozap dew shield can be retracted all the way back on the tube to allow the lens cover to be replaced when the telescope is not in use (see the photo on the right). Then when you go outside you slide the Astrozap dew shield forward for use in preventing the formation of dew on the corrector lens (see photo on the left). This is similar to the
 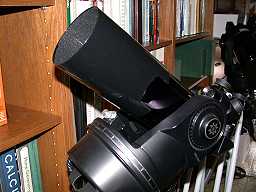 Clear Night Products TeleWrap (reviewed further down this page) except that inside of being a photograph on stiff paper, the Astrozap dew shield is longer-lasting but lightweight aluminum (high gloss black) with black felt lining. The fit is nice as is the functionality. It looks like it belongs on the ETX-90. There are also Astrozap dewshields for the ETX-105EC ($46) and ETX-125EC ($50). If you live in a dew-prone area as I do then the Astrozap dew shield can make a nice add-on for your ETX-90, -105, or -125.
| |||
| Moon Phase Maps | Astrovisuals | N/A | $10 |
| Thomas Brown () notes: "Just tried out the moon phase maps which were mentioned in the Sky and Telescope Hot Products for this year. They are available from astrovisuals.com.au and cost about $10 US. These maps are great because they give a day by day photographic view of the moon with the prominant features on the terminator marked. Although the maps are "upside down" for those of us in the Northern Hemisphere and they are backwards for those of us with mirror diagonal telescopes like the ETX, they are surprisingly easy to use. I've tried various moon maps and the famous Hatfield Photographic Lunar atlas, but find these phase maps the best so far." | |||
| Rechargeable Batteries | N/A | N/A | N/A |
|
Michael Morris (michaelmorris4@hotmail.com) reports: "Thanks yet again for the superb website. Please would you consider posting
the review below in an appropiate section of your website. I have no links
with the suppliers or manufacturers of the equipment reviewed except as a
customer.
Review Using NiMH rechargeable batteries with the ETX + Autostar. About 18 months ago I decided that my 4.5 inch reflector with a base that weighed more than many of the astronomical objects I was observing with it would have to go. My back and the house dcor could take the punishment no longer. After much research I plumped for a Meade ETX 90EC; it may be smaller but it gets used so much more often! I did however have one gripe. 8 batteries! And a fresh set of batteries would only run the Autostar reliably for 2 to 3 evenings! Do Meade have shares in Duracell? To save having to re-mortgage the house I had to find a solution. After reading several articles on your excellent web site it looked as though rechargeables might not work properly with the Autostar. However, after my socks were repossessed and the bailiffs took the goldfish I decided it was time to give them a try. I bought an Ansmann PhotoCam Power recharger and eight 1800mAh NiMH AA batteries from Digibattery, of Romford, Essex via their website at www.digibattery.co.uk. The service from the company was helpful, prompt and friendly and the whole set up cost only 31.45 delivered. I would recommend them. After charging up the batteries I first tried them on the hand controller for two evenings with no problems. I have since used the same batteries on the same initial charge for another 4 nights on the Autostar with absolutely no problems. Use has between 1 and 2 hours a night with the scoping slewing to the desired targets with no problems every time. Tracking has also been right on the money. Whilst the nights have not been particularly cold, no night in England in November or December could ever be described as warm! If I get substantially poorer performance in really cold weather (very close to or below freezing) Ill post an update to this review. In conclusion, the doom mongers seem to have got it wrong when it comes to using an ETX 90EC + Autostar with rechargeable batteries. In fact, my Autostar appears to work more reliably and for longer with rechargeables! Its a shame that Digibattery dont sell a relatively cheap recharger for charging 8 AA batteries at a time. Now to save even more money, where did I read that article about using grass clippings and sticky back plastic to make an observatory ?" | |||
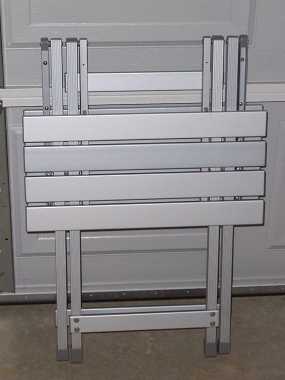
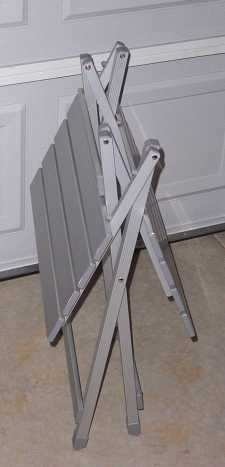
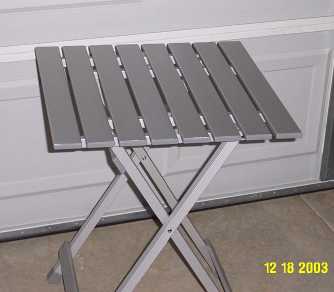
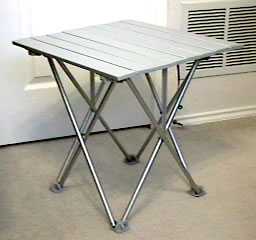
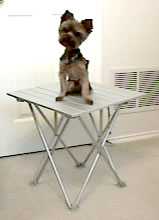
| Yet Another Observing Table | Target | N/A | $9 |
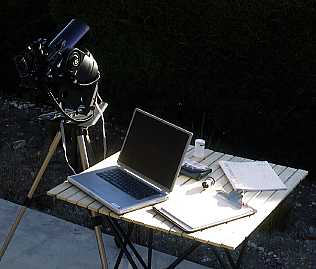
 Philip Jones (pjones@visiluna.com) reports: "While doing some image
 capture directly to my computer the other night, I realized I needed
something to put my computer gear on to keep it off the ground.
Yesterday, I was at Target and they had a little collapsible table with
a folding aluminum top. The frame is of the same type of structure as
the now-ubiquitous collapsible aluminum-tube chairs. The top is made up
of eight aluminum slats. It was marked down for clearance to $9.00, but
actually rang up at $6.40. If anyone has a Target nearby, this is a
great little table for field gear, books, charts, etc. It's small, but
sturdy, and the whole thing folds up into a bag smaller than the #882
tripod's carry bag. Additionally, the table surface is about 19" x 19".
Here are some pics of the table. The one with the "field gear" on it is
my favorite. :-)"
capture directly to my computer the other night, I realized I needed
something to put my computer gear on to keep it off the ground.
Yesterday, I was at Target and they had a little collapsible table with
a folding aluminum top. The frame is of the same type of structure as
the now-ubiquitous collapsible aluminum-tube chairs. The top is made up
of eight aluminum slats. It was marked down for clearance to $9.00, but
actually rang up at $6.40. If anyone has a Target nearby, this is a
great little table for field gear, books, charts, etc. It's small, but
sturdy, and the whole thing folds up into a bag smaller than the #882
tripod's carry bag. Additionally, the table surface is about 19" x 19".
Here are some pics of the table. The one with the "field gear" on it is
my favorite. :-)"
|
|||
| JMI MotoFocus | JMI | N/A | $100 |
|
Lynn Bathe (Mr_Mojave@msn.com) reports: "This is a great site. I visit it often. For those that are considering getting the electric focus for the ETX, I wanted to give my comments on the JMI Motofocus that I recently purchased for my ETX-105EC. I received it last week. The electric motor is really small. I don't know what I expected so I am somewhat surprised and somewhat pleased. At first glance you don't seem to get much for your $100 purchase. I found the instructions clear and the installation quick and easy. The Motofocus controller is simply designed with two push-button keys to focus in and out. I believe there is one other little adjustment on it, but I don't know what it does. The instructions didn't seem to mention it. The Motofocus controller allows the Autostar controller to couple with it so it feels like you have only one controller in your hand. The unit operates on batteries. The controller is connected to the electric motor via a coiled cord. I found that the JMI unit worked extremely well. It totally eliminates the image bounce when focusing. I did not notice image shift when using the JMI, except on high power. The only very slight negative (at least on my unit) is that there seems to be a very slight delay of the focus when changing directions. I believe it is inherent with the design method of coupling the focus wheel with the JMI motor via the rubber band as the motor itself changed directions immediately and very definitely. The delay is extremely short. I really enjoyed the JMI unit when refocusing after changing eyepieces. Would I buy this item again? In a heartbeat. Lynn"
Mike here: I have a review of the MotoFocus for the original ETX (ETX-90RA) here. |
|||
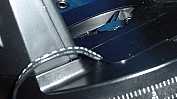
| Flexishield dewcap | Orion | N/A | $27-$75 |
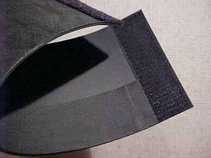 Martyn (martyn@starmail.co.za) reports: "I recently acquired a Orion flexishield dewcap. I think It'll do the job
nicely. I send along two pics of the thing. The sideview shows what it
looks like when wrappped around the tube - the end makes a "nice" hook
Martyn (martyn@starmail.co.za) reports: "I recently acquired a Orion flexishield dewcap. I think It'll do the job
nicely. I send along two pics of the thing. The sideview shows what it
looks like when wrappped around the tube - the end makes a "nice" hook
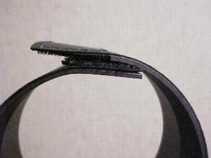 on your telescope, so be carefull. The other pic shows it's full colors.
It locks with velcropads which are stitched to the dewcap and the shield
has a very soft rubber? lining to protect the tube and provide a good
grip for the dewcap.
I bought the flexiShield in The Netherlands and I paid
NLG 103.00. In the US Orion at it's website offers it for USD 26.95
For use on the ETX 90 I intend to stich an extra piece of velcro so
that there are no protruding pieces."
on your telescope, so be carefull. The other pic shows it's full colors.
It locks with velcropads which are stitched to the dewcap and the shield
has a very soft rubber? lining to protect the tube and provide a good
grip for the dewcap.
I bought the flexiShield in The Netherlands and I paid
NLG 103.00. In the US Orion at it's website offers it for USD 26.95
For use on the ETX 90 I intend to stich an extra piece of velcro so
that there are no protruding pieces."
|
|||
| Dew Shield | Apogee | N/A | $25 |
| Jerry Mullen (GBMULLEN@msn.com) reports: "Bought a dew shield for my new ETX90RA. I purchesed it from Apogee Inc. It came in 2 days, well packed in a corrugated cardboard box and also wrapped in bubble wrap. The shield is metal, with an attractive blue star-chart overlay, and lined with thick grey felt. The shield fits perfectly, and can even be stored on the scope when not in use. I have not used it yet , but have read that felt is especially helpful in preventing dew formation. It looks great and the price is inly $24.95 plus $6.00 shipping. Perhaps other ETX owners would like a metal shield that is made to fit the ETX tube." | |||
| Dew Shield | Meade | #670/673/675/678 | $20/25/28/30 |
 Shutan Camera and Video sent me one of the new Meade Dew Shield for the ETX models. There are models for the ETX-60AT and ETX-70AT (#670), ETX-90 (#673), ETX-105EC (#675), and ETX-125EC (#678). The model pictured here is for the ETX-90 models (including the spotter scope). The shield is made of heavy plastic and painted flat black to reduce reflections. The shield screws onto the ETX where the lens cap fits. The views shown below are of the Dew Shield mounted on my ETX-90RA. Unfortunately, the lens cap does not mount to the Dew Shield so you have to remove the shield to replace the lens cap for protection. But when not in use or for packing, the shield can be stored on the ETX as shown here. If dew is a problem where you live and you don't want to make a dew shield but do want one that is more securely attached to your ETX, consider the Meade Dew Shield.
Clay Sherrod (sherrodc@ipa.net) adds: "I am frequently asked, particularly this time of year, what dew preventative methods I recommend for the ETX scope; that massive cold glass meniscus lens is very prone to cooling and hence once the dew point is reached, dew and frost can greatly hamper the viewing quickly on the cold nights of fall and winter. First, I highly recommend an effective corrector warmer such as the Kendrick and Scopetronixs units; they are very effective and if kept between low and medium will NOT interfere with high power observe by way of heat currents. I have found that with such a unit observing even on the wettest of nights can continue unhampered. In addition, a good dew shield is recommended not only for dew, but for these collective reasons: 1) to discourage (it will never eliminate) dew formation; 2) to block breezes from blowing dust and pollen onto the front lens; 3) to minimize chance of actual scratching and damage to the delicate front glass surface. One thing to remember is that a dew cap WILL retain residual heat and if left in a low (near horizontal) position for very long will build up currents of its own capped within the cylinder! I have tried virtually all that are available and recently was offered a chance to try the Meade new versions; these are heavy poly material and screw directly onto the front of the tube where the metal lens cap engages; this is somewhat of a drawback however, since you must unscrew the shield each time you wish to reinstalled the dust cap. Also, a user must take great care to not cross thread the shield upon installing as this is quite easy. This photo shows the dew shield installed on one of our Meade scopes' ETX 90 guide telescope; since we leave the shield on permanently, I have fitted the INSIDE of the shield with a tight-fitting firm foam insert to serve as a dust cover when not in use; I small cabinet knob and short bolt through the center make for easy installation and removal. The BIG advantage to the Meade dew shield is thermal qualities; the material of construction is a very heavy insulating material that actually inhibits dew and moisture yet does not cap heat nor cold....very temperature resistant. All-in-all, if you do not mind removing and reinstalling every time the scope is used, this is by far the best dew shield I have found for the ETX telescope and highly recommend it.....however, as with many Meade accessories, it is a bit pricey for such a small item made of plastic!" 
|
|||
| Observing Table | MacCabee Sports | #XT | $25 |
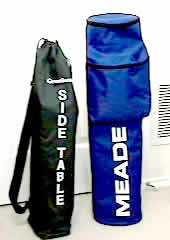
I had been thinking of purchasing the Orion Telescope and Binoculars "Aluminum Observer's Table", cost $60, but then I saw a similar looking table at my local grocery store that was being sold for only $25. Both tables seemed to be about the same size, fold down to a small size, and come with a carrying case. The only obvious difference was that the Orion table top was aluminum and the one at the store was wood. So I decided to give 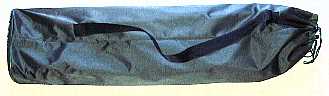 the store one a try, although I wonder how well the "kiln-treated" wood will stand up to heavy dew.
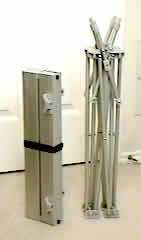
The photo on the right shows the table in its case. The case is a green Cordura-type material (cloth-like on the outside, rubberized on the inside) and has a long strap so it can be easily carried over your shoulder. Inside the case are two compartments, one for the legs and one for the top. Take-down/set-up instructions are sewn into the inside of the top of the case for easy reference. The case and table weigh 10lbs. The photo on the left shows the legs (collapsed) and the top rolled up.
the store one a try, although I wonder how well the "kiln-treated" wood will stand up to heavy dew.
The photo on the right shows the table in its case. The case is a green Cordura-type material (cloth-like on the outside, rubberized on the inside) and has a long strap so it can be easily carried over your shoulder. Inside the case are two compartments, one for the legs and one for the top. Take-down/set-up instructions are sewn into the inside of the top of the case for easy reference. The case and table weigh 10lbs. The photo on the left shows the legs (collapsed) and the top rolled up.
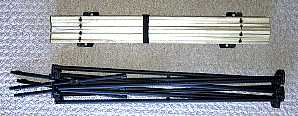
To set up the table you simply pull on two opposite legs until the legs are fully apart. The view on the left below shows the table legs set up. You then unroll the top and place onto the leg structure, as seen on the right below. The individual slats are held together with two elastic cords running through holes in the slats. The top is secured to the leg structure by connectors near each of the four corners. 

|
|||
| ETX-60AT, ETX-70AT AC Adapter | Meade | 546 | $20 |
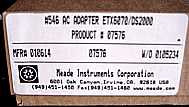 Don Spencer (ECDON@aol.com) reports: "Just wanted to let you know that
Meade now has the #546 AC power adapters for ETX-60/70. I ordered mine
Don Spencer (ECDON@aol.com) reports: "Just wanted to let you know that
Meade now has the #546 AC power adapters for ETX-60/70. I ordered mine
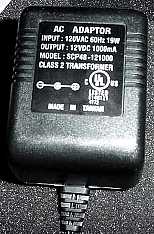 through them about a month ago and it just arrived tonight. The
connection is the same as it was with the battery pack (forget what they
call this type of connection) and the power cord is 25' long. as for
performance, It seemed to make a great difference in slewing and in
tracking. With a very rough two star alignment, I was able to track M13
for over 45 minutes."
through them about a month ago and it just arrived tonight. The
connection is the same as it was with the battery pack (forget what they
call this type of connection) and the power cord is 25' long. as for
performance, It seemed to make a great difference in slewing and in
tracking. With a very rough two star alignment, I was able to track M13
for over 45 minutes."
|
|||
| Handpainted Astronomical Clothing | Wearable Starscapes | N/A | $45-up |

J.A. Stelnicki 3011 Market Street San Francisco, CA 94114 415-621-2352 If you like astronomical-themed wearable accessories, check out this dealer. [10/6/00] I have purchased a second tie, the "Pleiades", shown to the right. [09/22/01] Wearable Starscapes now has an email address: wearablestarscape@yahoo.com. Here are some photos of some of their astronomical items:  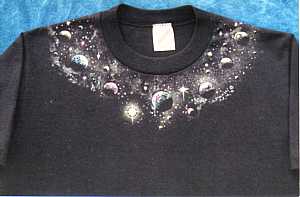 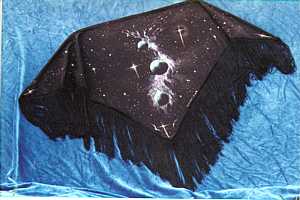
[10/10/01] Here is current pricing information: All prices include 1st class insured postage. From left to right: Horse Head Nebula $45.00; Pleiades $50.00. Dragon with monogram initial of choice on shield $45.00. Red veil Nebula $45.00. Purple and Pink Moons with Planets $50.00. Horse Head Nebula same as above. For extra long ties add $1.00. Necklace of Moons and Stars $50. State size and short or long sleeve. Shawls 6ft x 3 1/2ft. $180.00. Shawl shown here is Purple Nebula with Moons. All astronomical designs from ties available on shawls. All shawls have stiched loop at top for hanging on rod if desired. All designs are hand painted and signed by J.A. Stelnicki |
|||
| Canon Image Stabilizer binocular | Canon | N/A | $360 |
|
Frank Goldner (fgoldner@worldnet.att.net) reports: "I just gave myself a gift, which is a wonderful accessory to my
ETX-125, namely a 10x30IS - Canon Image Stabilizer binocular.
An excellent review of the possibilities with image stabilizing
binoculars is given in the July 2000 issue of Sky and Telescope (p.59).
The best price I could find was with Adorama in New York City
(www.adoramacamera.com) which charged me $359.95 (through the end of
this month, June, one can get an additional $50 Canon rebate).
Living in a polluted suburb, the 10x30 IS lets me check out areas of the
sky before setting up the ETX - a very pleasurable experience in itself.
I find I can observe down to 6th magnitude stars, more than enough to
have lots of fun.
I suspect these will also be highly interesting to birders and ETX'rs on
travel.
Regards to all. Frank Goldner, Bethesda Md." |
|||
| Pal-Lite Flashlight | Pocono Optics | N/A | $20 |
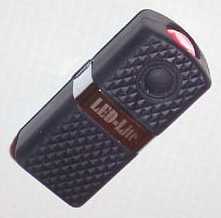 bob c (redflasher@yahoo.com) reports: "At a recent Hamfest in Minneapolis, I bought a red led
flashlight called Pal-Lite. This item sells for about
$20.00 and is available online from Pocono Optics and
I would imagine others as well. The light is about
half the size of a candy bar and pretty hefty. There
are two levels of brightness as well as a flasher
mode. The first level of brightness is blinding at
close range. Looking straight into the LED at arms
length left a red dot on my eyes for many seconds.
The second level of brightness appears to be ideal.
The flasher mode is timed at about one flash per
second but rather bright. A feature I really like
about the light is that the LED is always on in a very
dim mode. This makes it easy to find in the dark.
Battery life(9 volt transistor type battery)appears to
be very good. The blister pack says the battery will
last shelf life in the off(very dim) position. And
the blister pack has been thrown away so I cannot
quote the other times but appear to be many hours.
This light is built like a tank and should prove to be
very durable."
bob c (redflasher@yahoo.com) reports: "At a recent Hamfest in Minneapolis, I bought a red led
flashlight called Pal-Lite. This item sells for about
$20.00 and is available online from Pocono Optics and
I would imagine others as well. The light is about
half the size of a candy bar and pretty hefty. There
are two levels of brightness as well as a flasher
mode. The first level of brightness is blinding at
close range. Looking straight into the LED at arms
length left a red dot on my eyes for many seconds.
The second level of brightness appears to be ideal.
The flasher mode is timed at about one flash per
second but rather bright. A feature I really like
about the light is that the LED is always on in a very
dim mode. This makes it easy to find in the dark.
Battery life(9 volt transistor type battery)appears to
be very good. The blister pack says the battery will
last shelf life in the off(very dim) position. And
the blister pack has been thrown away so I cannot
quote the other times but appear to be many hours.
This light is built like a tank and should prove to be
very durable."
|
|||
| Dew Clip | Scopetronix | N/A | $60 |
| Dennis Wardell (dwardell@email.msn.com) reports: "I'd like to add a review of ScopeTronix's Dew Clip for the 90 mm ETX and my first attempt at the Messier Marathon. First of all I have to say that ScopeTronix customer service is 1st rate. Had a minor problem with my initial order but was corrected immediately when I called and a new part was shipped Priority Mail the next day. Now to my review. I decided to go and do the Messier Marathon up at the Texas Astronomical Society's (TAS) dark sky observing site in Oklahoma. Predicted weather to be as low as 30 F. Arrived at site approx. 5 PM and set up ETX to cool down. Attached my new Dew Clip and plugged it into 12 volt power supply from Sam's. Sun sets and off we go on the Marathon. Note: First Quarter Moon out creating major light pollution on western half of sky. Bagged 25 of the 28 items listed for early evening. Temperature starts to drop, so far no reported problems with dewing. It is now about 9 PM and am now starting the Leo/Big Dipper Region. Start to notice dew on work table and Marathon checklist. Object Lens nice and clear. Now down into the lower 40's. Got 12 of the 22 objects in this area. On to the Virgo Cluster Region. Got 15 of the 17 objects here. It is now after 11 PM and I start to here blower dryers running. Checked my Objective and still clear. Temp falling quickly, now in the lower 30's. I now had to wait till after midnight to continue with the next items on the list. Checked the time and it is now 12:30, temp 26 and dew is freezing (i.e. FROST). Everyone scrambling for their dryers to keep their lens clear. Me, I check up front and still clear. The DEW Clip is working superbly. Now I start on the After Midnight Objects and get 6 of the 8 items that are now above the horizon. It is now just after 1 AM and temp is closing in on 23 F. My eyepiece is now starting to dew over but the Objective lens is staying clear. Now the fun begins. GOTO M10 no problem, GOTO M12 no problem. GOTO M9 no problem, but could not see it. Maybe it slued to wrong location. So GOTO last item successfully located M12 and the scope instead of sluing 2-3 degrees in az. decides to go 15-20 degrees and 45 degrees in dec as well. Temp is now 22 F and Autostar no longer responding properly. Disconnected Autostar and plugged in standard controller and scope responds but sluggishly. I decide that I had better not risk the motors so I called it quits for the evening, but not before checking out one last Deep Sky object, Omega Centauri. Although not an M object it is still mighty impressive. It is now almost 2 AM with temp now at 22 F and a heavy frost appearing on everything. Almost all the other observers have given up trying to keep their scopes clear, but the Mighty ETX with ScopeTronix equipped Dew Clip is frost free! If not for controller problems I would have been able to finish the list. The Dew Clip has now been running for just over 8 hours and hasn't even put a dent into my 12 volt power supply, yet was able to keep my Objective Lens clear of dew and frost even in these low temperatures. My hat goes off to ScopeTronix for making an extremely useful piece of equipment. So final Messier count 58 out of 110, but due to scope problems was not able to tackle the last 35 M objects. That works out to 77% completion rate of the M objects I was able to actually look for. Not to bad I think for a first timer and the Mighty ETX." | |||
| ETXtender Focus Knob | Fancher | N/A | $20 |
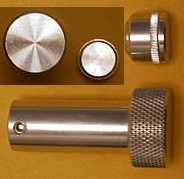 Truman Fancher sent one of his new ETXtender focus knobs for the ETX-90 model. As seen in the photo on the right, it is larger than the
  standard ETX-90RA and 90EC focus knob. The ETXtender knob diameter is the same as the standard focus knob on the ETX-125EC.
The hole for the focus knob shaft is only about 1/4" deep and a little larger in diameter than that of the standard focus knob on my ETX-90RA. There is only one setscrew (an extra is supplied along with an allen wrench). This results in the knob being mounted slightly canted from the axis of the shaft, however, it does not affect the feel of the focusing as the knob is turned.
The knob is easily used, even while wearing gloves. As seen in the photo on the left, it extends a good distance from the ETX (unlike the original knob) and is large enough to be graspable without needing small fingers. I found its use convenient although, depending upon the mount, vibrations during focusing can still be a problem since you are actually touching the telescope.
Contact Truman Fancher at bigtiii@earthlink.net for information on ordering.
standard ETX-90RA and 90EC focus knob. The ETXtender knob diameter is the same as the standard focus knob on the ETX-125EC.
The hole for the focus knob shaft is only about 1/4" deep and a little larger in diameter than that of the standard focus knob on my ETX-90RA. There is only one setscrew (an extra is supplied along with an allen wrench). This results in the knob being mounted slightly canted from the axis of the shaft, however, it does not affect the feel of the focusing as the knob is turned.
The knob is easily used, even while wearing gloves. As seen in the photo on the left, it extends a good distance from the ETX (unlike the original knob) and is large enough to be graspable without needing small fingers. I found its use convenient although, depending upon the mount, vibrations during focusing can still be a problem since you are actually touching the telescope.
Contact Truman Fancher at bigtiii@earthlink.net for information on ordering.
|
|||
| Electric Focuser | Meade | #1244 | $100 |
|
Michael Wrobel (mikewrobel@oh.verio.com) reports:
"Over the holidays I purchased a #1244 Electric Focuser for the ETX for about $50 at a going out of business sale of one of the local science/nature interests shops. I installed it and found it was reasonable easy to use for astronomical purposes. In my setup, I used it with the the Autostar.
There is a shortcut method for getting access to the focus control which involves holding down the MODE button for a second or two. When this is done, the Focus Control screen is displayed and the focus can then be adjusted with the UP/DOWN keys. The rate of focus adjustment can be adjusted by selecting the numbered keys 1-9, 1-slow to 9-fast. Exiting out of Focus Control mode is achieved by pressing the MODE button again.
The Menu Select keys allow you to view the other submenus under the MODE menu (Focus Control is one of many and is the obvious choice for the starting menu when the Electric Focuser is detected).
The version of Autostar I have tested the Focus Control function is version 1.3 as displayed on the startup display.
Since I utilize my ETX for both Astronomical and Terrestrial viewing I have opted to remove the Electric Focuser. The simple reason is that for my Terrestrial viewing use, I remove the ETX tube assembly and mount it on a lightweight camera tripod for the ultimate in lightweight portability. In this mode of operation, I do not want to be dependent on having to lug along the Autostar or the handheld Electronic Focus controller (provided with the #1244 Electric Focuser).
The provided Electronic Focus Controller would not be too bad for Terrestrial use except for the fact that as compared to other dedicated / ruggadized birdwatching spotting scopes the ETX requires a little more care in setup and use. My fellow birder's definition of a good spotting scope is something they can literally toss into the trunk, something that can be hauled around in the rain for hours and whose lenses can be dried off with a leftover napkin from McDonalds. Yes, all I would have to do is add this electronic (non waterproof) 'gizmo' to my scope for all of my fellow birder's to lose their last bit of patience with my babying of the ETX while they are trying to move on to the next bird observing site.
If the Electric Focuser unit itself had a means to still allow for manual focusing, I would have left it on the scope. For now, to retain the ease of use and portability of the ETX, I have foregone using the #1244 Electric Focuser. For those that use their ETX strictly for Astronomy, I would recommend the #1244 Electric Focuser as a nice accessory."
[08/15/05] John Zimmerman (john@z-family.com) adds: "I just received the Meade #1244 electric focuser for my ETX-90PE. It installs easily and works fine. But I want to share some observations: This has 4 speeds - fast, medium, slow, and fine. I had an ETX-125 with the Meade focuser and it had 3 speeds, not 4. There is a spacer plate included, but the design makes it impossible to attach the gear to the focuser rod. Strange. But leaving the plate off does not seem to affect anything. Using Autostar to control the focuser, you access the focuser in two way. 1) Hold down Mode. The focuser menu is the first to appear. On the PE, the finder set menu is also accessed this way. 2) Press the map light button. This also brings up the focuser menu, and on a PE, also turns on the SmartFinder red dot. Overall, I like this accessory." [09/27/05] Brian Crane (brian.crane1@ntlworld.com) adds: "Thought everyone would like to know that I have bought and fitted a #1244 Focuser from Telescope House (www.telescopehouse.co.uk). I ordered it at 2 pm yesterday, it arrived at 8 am today, and was fitted, tested and working by 8:30 am today. Only gripe is that the allen key provided to take off the original focus knob and to tighten up the gear which replaces it doesn't fit correctly, a little too small. Important point is, though, that ETX-105 owners can now fit this unit with confidence." [08/09/07] Tom Farrell (tsfarrell@carolina.rr.com) adds: "Meade Electric Focuser #1244 for Meade ETX 07077. People advised me that this was a "must-have" accessory and they were absolutely correct particularly on sub-zero evenings. Considering there's a heavy haze, during the warm months. which blots out most of the night sky where I live winter astronomy is a must. However, cold weather convenience isn't at all what the electric focuser is all about. I was shocked once I installed it how incredibly imprecise focusing had been without it as well as how very much vibration and misalignment, due to fingers turning of manual focus screw, the electric focuser totally did away with. Even at the relatively low level of magnification when using the 25 mm Super Plssl eyepiece supplied with my ETX 90 Premium Edition with UHTC, turning the focus screw a single degree could totally distort an almost-focused image. Likewise, doing so could move the celestial object off center in the eyepiece or even out of the eyepiece altogether occasionally and could cause the celestial object to blur due to minute vibrations, making the job of focusing that much more demanding. The electric focuser can turn that focus screw slowly enough to fine-tune focus. Has variable focusing speed, which is good, considering that the focus screw has to be turned at least two or three dozen times to change focal length from closest possible to infinity. The electric focuser comes with its own controller, which plugs into one of the AUX ports on the ETX's base, and has buttons which change focus direction and speed of focus. This little controller is very useful, but it is really great that Meade designed the AutoStar controller which comes with its Premium Edition ETX telescopes so as to be able to control direction and speed of the focuser as well as telescope slewing all using the same buttons with a simple button sequence used to toggle between slewing and focusing. There are pluses and minuses to focusing using either the AutoStar or the separate focus controller but it is good to have both options available. Even a great accessory like this has some drawbacks: Until a recent revision of the AutoStar firmware, there were some bugs which could result in the electric focuser running on its own without any button being depressed, as well as the escape button sequence used to toggle between slewing and focusing modes having the unfortunate side effect of also escaping from a session of the "Guided Tour" feature or any other celestial object observation selection for that matter. But these bugs have all been corrected. Thank you, Meade. The Electric Focuser needs to be redesigned to be slightly less bulky. It rubs up against the right-hand side of the telescope fork mount. This causes friction and drag when slewing to a vertical position. I do not believe this affects telescope alignment at all, since the drive motors are servo-mechanical and self-correcting. I cannot say that this will reduce the life of the motor drive, but can't see how it can be a good thing to have unnecessary drag. It is a certainty that the drag incurred can cause the telescope too "stick" during slewing and results in one having to lock the axis tighter than might be preferred. I guess that my specific qualm is how this design flaw came to be. Was this accessory designed for a different telescope with more clearance between focus screw and fork mount? Was it haphazardly retrofitted and/or for the ETX 90 without properly testing the result on the actual unit? (Could this even, like the Hubble debacle, have resulted in mixing up metric and English measurements?) I can say this: support technicians at Meade are not unaware of this drawback and I have verified personally that this design oversight is not unique to my telescope or electric focuser. While not so hard to install, once one gets familiar with what set screws to loosen / tighten with what tools (which are included) I found it not very easy to tighten the drive gear which converts into torque the speed of revolution of the electric focuser's motor. I really worked hard at this yet found, repeatedly, that should one reach either end of the focus screw's focal spectrum, the electric focuser's motor is powerful enough to wrench the drive gear clear off the ETX's focus screw such that one then has to remove and reinstall the electric focuser with the drive gear set screw tightened to the max. Once I did get the set screw securely fastened, I found that, when hitting either end of the set-screw's focal spectrum and even though no longer wrenching the drive gear loose from the focus screw the electric focuser motor's torque was still sufficient to wrench the drive gear and the electric motor's gear out-of-mesh so that they would just continuing "spinning their wheels" in a manner similar to when the drive gear was wrenched loose, but without the jangling sound caused by a loose drive gear. I would have expected the electric focuser to just freeze at either end of the set screw's focal spectrum or better yet have an automatic electronic cut-off when sensing higher electrical resistance due to a stalled motor. Fortunately, most of the time, the motor will stall out not go off its gears. And when the gears unmesh in such a manner, simply reversing the focus motor will bring them back into mesh though with a crunch like a automobile gear-shift changed with clutch engaged. Ultimately, however, with relation to the last two bullets I have to admit that, once familiar with using the telescope and electric focuser there really aren't a lot of circumstances when one needs to hit the maximum or minimum boundaries of focal length. So these issues might be considered analogous to trying to get a gear-shift automobile moving in 5th gear or perhaps more aptly braking such a car by shifting hard into 1st gear. I would call these as well as the friction of electric focuser against fork mount of minor consequence if not moot but for the fact that I know an electric focuser at this price (over $100) could easily be designed so as to install and function flawlessly as an integral component of the telescope rather than what this is an add-on accessory. Maybe I am overly-demanding but that's how I feel. The design and manufacture of the ETX telescope itself is of such high quality that I guess I had expected more from the electric focuser. However, there is no truly perfect machine in all of existence and the electric focuser certainly gets its job done with pros far outweighing cons. I cannot see using my ETX telescope without this accessory don't know how I used it before I ordered one. I suppose there are some reasons to leave the focus screw shaft exposed for applications I cannot imagine otherwise I would suggest that Meade bundle the focuser with at least high-end ETX models." |
|||
| FlexiFocus | Scopetronix | N/A | $35 |
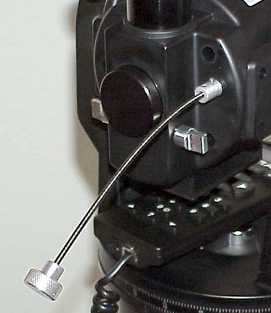 kenng@QNET.COM reports:
"I just received a product from Scopetronix. The device is called
FlexiFocus and sells for $34.95. Their advertisement is quoted: FLEX90
- FlexiFocus for all 90mm ETX models - $34.95 "This new product solves
two common ETX problems! It allows you to focus without the jitters and
allows you to easily reach the focus knob even when the OTA is parallel
with the forks! Since the new ETX/EC operates in Alt-Az mode there is a
very large portion of the sky overhead where you can't reach the focus
knob when viewing (unless you have fingers like chopsticks!). Don't let
its extreme flexibility worry you, focus control remains fine and crisp
kenng@QNET.COM reports:
"I just received a product from Scopetronix. The device is called
FlexiFocus and sells for $34.95. Their advertisement is quoted: FLEX90
- FlexiFocus for all 90mm ETX models - $34.95 "This new product solves
two common ETX problems! It allows you to focus without the jitters and
allows you to easily reach the focus knob even when the OTA is parallel
with the forks! Since the new ETX/EC operates in Alt-Az mode there is a
very large portion of the sky overhead where you can't reach the focus
knob when viewing (unless you have fingers like chopsticks!). Don't let
its extreme flexibility worry you, focus control remains fine and crisp
 with no backlash or rubbery feeling, the flexible shaft is extremely
rigid on its rotational axis. Installs in seconds with the included
wrench. No jitters, easy access with the OTA vertical, fine control, and
at a fraction of the cost of an electric focuser!"
I ordered the product, received it and offer the following: The
FlexiFocus is, as stated in their advertisement, "crisp" and lacking any
"backlash or rubbery feeling". Five minutes after opening the package
it was installed on my ETX 90 EC. The FlexiFocus comes with an allen
wrench and an extra set screw, nice touch, since the one in the
FlexiFocus had fallen out in the envelope, during shipment, and was
almost thrown away. You must use the allen wrench that came with your
ETX to remove the stock focusing knob and once removed the FlexiFocus is
easily and quickly installed on the scopes focusing shaft. Two minutes
after installation, I was outside and zeroing in on Jupiter, near the
zenith, in the early California evening. As advertised, the FlexiFocus
allowed me to easily focus on Jupiter even though the OTA was
approaching the vertical position!"
with no backlash or rubbery feeling, the flexible shaft is extremely
rigid on its rotational axis. Installs in seconds with the included
wrench. No jitters, easy access with the OTA vertical, fine control, and
at a fraction of the cost of an electric focuser!"
I ordered the product, received it and offer the following: The
FlexiFocus is, as stated in their advertisement, "crisp" and lacking any
"backlash or rubbery feeling". Five minutes after opening the package
it was installed on my ETX 90 EC. The FlexiFocus comes with an allen
wrench and an extra set screw, nice touch, since the one in the
FlexiFocus had fallen out in the envelope, during shipment, and was
almost thrown away. You must use the allen wrench that came with your
ETX to remove the stock focusing knob and once removed the FlexiFocus is
easily and quickly installed on the scopes focusing shaft. Two minutes
after installation, I was outside and zeroing in on Jupiter, near the
zenith, in the early California evening. As advertised, the FlexiFocus
allowed me to easily focus on Jupiter even though the OTA was
approaching the vertical position!"
Ron McCafferty Jr (ronmccafferty@email.msn.com) adds: "I recently purchased a Scopetronix Flexi-Focus Knob and offer this review. The device consists of an attaching collar, a 5" or so tightly wound spring, and a focus knob. It was easy to install but I had to dig a small allen wrench out of my tool box. The supplied wrench was to big for my stock knob. Remove the stock knob and slip the collar over the focus post and you're in business. The knob is larger than the stock ETX focus knob. The rest of the review I'll preface by saying I use a heavy duty video tripod that isn't the best of mounts. Your results may vary. The bad news. If the Flexi-Focus isn't touching the scope after focusing the I needed to wait for the Flexi-Focus to stop bouncing. The bouncing causes the image to move about. I decided to un-install and re-install each time I use my scope because I don't want the spring to get a memory and become bent while the ETX is in it's storage position. I think $34.95 + $5 in shipping is a bit steep for a collar, spring, and knob. The good news. The larger knob makes it easier to make small adjustments. While it didn't completely remove the focusing jiggles, see tripod note above, it made focusing magnitudes easier. I was able to get clear views in a fraction of the time it would normally take. The Flexi-Focus makes it easy to focus when the stock focus knob would've been difficult, or impossible, to reach. I do most of my viewing on my front sidewalk. My neighbors come over when they see me out. Before the Flexi-Focus the neighbors had to look how I had focused. Focusing took a knack with the old knob so most didn't try or asked me to fix it. Now they can focus easily. If you don't have motorized focus capability I recommend you get a Flexi-Focus." Donald McClelland (DonMcClelland@webtv.net) reports: "Just thought I'd add a comment about the Scopetronix Flex-focus. What a handy tool. Easy to put on. Makes focusing at high power a snap by comparison and most importantly you can now actually focus when the scope is pointed straight up. It's great. I have both the 90 and the 125 and for two dollars they sent me a coupler that interchanged with the ETX-90 so I can now use it on both scopes. They should sell them in bulk to Meade. It should be a required accessory considering the logistics in the mechanics of these scopes. Highly recommended IMHO." Frank Welsh (welshf@yahoo.com) adds: "Just got my ETX-70AT (will use as my portable, plan to build a dob). The focuser cable offered by Scopetronix (http://www.scopetronix.com/ ) is the best thing since presliced bananas! My fingers are not skinny enough to operate the focus knob when the scope is near the zenith, and even when not near the zenith, operating the knob jiggles the scope too much. With this little cable similar to the slow motion cables on older, non-motorized beginner scopes solves both problems. The item is marketed as ScopeTronix Flexi-Focus and costs $34.95. I believe that it is assembled by the vendor as I have not found it for sale anywhere else. I didnt see this anywhere in your SUPERB web site, so I thought Id offer it." |
|||
| Microstar II+ | Scopetronix | N/A | $280 |
Joe Hartley (jh@brainiac.com) reports:
"Reviewers Note:
I have taken this opportunity to modifyu my original review to clarify
some language. I refer in Part II to a "cheesy dec linkage". Jordan
reports that some people have mis-interpreted this to mean the
MicroStarII+ declination motor. It is not! I am referring to the ETX's
declination linkage, NOT to the Microstar! While I believe the original
text was clear enough, this has been enough of a problem to warrant note
of the correction here.Part II've just finished installing the new MicroStarII+ from Scopetronix, which of course brought the clouds rolling in! I had little trouble installing the unit, since I've got some experience with electronic assembly. The components are nicely manufactured, and extra consumable parts such as belts, setscrews and double-sided tape is provided, which is a nice touch. Also included are the batteries and a small double-headed screwdriver. Installation can theoretically be done simply with what's in the kit, but I opted for a larger screwdriver to remove the ETX base and a jeweler's screwdriver to help remove the Phillips-head screws holding the circuit board in place, as both sets were pretty tightly fastened. Ease of installation was always present in the mind of the designer of this kit, Jordan Blessing. The simple manner in which the various wires are connected and the clarity of the manual attest to this. The most difficult part of the installation was getting the coiled wires through the holes in the base plate and being able to re-attach the baseplate without getting some coils caught up between the circuit board and the plate. To simplify this, I ran the focuser cable through the N/S switch hole rather than the On/Off hole suggested by the manual, and stripped another inch or so of the black coil insulation from the cable. Since I have a Bogen quick-release tripod plate attached to the base of my ETX, I already knew that using the N/S hole would not interfere with the mounting of the ETX. Alternate setups may not allow for this. Attachment of the 2 motors is straightforward. The Dec motor attaches using double-sided tape; placement was simple. The focuser motor was a bit tougher. Though it simply has a coupling that slips over the focus shaft, it took me longer than I thought it would to adjust it so that the wobble seen when the motor is running is minimized. I also found the suggested placement of the Dec motor power cord (through the fork from the rear to the front) to interfere with either my access to the RA knobs or the ability to swing the OTA to 90 degrees dec. This was easily solved by running the cord up from the front of the scope. It seems to be a matter of preference, and ample cord has been provided to be routed either way. As the MSII+ was being designed, the Scopetronix website was updated on a regular basis. At one point, the website showed a pulley-driven focuser which allowed the focuser to be used even when the OTA was set to 90 degrees declination. Fairly close to the release date the design for the focuser was changed. (The manual explains that the original design was difficult to build, required a bit more skill to install, and was more expensive to make than the current model.) Unfortunately, it is now impossible to get the OTA to go beyond 60 degrees declination with the focuser motor's power cord in place. A lower profile plug is important here. Unfortunately, a 2.5mm right-angle plug is not a standard item at Radio Shack or any other electronic stores I visited. I decided to bite the bullet and use a regular plug and bend the lugs at right angles. A little shrinkwrap and I had a usable plug with a much lower profile. I am now able to swing the scope easily to 80 degrees declination, and can get 85 degrees by making sure the cord's set just right. I've discussed this issue with Jordan Blessing, who agrees that a 90 degree power cord would greatly reduce or remove this problem. He is looking into this for the next production run of the MSII+. I'd like to point out that it's easy to simply unplug the power cord to achieve polar alignment or to get the scope to the 85-90 degree area. This is a relatively small and (I believe) relatively featureless area of the sky, so losing the focuser in that area is not a major disaster. It should be noted that the JMI focuser can't get to this region of the sky without removing the focuser motor entirely, so this problem is not unique to the MicroStar II+ - it's an inherent problem in the design of the ETX, with virtually no clearance when the scope is set to declinations approaching 90 degrees. The hand controller is a nice little unit that's simple to use, and has only a single ribbon cable connecting it to the ETX. It sits conveniently on the shelf created by the Bogen offset plate created by Steven Stanford when I'm not using it, it has an LED to indicate that it's on (which will also help finding it in the dark), and good quality microswitches. Once it was set up, I had no trouble panning around the backyard and focusing back and forth. In terms of its operation, the MicroStar II+ works well. The preset speed for the Declination slew seems fine. The RA slew, preset to 8x with no variation, took me a little time to get used to. It is slower than I thought it would be, especially compared to the dec slew rate, but 8x is a reasonable speed. The JMI Commando unit goes up to 10x by using a different motor, and that's not a big difference. (The Commando also will _only_ work when you use the JMI tripod, Wedgepod and Wedge or standard legs! Since I already had a very nice tripod and head, I wasn't going to consider replacing them in order to use the Commando.) It's important to note that the MicroStar II+ is not going to turn the classic ETX into a goto scope, or even provide fast slewing to any point in the sky. The Declination motor is limited by the slow-motion declination range of the ETX mount, and 8x RA slew is pretty good performance from the little ETX motor. What it _will_ do is let you get near an object and pan around the general area without having to fumble with the slow-motion knobs on the ETX. That's something that will be nice on the cold evenings still to come! I can't go without mentioning the manual. It's well-written, clear and informative, giving not only the basics on setting up the unit, but also why some things have been designed the way they were, and what to do when things go wrong. Items like fixing a binding Declination control or what to do if the focuser rod goes too far and falls into the OTA are covered, which I feel is above and beyond what's required in the manual. All in all, I'm reasonably happy with the installation. It took me about 2 hours, including a fix to a a bent Declination control screw. It functions exactly as advertised, and is much less expensive than the equivalent products I've seen advertised for the ETX. I also had the opportunity to call Scopetronix a few times to check on the order, which sat at my local post office for almost a week(!). At all times the folks at Scopetronix were reachable and helpful. I'd be happy to do business with them again, and can recommend the MicroStar II+ as a nice package to add versatility to the ETX. Part III finally had skies clear long enough to try out the Scopetronix MicroStarII+ that I installed earlier in the week. I had a very limited amount of time at dusk last night to use the scope, so I went for the obvious target, the moon. I jumped right up to 256x using the 9.7mm eyepiece and the Barlow. What a joy to be able to pan around the moon's face without using the slow-motion knobs! It was great being able to follow the terminator just by pushing a few buttons, but it was not without a problem - a binding declination knob. I had previously gone in and straightened the long screw that connects the two slow motion knobs, and I had pretty smooth motion, but when I used the motor, it was very jerky. It would move, then stop, then move, then stop. This was NOT a problem with the MSII+!!! The manual clearly states that any problems with the RA or Dec mechanisms will be magnified by the MSII+. This is most certainly true. I ended up having to disassemble the whole declination mechanism to loosen up the fork the dec drive nut rides in. I also put a tiny smidgen of liquid graphite on the plastic. The declination motor now rides very smoothly to both ends of its travel. I must say that I was underwhelmed the first time I opened up the ETX. The declination mechanism is pretty darn flimsy, if you ask me! I cannot over- emphasize the need to have your declination mechanism as close to perfect as possible to get the most out of the MSII+. A side note: I took the opportunity of having the dec assembly apart to put a white line down the center of the dec arm. Since there's a little cutout in the inside fork cover, I can now tell at a glance how far the arm has traveled to one side or the other. I mentioned in my earlier post about the 8x RA slew speed and how it seemed slow to me. This speed seemed just about perfect when looking at the moon. So now I've learned not to rely on terresrial viewing to make judgements! It is also worth mentioning that overcoming the initial inertia is more difficult the slower the focuser is set to. Increasing the focuser speed on the hand controller can sometimes, but not always, overcome this problem. The real solution is to spend as much time as necessary getting the coupler aligned as well as possible. It seems pretty good now, but again I had only terrestrial objects to focus on. We'll see how the clouds hold out for tonight! Finally, in the real nitpicking department, I would like to mention that I would prefer to have had the ribbon cable exit from the top of the controller rather than the bottom. It just seems more natural, especially since I tend to let the controller dangle at the end of the ribbon cable. If the ribbon was at the top of the controller, I'd immediately be in position to start making adjustments. One point I'd make is that with the dec motor installed, using the slow-motion control manually doesn't seem to be a good idea. There's a lot of resistance from the belt, and I'd be afraid of stretching the belt or stripping gears (or most likely breaking something in the ETX's cheesy dec linkage!). If you want to use the slow-motion knob manually rather than with the MSII, slipping the belt off first might be a good idea. I'm really happy with this unit, and with Scopetronix. Jordan Blessing's been very accessible through email, and very informative. He's given me the straight dope on everything, warts and all, when I've asked questions. Part IIII've had the opportunity to use Scopetronix's Microstar II+ for a couple of weeks now. While I am generally pleased with the unit, I have found a shortcoming in using the electric focuser: after sitting out in the cold for a while, the focuser stops working. This is due to the lubricants in the ETX focus mechanism and the focuser motor thickening in below-freezing temperatures. With this thickening, more torque is needed to turn the focus mechanism, but because of the low current fed to the motor in order to turn the focuser rod at a slow speed, it is not able to overcome this "stiction," and the focuser controls stop responding. I have found that the problem exhibits itself even in milder temperatures, though still below freezing. Last night the temperature was about 28F but I still had the problem after the scope had been outside for about an hour. Jordan Blessing, when asked about this, confirmed than a couple of people have reported this condition, which he says is one of operating the unit outside of its design limits. Given the number of units shipped so far, this problem is likely to have more to do with the type and amount of lubricant in the ETX focus mechanism than in the MSII+ focuser motor. Jordan has offered a number of different options to the people who have run into this, which is consistent with the excellent service I've gotten from Scopetronix so far. His commitment to keeping me a satisfied customer is quite evident, even when it is not his unit at fault. Unfortunately, this is a case where I need to lower my expectations! In responses to a query I posted in the Usenet group rec.astro.amateur brought a number of responses from folks who have problems with telescopes in temperatures both below and even above freezing. It seems to be a fact of owning a telescope that operating in less-than-balmy temperatures is not of great importance to the scope manufacturers. The reason that telescopes with moving primary mirrors tend to have focus problems in the cold is that since the cored mirror must slide back and forth on the central tube it must be cored slightly larger than the tube. ANY sideways movement of the mirror results in miscollimation and annoying focus image shift. So a VERY thick grease is used between the mirror and central tube, and this thick grease by its very nature thickens even more in cold temps. This thickening is what keeps the MSII+ focuser from moving the mechanism. The focuser motor is easily removed and the original focus knob replaced, so before a night's viewing, I will check the temperature and determine whether I should use the MSII+ focuser or the manual knob. The RA and Dec controls have not been affected by this problem, most likely because those motors have more power fed to them, providing more torque. In fact, in my last viewing session, I spent quite a bit of time on the moon (because its glare made other observing difficult!) and found that I was truly enjoying the use if the panning controls. Jumping from crater to crater along the terminator at 258x was a snap! What a difference from the manual slow-motion controls! This wraps up my account of installing and using the MSII+. I can honestly say that everyone with a Classic ETX should get a MicroStarII! The panning controls make the ETX experience a joy. I also recommend, with a caveat, the MSII+. When the focuser works, it's wonderful, but on my ETX, the unit is highly sensitive to lower temperatures. Other scopes in similar climates may be better able to handle the cold, or you may live in a climate a little more hospitable to motorized focusers. Your mileage may vary. If you're considering buying the MSII+, I suggest calling Scopetronix and finding out the options available to you. Jordan is a straightforward person who will be honest about which unit best suits your needs." Mike here: As noted on the Scopetronix web site, there are several Microstar models and several Microstar upgrades at various price points. I have now received a Microstar II+ from Scopetronix. See my comments on the Showcase Products page. |
|||
| "ETX" T-Shirt | Hyper-Designs | N/A | $18-20 |
 In 1999, Hyper-Designs sent me one of their new Mighty Mak Design T-shirts. As you can see in the photos, the design acknowledges our favorite mighty Maksutov-Cassegrain telescope. The T-shirt itself is from one the top shirt manufacturers. The design (seen in close up in the other photo) is large and very nicely done. The shirt seems stiff where the design is located but I would guess that will change as the shirt is washed. Washing and color restoration instructions are included. My only "complaint" about the T-shirt is the size availability; it only comes in In 1999, Hyper-Designs sent me one of their new Mighty Mak Design T-shirts. As you can see in the photos, the design acknowledges our favorite mighty Maksutov-Cassegrain telescope. The T-shirt itself is from one the top shirt manufacturers. The design (seen in close up in the other photo) is large and very nicely done. The shirt seems stiff where the design is located but I would guess that will change as the shirt is washed. Washing and color restoration instructions are included. My only "complaint" about the T-shirt is the size availability; it only comes in 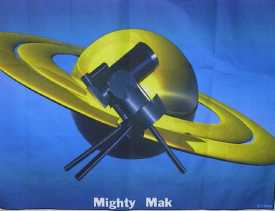
Large and XLarge ($17.99), and XXLarge ($19.99). Small and medium sizes would be nice for children and petite people. This is a T-shirt that you can proudly wear at star parties and astronomy club meetings. In 2009, I received a new URL with new T-shirt designs: http://www.printfection.com/epicshirts. |
|||
| Nighthawk Microlight II LED flashlight | Wavesure, LLC | N/A | $10 |
Wavesure sent me one of their Nighthawk Microlight II LED flashlights for evaluation. This very small and inexpensive flashlight  has many uses. It comes ready to use with batteries (two 1.5 volt button style) installed, and a clip and velcro strap for attaching the flashlight to almost anything. I found the flashlight so light and small that I wore it on my finger for two hours without even being distracted by has many uses. It comes ready to use with batteries (two 1.5 volt button style) installed, and a clip and velcro strap for attaching the flashlight to almost anything. I found the flashlight so light and small that I wore it on my finger for two hours without even being distracted by  it. In fact, it was easy to forget that it was there, ready for use. From a general use perspective I found the Microlight II very convenient and easy to use. The only minor complaint I have with it is the ON/OFF switch. If you place the light on your finger you have to use the other hand to slide the switch. It would have been nice if there was a push on, push off style button that could be triggered by a finger on the same hand (somehow...). But compromises had to be made to keep the flashlight small and lightweight. From an astronomical use perspective, the LED is amber not red. Nor is there a brightness adjustment. The Wavesure web site even comments on how bright this LED is and it IS bright. This can impair night vision somewhat. It should be possible to easily create a red lens cover for this flashlight but I have not done that yet. Overall, the Microlight II is a convenient and unobtrusive flashlight that has many uses. it. In fact, it was easy to forget that it was there, ready for use. From a general use perspective I found the Microlight II very convenient and easy to use. The only minor complaint I have with it is the ON/OFF switch. If you place the light on your finger you have to use the other hand to slide the switch. It would have been nice if there was a push on, push off style button that could be triggered by a finger on the same hand (somehow...). But compromises had to be made to keep the flashlight small and lightweight. From an astronomical use perspective, the LED is amber not red. Nor is there a brightness adjustment. The Wavesure web site even comments on how bright this LED is and it IS bright. This can impair night vision somewhat. It should be possible to easily create a red lens cover for this flashlight but I have not done that yet. Overall, the Microlight II is a convenient and unobtrusive flashlight that has many uses.
"I recently took the Microlight II with me to an event where it would have come in handy in a minor emergency. At one point in the event I needed to look on the floor for something that had dropped and so pulled out the Microlight. Unfortunately, it failed to operate properly; I turned it on and discovered that it would only illuminate when in a horizontal position and intermittantly when aimed skyward. Neither of which were very useful since I needed to point it downward. Even though the Microlight has received minimal usage since my earlier comments it certainly should not have failed. It appeared that something may have come lose or broken internally. It still illuminated but it was very sensitive to orientation and so was unusable for any purpose. The failed unit rattled when shaken whereas a new one does not. But since I never dropped or otherwise mishandled the failed one, and since it sat on a shelf for a couple of weeks not being used (bad weather!), I'm at a loss as to what could have happened. I contacted Wavesure about this problem and returned the failed unit to them for analysis. They sent me a replacement unit right away. The warranty instructions say to return to the place of purchase but I am certain that Wavesure would work directly with any purchaser. They reported that the failed unit had a misaligned spring. Replacement unit has worked flawlessly." |
|||
| JMI Polar Finder | JMI | N/A | $50 |
| Tim Kramer (Geargrip@aol.com) reports "I recently purchased an ETX and immediately bought JMI's wedgepod (since improved, oh well...) and their polar finder. Living in Chicago, I wasn't sure how useful it would be, but I frequent many dark sky spots and thought I would try it out. The finder arrived in a small box from JMI and included a xeroxed instruction sheet on installation. While the instructions weren't real clear (especially for a beginner) one call to JMI got all the friendly help I needed. The finder is attached to a mounting frame and is hinged to tuck right next to the tube when not in use. The actual installation is fairly straight forward. The bracket mounts to two screws already set into the fork mount on the ETX. They are fairly difficult to get at, although I was able to loosen them with a jewler's screwdriver I got at the local hardware store. Once loosened, the finder's mount fits onto these screws and they are tightened back onto the fork. That's how it is supposed to work. In actuality, it is a very tight fit. Once loosened, the mount had to be CAREFULLY wedged in place. I was only able to loosen them a tiny bit even with the smallest screwdriver I could find. I was worried about tightening them up again. However, I found that once wedged in, tightening wasn't necessary. Even after 2 months of thrice weekly observing, the sight hasn't budged. To use, simply make sure that your proper latitude is accounted for on the wedge or tripod, turn the finder so that it has swung away from the scope, and look through the sight tube (1x magnification) and turn the tripod until polaris is sighted. Very simple. I am not sure how well this accessory would work if using the ETX on a table with the supplied three legs. It is necessary to have your head below (or at the level of) the base in order to see through the small sight tube. Although I haven't tried any long exposure photography, the alignment seems to be fairly accurate (<1 degree). I am able to keep objects centered for long periods of time (10-15+ minutes) without any adjustments. Is it worth the $50? I think so. Polar alignment by sighting through the scope is much more laborious, and I haven't spent more than 2-3 minutes setting up as long as Polaris is in view. In fact, I haven't even really needed my compass since this addition. The quality of this product seems a little chincy, but it has held up well to my abuse, and only time will tell. Thanks, Mike, for a great site. I look forward to many more enjoyable hours with my little Mak and your web site. I am purchasing the Microstar drive corrector this week and will gladly send you my comments on it as soon as I can." | |||
| SCT Accessory Adapter | Shutan Camera & Video | 5956290 | $30 |
 Shutan Camera & Video sent me a SCT Accessory Adapter to review. This product connects to the rear port of the ETX (where you would connect the Meade 45-Degree Erecting Prism or the Meade T-Adapter). It is designed to allow the use of most accessories for larger Schmidt-Cassegrain telescopes, such as visual backs, diagonals, off-axis guiders, etc. Since I do not currently have any such accessories I could not check out the functionality of this ETX accessory except that I can say it does connect to the ETX without any problem. The only problem I expect might occur when mounting some SCT accessories on the ETX would be weight. Extra weight will throw off the ETX's balance, either on its legs or by adding too much torgue to the drive motor to allow accurate tracking. If you already own some SCT accessories then you may find this inexpensive Shutan accessory a valuable addition to your ETX travel case. Shutan Camera & Video sent me a SCT Accessory Adapter to review. This product connects to the rear port of the ETX (where you would connect the Meade 45-Degree Erecting Prism or the Meade T-Adapter). It is designed to allow the use of most accessories for larger Schmidt-Cassegrain telescopes, such as visual backs, diagonals, off-axis guiders, etc. Since I do not currently have any such accessories I could not check out the functionality of this ETX accessory except that I can say it does connect to the ETX without any problem. The only problem I expect might occur when mounting some SCT accessories on the ETX would be weight. Extra weight will throw off the ETX's balance, either on its legs or by adding too much torgue to the drive motor to allow accurate tracking. If you already own some SCT accessories then you may find this inexpensive Shutan accessory a valuable addition to your ETX travel case.
As this accessory is no longer available from Shutan, an alternative is the "Meade Rear Cell Adapter for ETX Telescopes" from OPT. |
|||
| Craig TeleWrap/Dew Cap | Clear Nights Products | N/A | $22 |
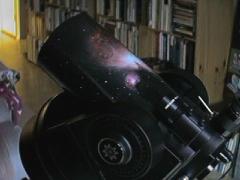 Clear Night Products (248-547-1299) makes the Craig TeleWrap/Dew Cap for the ETX. These are BEAUTIFUL as well as functional! The dew cap is actually a slip-on cover that covers the entire front portion of the ETX OTA (optical tube assembly). When the ETX is not in use the cover adds to the beauty of the ETX by displaying a high quality astronomical photograph (M-42 is shown on the right and M-45 on the left). Clear Night Products (248-547-1299) makes the Craig TeleWrap/Dew Cap for the ETX. These are BEAUTIFUL as well as functional! The dew cap is actually a slip-on cover that covers the entire front portion of the ETX OTA (optical tube assembly). When the ETX is not in use the cover adds to the beauty of the ETX by displaying a high quality astronomical photograph (M-42 is shown on the right and M-45 on the left). 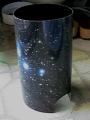 The cover has cut-outs for the fork mounting attach points on the side of the ETX OTA (cutouts visible in the photo on the left). For use to prevent dew accumulation on the ETX corrector lens you have only to pull the cover forward 3-4 inches. The only problem I had was that I had to remove the corrector lens cover before slipping the dew cap on. The The cover has cut-outs for the fork mounting attach points on the side of the ETX OTA (cutouts visible in the photo on the left). For use to prevent dew accumulation on the ETX corrector lens you have only to pull the cover forward 3-4 inches. The only problem I had was that I had to remove the corrector lens cover before slipping the dew cap on. The 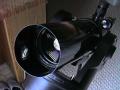 Telewrap/Dew Cap was just a fraction of a millimeter too long to unscrew the cover with the cap on. But once I had the dew cap on without the cover then I could screw and unscrew the cover OK, just not very tightly. One concern that they are already addressing is that the inside of the cover is shiny and can reflect some light into the ETX. You can see this shininess in the photo on the right. Watch their web page for new versions of the Telewrap/Dew Cap with other astrophotographs. Telewrap/Dew Cap was just a fraction of a millimeter too long to unscrew the cover with the cap on. But once I had the dew cap on without the cover then I could screw and unscrew the cover OK, just not very tightly. One concern that they are already addressing is that the inside of the cover is shiny and can reflect some light into the ETX. You can see this shininess in the photo on the right. Watch their web page for new versions of the Telewrap/Dew Cap with other astrophotographs.
Clear Night Products reports that the TeleWrap/Dew Cap fits the new ETX-90/EC model. Clear Night Products sent me one of their new TeleWrap/Dew Caps. The product has been slightly redesigned to ensure that it has the proper fit (corrects for my comment above on the original model TeleWrap/Dew Cap). Also, as I noted on the above comments, the inside of the original design was a shiny surface. This has been corrected by using a felt liner. The liner essentially eliminates reflections from the interior surface and makes for a snugger fit. The photos show the new TeleWrap/Dew Cap retracted and extended on the ETX. Clear Night Products is offering the new version at the same price ($22) as the original TeleWrap/Dew Cap. If you are worried about dew forming on your ETX corrector lens, then adding a TeleWrap/Dew Cap is an inexpensive cure that will add to, rather than detract from, the beauty of the Meade ETX and ETX-90/EC. 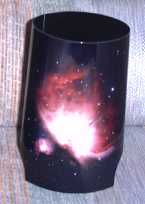
 
[02/1/00] Mike here: In 1999, I had also emailed CNP about one sent to me for evaluation that had come unglued; no response. It was a nice idea and product while it lasted.
[02/16/00]
[06/30/00]
[08/22/03] I contacted Clear Night Products and received this reply: Sent: Thursday, August 21, 2003 12:45:44
[09/25/03] |
|||
| MotoDec | JMI | N/A | $100 |
| Tom Harnish (katetom@znet.com) reports: "The JMI motodec does what it does. Not as satisfying as the motofocus, somehow, I guess because it isn't used as much. Typical lousy instructions, but got it installed okay after losing the screw inside the fork 4 (four!) times. As reported by others, at lowest speed the little motor doesn't have enough torque to overcome stiction so ya gotta crank it up a bit to get it moving. The JMI dual control for motofocus and motodec works fine, but personally I'd prefer a rocker switch instead of two different buttons. A little human factors consideration would have put selector switch on back edge for trigger finger, rocker on front edge for thumb, but it's acceptable as is." | |||
| NGC-microMAX NGC-MAX |
JMI | N/A | $399 $699 |
| Ray Wartinger (Ray_Wartinger@wb.xerox.com) reports: "Well, the clouds finally parted slightly last night and I got to try out my new MicroMax. I received it about a week ago and its been cloudy ever since -- typical! Installation was a breeze, operation is easy, and it works great, too! Installation consists of removing the right-hand declination circle, screwing in a brass adaptor, and attaching the encoder. A rather flimsy rubber cover fits over the encoder with a velcro patch. Then remove the bottom cover and the circuit board. The RA encoder simply fits over the hex-head screw and is held in place by the circuit board. I found this to be a little cheesy but I guess they didn't want to do anything that would void the warranty. Just as a precaution, I added a thin piece of foam padding in between to keep the solder nubs on the bottom of the circuit board from digging into the back of the encoder. The RA encoder wire exits the drive case through the small gap between the bottom plate and the case. This too seemed a little cheesy but actually worked just fine. After that, just plug it in and away you go. It was already set up for the ETX so I didn't have to change any of the computer settings. Before each use, you first zero the declination and press a button. Then you select two stars to align to (one star if you're accurately polar aligned). You can then select which catalog you want to use. The MicroMax only has 245 objects in its database (all 110 Messier, 90 stars, 17 deep sky, and 28 user-definable). (The MiniMax and Max have more objects, more catalogs, and more features, but I couldn't justify spending the more bucks). Select an object, display some info about it, and then use the guide mode to direct you to it. When the MicroMax is in the guide mode, the display shows you which direction to move the scope and by how much. For example, it might say "120<- 15^" ( where <- is a left arrow, and ^ is an up arrow). So you start moving the scope left and up. As you do, the display counts down toward 0. When you get within 10 degrees on either axis, the display changes to show degrees and tenths of degrees with the arrow in between. So it might look like "5<-4 2^3" for example, meaning 5.4 degrees left and 2.3 degrees up. You keep moving the scope in the indicated directions until both numbers reach 0-0. If you go past 0, the arrow changes direction. Its really quite slick. And, since you're moving the scope by hand, you can get where you're going very quickly - I suspect much more quickly than the motorized GOTO scopes can. This worked very well. After doing the alignment on Alpheratz and Altair, I chose M31. Moved the scope as directed and looked through the eyepiece. There it was! Cool! Of course, M31 is easy to find visually but right now its almost straight up so its a real backbreaker to try to line it up through the finder. Within about 5 minutes, I had found M2, M15, and M27, all landing in the 1 degree field of my 24mm eyepiece. A couple of these I found using the RA/DEC mode, where the MicroMax becomes a very easy to use set of digital setting circles. You simply move the scope until the display reads the RA and decl of what you're looking for. I was very pleased with the operation and ease of use. Also included is a bracket to hold the MicroMax. It has a couple of holes in it, one of which fit over the center post of my tripod. There is also a video tape which I guess shows you how to use it but I haven't looked at it yet. My conclusion: The JMI computers are great! High quality. Easy to install. Easy to use. Very useful and accurate. Can't wait for the next break in the clouds!"
Mark Stratton (virtual@ix.netcom.com) reports: "Well the weather and my schedule finally converged last night and I got a chance to put the JMI Max computer through it's paces. This is a pretty neat (albiet expensive) little tool. The main reasons I chose the Max over the mini-max or micro-max were 1) It can perform initial alignment using any 2 objects in its library (over 12,000 of them) including planets and 2) it has an RS-232 port so that it can interface with planetarium software such as "The Sky". This last feature is really slick and I will go into more detail about it below. The setup consists of a small box containing the computer (about 3x5x1), 2 encoder/sensor units, connecting cables from the sensors to the computer, a cable to connect the computer to the serial port of a notebook and a bracket to hold the computer (with a hole in it that fits fine over the center post of my bogen 3211). All the cables had modular phone style plugs which makes setting up and taking down the unit pretty quick and painless. Installation was pretty quick and the instructions were straight forward. One sensor connects to the declination shaft and replaces one of the ETX's setting circles. The second sensor goes on the RA shaft and in installed inside the base of the ETX under the circuit board for the clock drive (not as bad as that might sound). I initially tried the unit on a stand alone basis (without the RS-232 connection). Upon power up The computer asked me to set my Declination to zero (NB it is CRITICAL to make sure that your tube is really parallel to the base of the ETX when the declination is set to zero). You can then select an object from the catalog and align using the selected object. After 2 objects have been aligned you can then select any object and specify quide mode and the display will show a pair of arrows along with indications of how far you must move your scope in each direction to find the object. These distances update as you move your scope and when you get very close the scaling jumps by a factor of 10 for precise alignment. All in all it takes under a minute to select any item from the catalog and point your scope right to it. Next I tried using the Max in combination with "The Sky" (from Software Bisque). This required only plugging in an additional modular cable from the Max to the serial port of my notebook. Your then turn on the Max unit and forget about it, all alignments are done using the software on the notebook. The alignment process is similar, however with this setup you use the notebook software to specify any object in its database or just click on the object (such as a star) right on the screen and tell the software to align using that object. This is particularly usefull for people such as myself who don't yet know many star names by heart. Since I always lug my notebook outside whenever Im observing anyway (just to help me learn my way around), the extra connection and the notebook requirement aren't a burden at all. The really neat part of this setup is that once you have aligned on two objects a set of crosshairs appears on your notebook screen telling you exactly where the ETX is pointed! I can't begin to tell you how cool it is to be viewing something with the scope and to be able to look over at the notebook screen to identify it. You can guide your scope to an object either by aligning it using the crosshairs on the screen to center your scope on an object of interest or by activating guide mode which gives you a large easy to read alignment display on the screen. I can't begin to recommend this unit highly enough. For me it has made a huge qualitative difference in my observing. I had never had the opportunity to view deep sky objects before but this unit made them easy and fun to locate. I particularly enjoyed using the link from Max to my notebook, it is enabling me to learn my way around much faster than I could have otherwise. The only main downside to this setup is cost. The Max costs $700 which is of course, more than the ETX itself. And I must admit that by the time I connect the motofocus, motodec and the Max that I seem to have an awful lot of cables dangling from my (originally) portable and easy to use scope. Still, the connections and the alignment really don't take long to set up at night and this unit has suddenly opened up observing options that would not have been available to me until I had learned my way around the sky much more thoroughly. I can now spend my time concentrating on observing and learning the sky instead of beating myself over the head trying to star hop across light polluted skies. One last note, this unit can be used on multiple scopes. JMI sells stand alone encoder units so you wouldn't have to completely replace it if you upgraded or added a scope." |
|||
| Nighthawk Microlight | Triton LLC. | N/A | $22 |
| Bob Smith (RSmith2980@aol.com) reports: "I thought I would pass on some information on a neat little LED light. My wife sent away for the Nighthawk. I'm never sure of the quality of most equipment that is ordered "sight unseen", but this little light works great! The light's physical size is 1.5'" long, 1/2" wide on all sides. It has an amber LED for the light source. The amber color of the LED doesn't take away your night vision at all. The manufacturer states that it is weatherproof, not waterproof. It is powered by two 1.5 volt alkaline mini batteries. The on/off switch is mounted on the top of the unit where you can feel it at night with no problem. The attachment is really super ! It attaches to the top of any finger with Velcro straps. They recommend that the light be positioned between the hand and first knuckle. It is small enough that you can still use your fingers to make adjustments necessary to your scope, or anything else you would need a light source for. The light was developed for helicopter pilots and crew for map reading, etc. in Desert Storm. By: Triton LLC., 360 West Putnam Ave., Greenwich, CT 06830, no phone number on brochure." | |||
| Starlite, Skylite, and Skylite mini LED flashlights | Rigel Systems | N/A | $21-$31 |
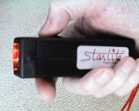 While not strictly an "ETX accessory", I thought I would provide some comments on a nifty little flashlight for astronomical use. It comes from Rigel Systems and is just one item from their line of products. This model has two red LEDs (light emitting diode), powered by a single 9-volt battery, and controlled by a thumbwheel (under my thumb in the photo). A long cord is supplied which you can wear around your neck. During a recent trip to the mountains to observe Comet Hale-Bopp I used the Starlite model along with a now discontinued model of the "Skylite" with switchable red and yellow LEDs ($29.95). The illumination from the red LEDs was surprisingly usable through nearly the entire range of brightness. At a dimmer setting I could read charts and handwriting, set up equipment, and look for items buried in a bag. At the brightest setting I could light up the pathway for walking. And all without impairing my night vision. The thumbwheel was fully functional even while wearing gloves. I found this lightweight flashlight very handy and versatile. The only complaint I have is that the rectangular cross-section of the flashlight makes it more uncomfortable to hold in the mouth than a small tube-style flashlight! The Skylite model, with its (now) white (actually bright blue) LEDs in addition to the red LEDs, is a nice model to have if you need both an astronomical use flashlight and one with more illumination. I can highly recommend the Rigel Systems flashlights. Check out their web page for more information.
[12/27/05] |
|||
| MotoFocus | JMI | N/A | $90 |
| Don (TheDBarbee@aol.com) notes the following about the MOTOFOCUS from Jim's Mobile Inc. (800-247-0304 for orders or 303-233-5353 for information). "Wow this is a GREAT product. The ability to focus with no vibrations whatsoever is fantastic. The MOTOFOCUS probably weighs about 4 oz. It also will also fit between the scope and the base when in the storage position. You cannot believe how small this motor and gear drive are. It the size of a regular stereo jack!! Takes five minutes to install. Its variable speed too. You can really get a fine vibrationless focus with it. I am really impressed with the quality. Worth every penny. The MOTOFOCUS is $89.95; there is shipping."
Al Winger adds (awinger@azstarnet.com): "JMI MotoFocus & Dec- For my casual viewing and as someone who is new to astronomy I found these items to be useful and convenient. They were very easy to install. The directions were clear and they came well packaged. Installation took maybe 5 minutes for both. The only question I had was regarding the set screw for the Moto Focus. It seems that now you can only use front slot as the other one is not machined to accept a set screw. This took a phone call to verify and JMI apologized and assured me they would change this in the directions. Focusing is a breeze with the standard 26mm, 2X Barlow and a 10mm for all views. My only focusing problem was with the 45 deg prism due to my astigmatism without glasses. This is not any fault of JMI's. During my ordering process and follow-up JMI was prompt and courteous, plus during September shipping charges were free. I hope they continue to design for the ETX and look forward to obtaining their Mini-Max very soon." Mark Stratton (virtual@ix.netcom.com) notes: "I saw the note regarding the set screw for the motofocus for the ETX. I also have this unit. I originally thought only one of the holes accepted a set screw. Actually I found that the hole closest to the motor already had a set screw in place that was screwed in all the way. This made it look like you can't insert a screw into this hole. In fact both holes accept the same type of set screw. The first screw secures the adapter to the motor shaft and the second screw secures the adapter to the focusing shaft of the ETX." Tom Harnish (katetom@znet.com) reports: "The JMI motofocus works great. Initial installation straight forward in spite of awful instructions (a JMI specialty included with all products), but found the whole gizmo was sloppy because the pin that keeps it from turning was a loose fit in the telescope. Jammed some stuff in the hole (obviously a highly technical process which should only be accomplished by a trained technican) and the problem was solved. Love it." Mahlon Hale adds: "Several months ago I bought the motofocus from Shutan and never bothered to fit it on. It was too cold in CT. What a mistake. It is a wonderful device. I can't more strongly recommend it. I did have some trouble with the enclosed allen wrench undoing the Meade knob as it was very tight. I got another wrench. The allen is very small. I think it is the 0.05. I got a set from Lowes for $2.86 and the 0.05 was included." [09/23/07]Jacques (jchaurette@lightmypump.com) adds: "I have just recieved the JMI Motofocus 125 for my Meade ETX-125. It looks great, a marvel of miniature gearing. It installed easily and flawlessly and even comes with it's 9V battery. It has two different speeds but I fear that even the slow speed is too fast so I will install a resistor on the motor power lead. It turns out to be a 10 ohm resistor. I did the mods to the JMI motofocus, and managed to reduce the lowest speed by about a half."
[12/23/08] |
|||
| 45-Degree Erecting Prism | Meade | 932 | $53 |
The Erecting Prism is intended for high quality terrestrial viewing. When viewing through the  90-degree (normal) position on the ETX, objects appear upright but reversed. When viewing through the Erecting Prism, objects appear normal, that is, not reversed. The Erecting Prism is useful to provide better viewing positions when the normal 90-degree position is not convenient. It is mounted at the rear of the ETX by removing a screw-on cover from the ETX and attaching the Erecting Prism. The tube has a set-screw (visible in the photograph) for locking the eyepiece into place. Locking the eyepiece is very important as the eyepiece end of the Erecting Prism can rotate freely. I wish there was a separate rotation lock. I also wish the Erecting Prism included a cover for the 90-degree position eyepiece holder; I usually insert the other eyepiece in it to keep any debris from falling inside the telescope. Many users have suggested using an empty 35mm plastic film can for the 90-degree position eyepiece. This works great too. 90-degree (normal) position on the ETX, objects appear upright but reversed. When viewing through the Erecting Prism, objects appear normal, that is, not reversed. The Erecting Prism is useful to provide better viewing positions when the normal 90-degree position is not convenient. It is mounted at the rear of the ETX by removing a screw-on cover from the ETX and attaching the Erecting Prism. The tube has a set-screw (visible in the photograph) for locking the eyepiece into place. Locking the eyepiece is very important as the eyepiece end of the Erecting Prism can rotate freely. I wish there was a separate rotation lock. I also wish the Erecting Prism included a cover for the 90-degree position eyepiece holder; I usually insert the other eyepiece in it to keep any debris from falling inside the telescope. Many users have suggested using an empty 35mm plastic film can for the 90-degree position eyepiece. This works great too.
John White (jgwhite@us.ibm.com) comments: "I have the 45 degree erecting prism for the ETX and I love it. I got it primarily for use when observing wildlife, but tried it while looking at Jupiter and Saturn last week. The images were crystal clear. Without knowing their positions beforehand, I could easily see the red spot on Jupiter AND the shadow of Ganymede near the edge of the spot. The seeing that evening was much better than is usual at the base of the Rockies, but I haven't seen the spot this easily in either my Celestron 4.5 or my Orion 10" Dob (although I didn't take the Dob out that evening to compare). The only 2 things negatives are a TINY bit of chromatic aberration at the edges during bright sunlight and the lack of a set screw to keep it from rotating. The chromatic aberration was only visible at the very edge and only during strong daylight. It was minor enough that I didn't notice it unless I was consciously evaluating the optics. The lack of a set screw would only be a problem if you try to add something heavy, such as a camera, to it. I highly recommend this product." |
|||
Go back to my ETX Home Page.
 I recently tried out the new "white" LED Skylite model ($34.95) while using my ETX. This model has two red and two white (more bluish than white) LEDs. It was very nice to have blue and red. The blue was very useful for additional illumination since the moon was nearly full but not bright enough to read details. Red illumination was not enough to bring out details in printing but the soft blue was perfect. I inadvertantly left the Skylite on nearly full bright for over 24 hours. Unlike conventional flashlights that would have drained the battery, the Skylite 9V battery is still going and going...
 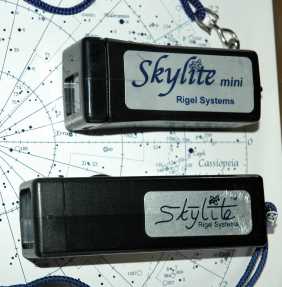 previous model in having two white LEDs and two red LEDs (other colors are available) and also uses a 9V battery. But this new model is smaller (as seen in the photo), lighter, and according to Rigel Systems, 25% brighter. I can attest that it is indeed brighter than my earlier model. It still comes with a nice cord to hang the flashlight around your neck but the price has been reduced $10 from the previous model. If you are looking for a versatile high quality LED flashlight at a reasonable cost, check out the