How I Do Astrophotography
Posted: 29 August 2020
Introduction
I frequently get asked how I do astrophotography. This article will attempt to answer that question. Disclaimer: I am not a "serious" astrophotographer. I just "play" at doing astrophotography. I do enjoy acquiring images of the Moon, planets, and Deep Sky Objects (DSOs). I do not generally "stack" DSO images, but I will stack frames from video recordings of planets. I do not have a dedicated astro imager and I don't use a computer at the telescope. Most of my imaging is with my 12" LX600 w/StarLock, although sometimes I use one of my other telescopes, a tracking mount, or even just a camera tripod.
This article is a complete rewrite of my older How I Do Astrophotography article that discussed my 8" LX200-ACF and older cameras. This update discusses sky astrophotography using a camera tripod, a sky tracker, and telescope piggyback mounting, my 12" LX600 w/StarLock (which I began using in February 2016), my D850 DSLR (use began February 2018), and my iPhone 11 Pro Max (use began October 2019).
In this article you will learn some basics of how I do astrophotography of the sky and through the telescope, camera settings I use, how I focus and guide during long duration imaging, and how I process the images for posting on the "Cassiopeia Observatory" reports and photos albums. I'll discuss imaging with both the D850 DSLR and the iPhone. While some of what I'll discuss here will be specific to those cameras, much of the article will be applicable to almost any DSLR, point-and-shoot, or smartphone camera. I do not discuss dedicated astro imagers in this article, although some of the techniques mentioned will be applicable to them. I will end the article with information on some astrophotography accessories that I use.
There are several types of astrophotography: sky, piggyback, prime focus, afocal, and eyepiece projection. My earlier article on "Astrophotography Types" discusses each of these and provides some general imaging and editing tips. Where appropriate, I will include links to other articles or reviews I have written. Be certain to check those out for additional details.
The easiest way to get started with astrophotography is to photograph the night sky using a tripod-mounted camera or smartphone. This will allow you to become familiar with how your camera will perform in low-light conditions, how to adjust the camera settings for astrophotography, and how take long duration images. To learn to take photographs through your telescope I suggest using the Moon as your first imaging target. This will allow you to get to know how to use your telescope + camera combination for astrophotography. Once you are getting good photos of the Moon and craters, you can move on to more difficult targets. Imaging the brighter planets is easy; getting details on those planets is difficult. This is where imaging stacking may really improve the quality of the image. Once you have some experience with imaging bright objects, and if your equipment allows, you can move on to imaging stars and DSOs. Stars and bright DSOs (like M42 in Orion) are easy. Faint nebulae and galaxies are challenging and will require some dedication.
Sky Astrophotography
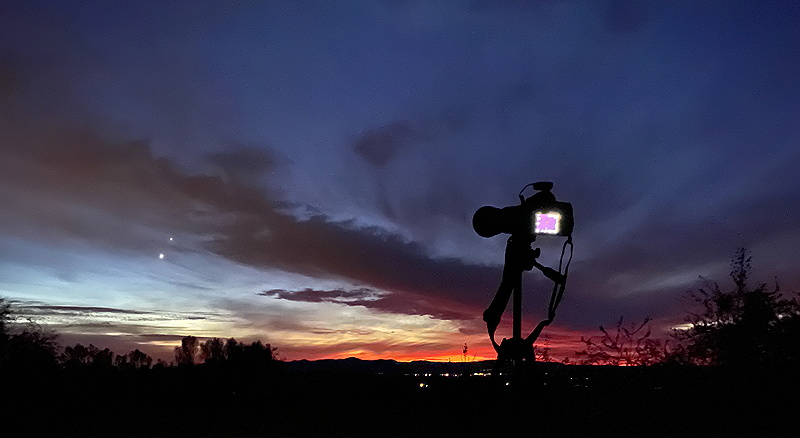
As I said earlier, sky astrophotography is the easist way to begin learning how to photograph objects in the night sky. At its simplest there is no need to worry about polar aligning, guiding, or stacking images. As you gain experience you can still do those things to improve your night sky images, but you will be amazed at what you can photograph by just mounting a camera or a smartphone on a camera tripod. So lets start with just a tripod.
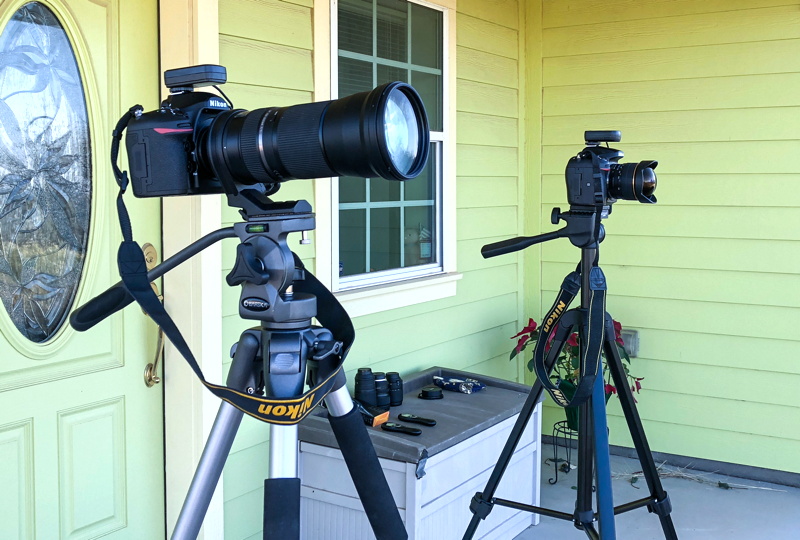
Here you can see two DSLR cameras mounted on camera tripods. One camera has a fisheye lens and the other camera has a long telephoto zoom lens. Your choice of lens focal length will be dictated by how much of the sky you want to photograph. A wide angle lens will give you more of the sky, whereas a long focal length lens will let you sharply photograph the Moon and brighter planets without needing to track the sky movement.
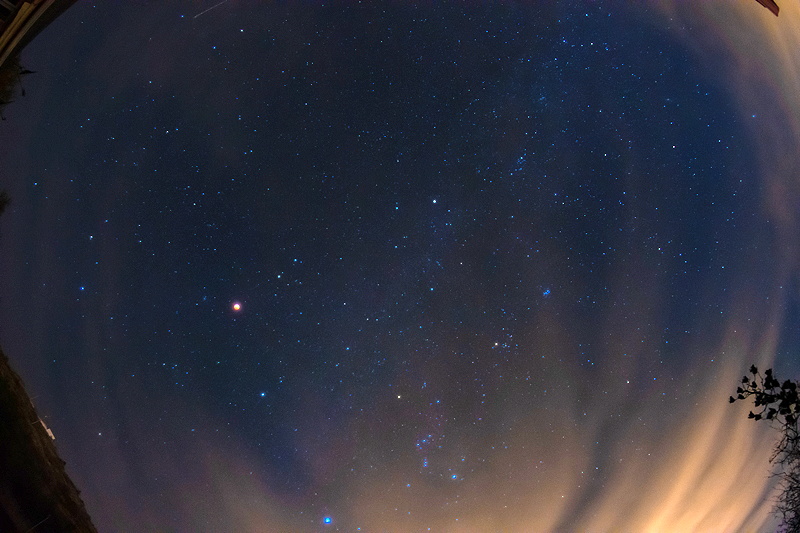
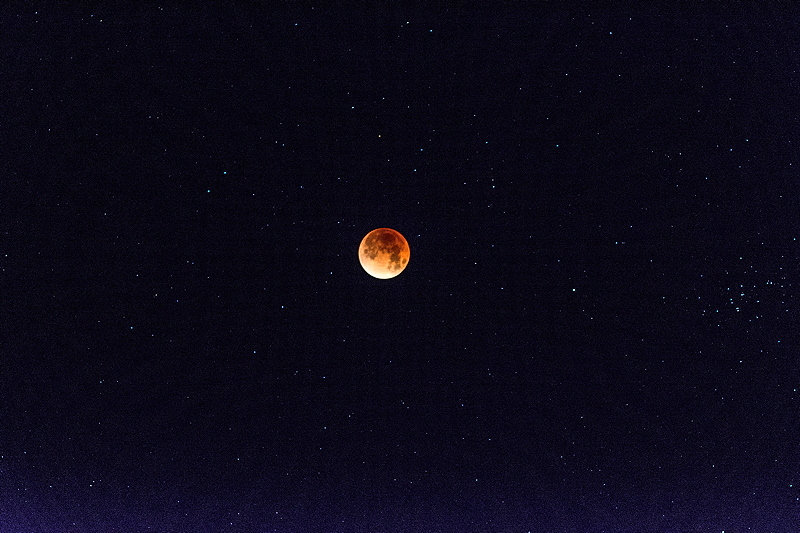
These photographs taken during total lunar eclipses show what can be done with untracked sky photography.
f/5, 15 seconds, ISO 5000, FL 8mm Fisheye lens
f/5, 1 second, ISO 1600, FL 150mm
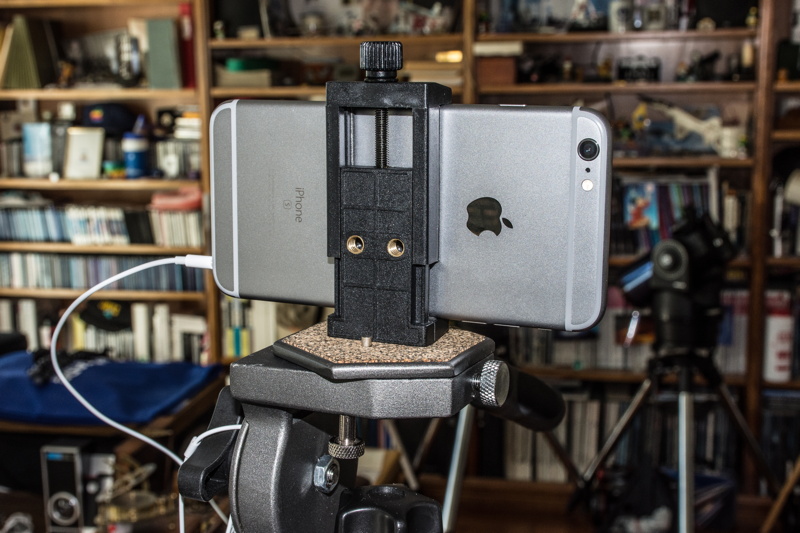
You can mount a smartphone on a tripod and photograph the night sky. I usually use a Levenhuk Smartphone Adapter (seen here) to mount my iPhone on a camera tripod. For most of my iPhone sky astrophotography I use the iOS app NightCap Camera.
Today's smartphones can do some pretty amazing sky astrophotography.
Jupiter-Venus Conjunction
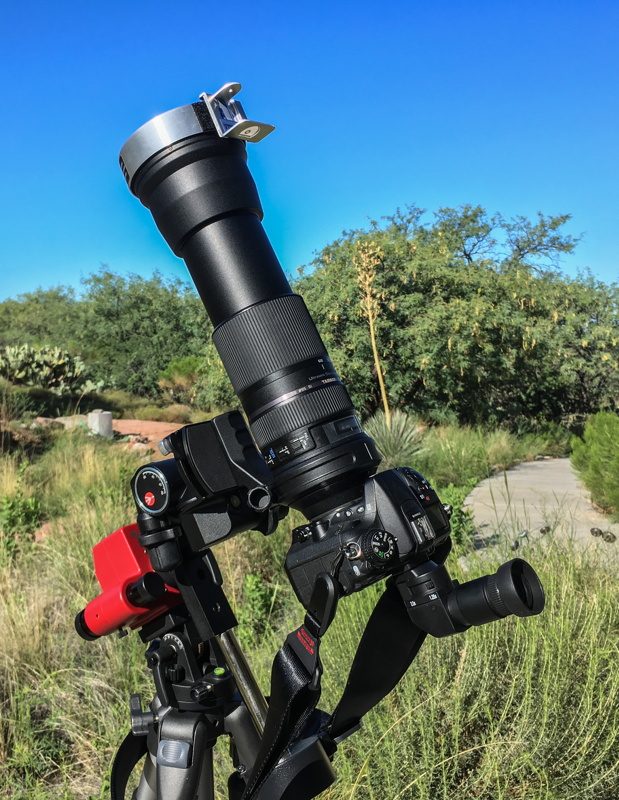
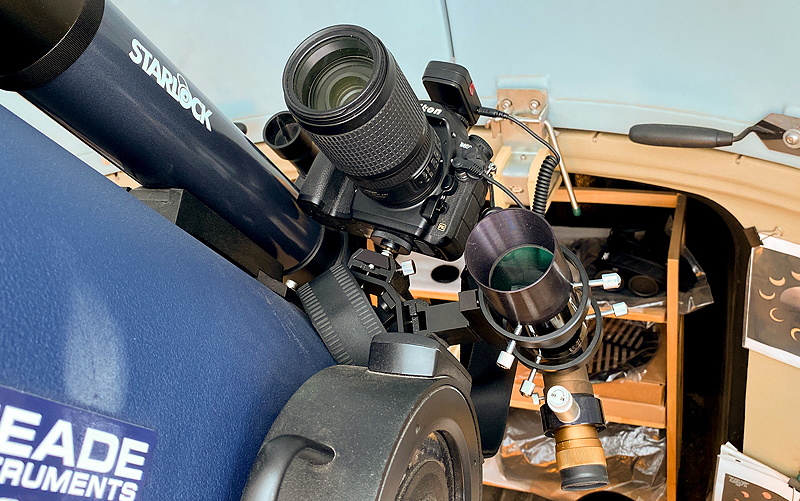
For tracked sky astrophotography with a DSLR or smartphone I use an iOptron SkyTracker Pro or will piggyback the camera/smartphone on the LX600 telescope using a ScopeStuff Camera Mount.
DSLR with 150-600mm lens on SkyTracker Pro
Smartphone on SkyTracker Pro

DSLR with 70-300mm lens on LX600
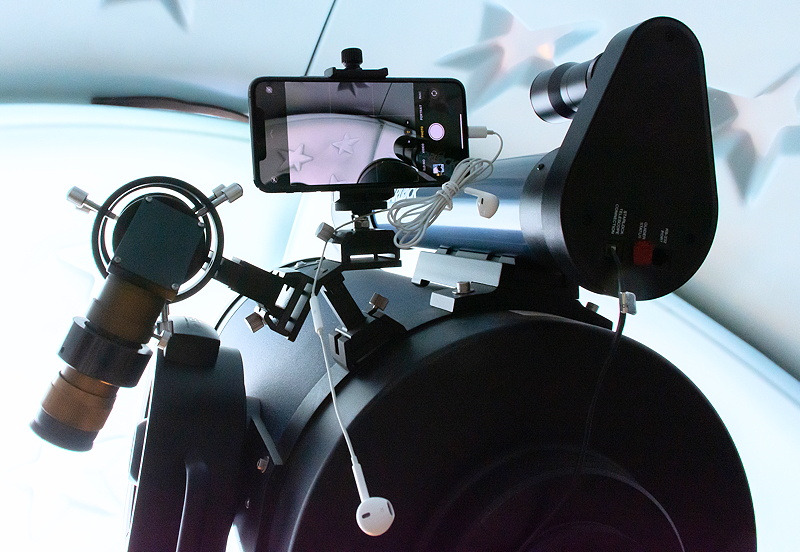
Smartphone on LX600
Tracked astrophotographs have the benefit of longer exposures without star trailing, yielding images of fainter objects.
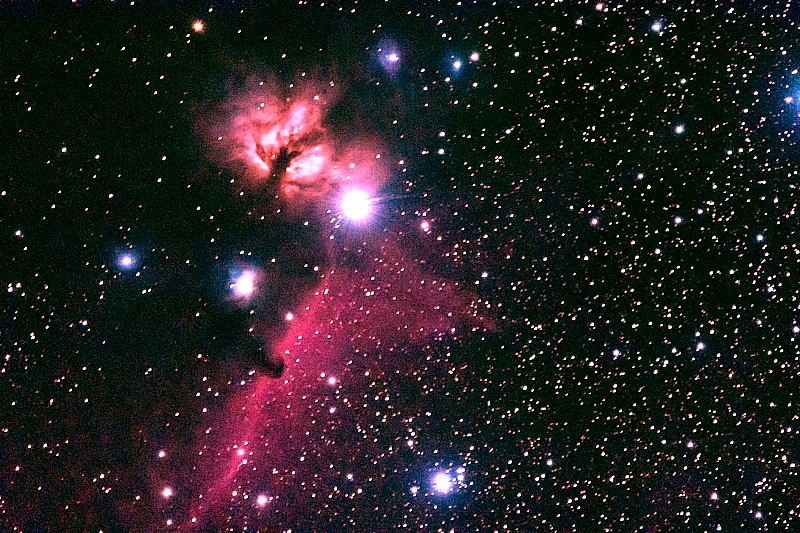
SkyTracker Pro
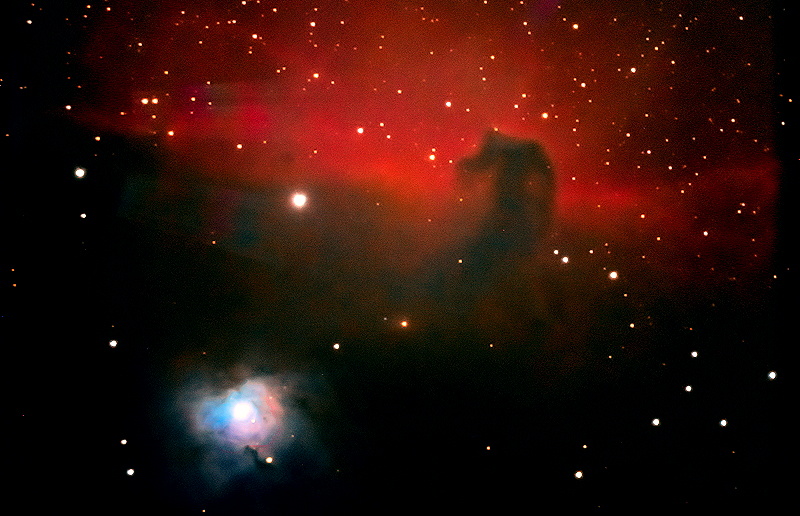
Flame Nebula & Horsehead Nebula, f/6.3, 2 minutes, ISO 12800, FL 600mm lens
Orion, iPhone 6s Plus Normal lens, 10 minutes, ISO 8000
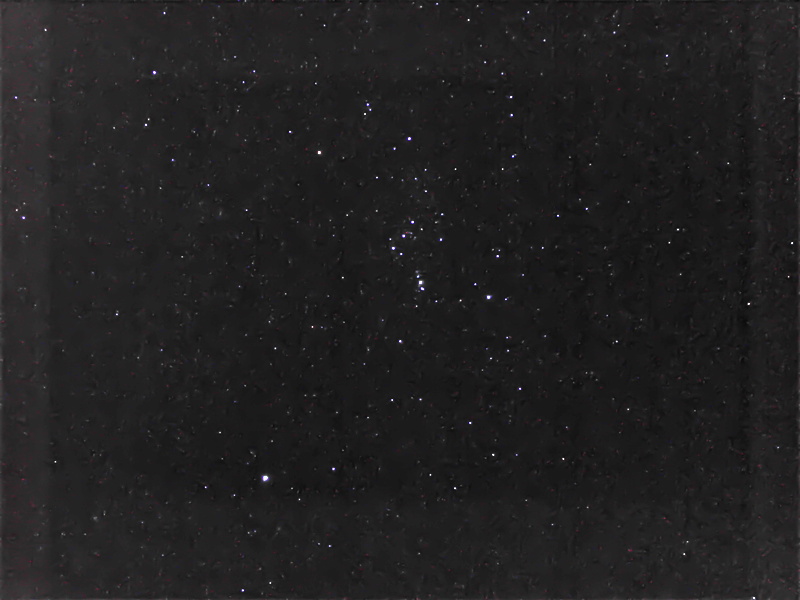
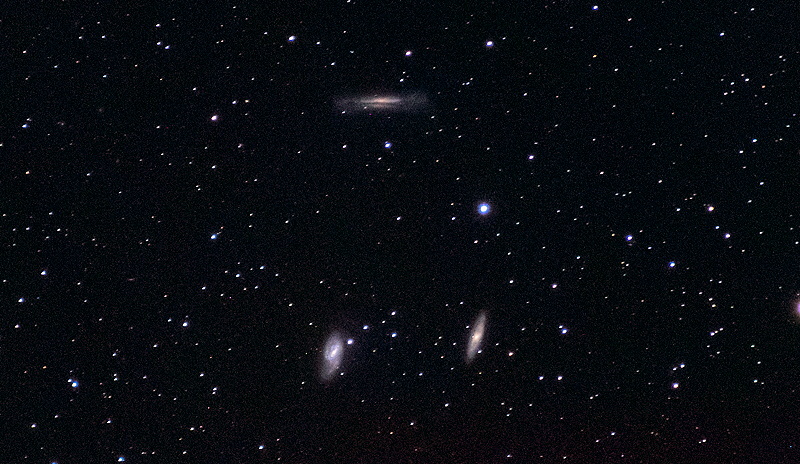
Piggyback on LX600
Leo Triplet of Galaxies, f/5.6, 5 minutes, ISO 4000, FL 300mm lens
iPhone 11 Pro Max, Camera app in "Night Mode" (30 seconds exposure, 1X lens)

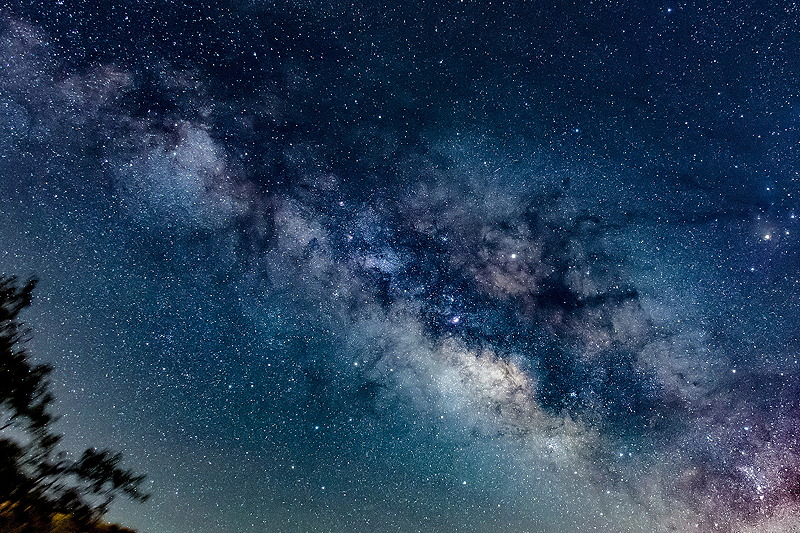
Mounting your camera on a tripod will let you photograph stars, the Milky Way, Zodiacal Light (if you have dark sky), planet conjunctions, and more. If you do not have a telescope, one of the many tracking camera mounts that are available today from multiple sellers will provide you with years of doing wonderful night sky astrophotography, including many DSOs. Just be certain to get one that can handle the weight of the camera and lens that you will be using.
Milky Way, DSLR, f/3.5, 2 minutes, ISO 5000, FL 18mm, SkyTracker Pro
Prime Focus Astrophotography
Mounting a camera with a removable lens at prime focus of a telescope turns the telescope into a telephoto lens for your camera. The camera must have a removable lens to do prime focus astrophotography. You need a T-Ring that is specific for your camera's lens mount and a 1.25" or 2" nosepiece that inserts where the eyepiece would be. No eyepiece is used for prime focus astrophotography.
The camera can be mounted on a star diagonal or a visual back, with or without a Focal Reducer or TeleNegative Lens (i.e., Barlow Lens, Powermate) to change the magnification of the object or the field-of-view. Some options can be combined and some not, depending on what accessories you have and their design.
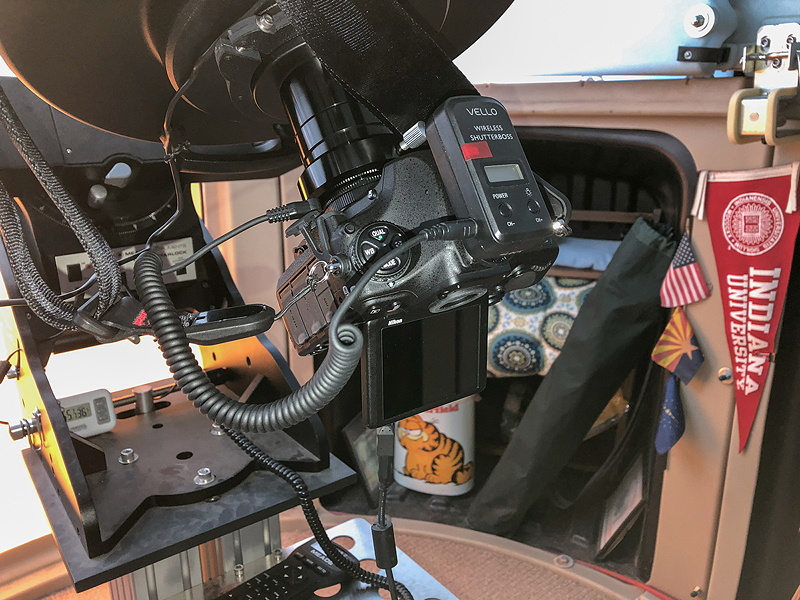
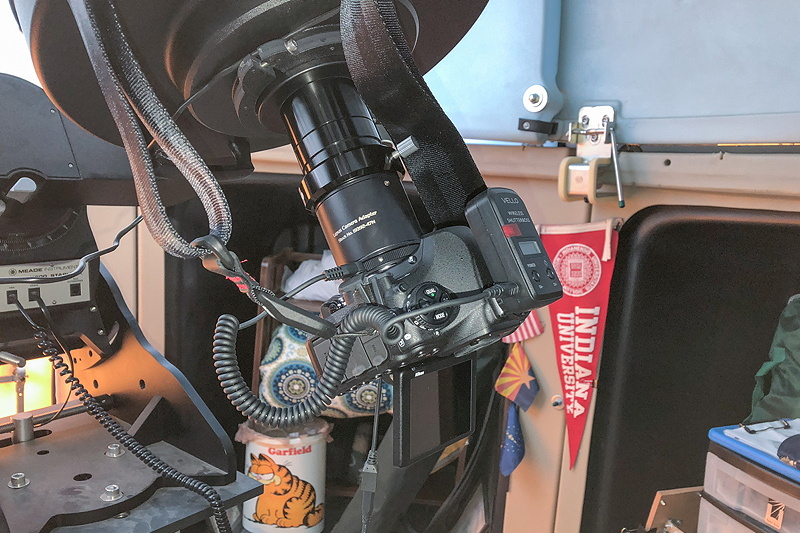
Here is my D850 DSLR mounted on my 12" LX600.
Prime Focus
Prime Focus + Focal Reducer
When I mount the DSLR on the telescope I always loop the camera strap around the finderscope mounting bracket. That way, if the holder screw loosens the camera won't fall to the floor.
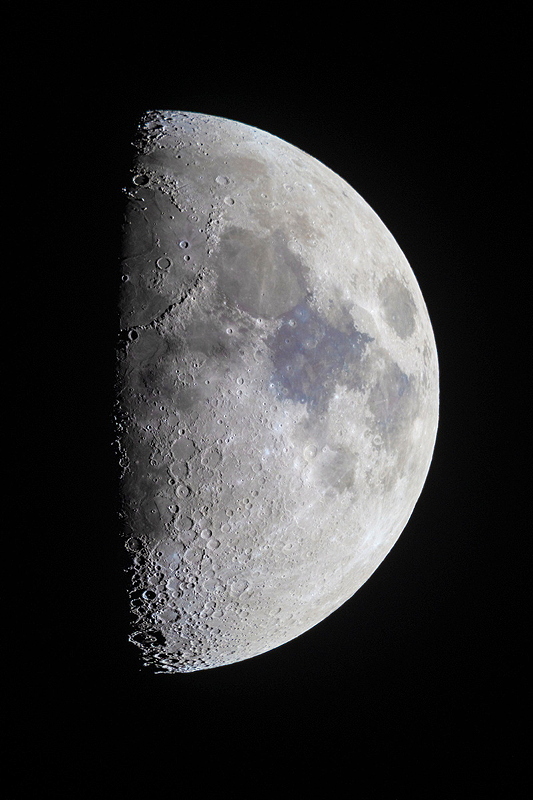
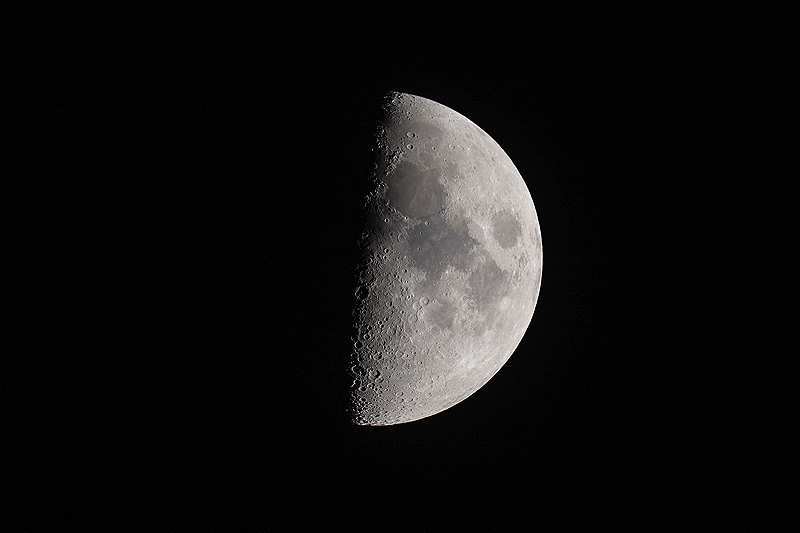
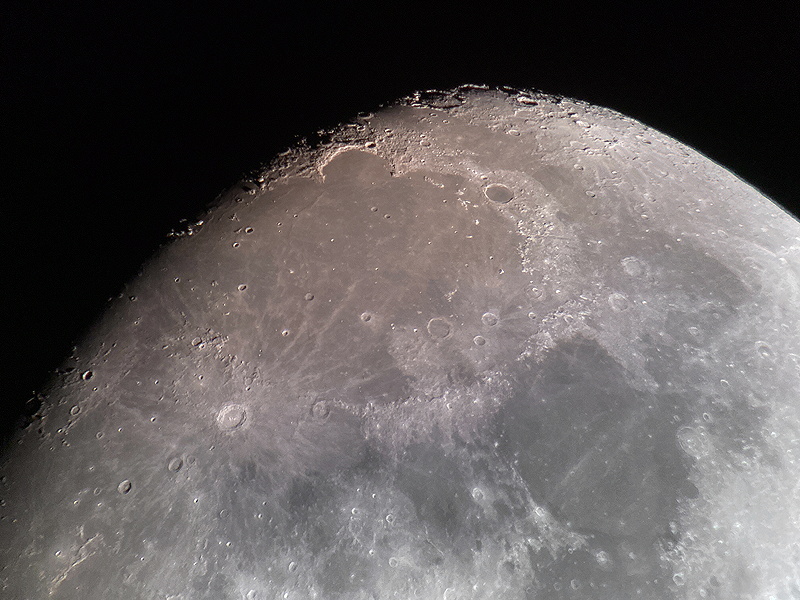
Imaging bright objects like the Moon and planets will not need guiding, although a tracking mount will let you concentrate on the imaging instead of working to keep the object centered. Here are some Moon, Sun, and Saturn photos taken at prime focus.
Moon, Prime Focus, 1/320sec, ISO 400
Moon, Prime Focus + Focal Reducer, 1/320sec, ISO 200
Moon, Prime Focus + 4X Powermate, 1/320sec, ISO 6400

Transit of Mercury, Prime Focus + Focal Reducer, 1/640sec, ISO 400, Full Aperture Solar Filter

Saturn, Prime Focus + 3X TeleExtender, 1/125sec, ISO 6400, stack of 2280 video frames

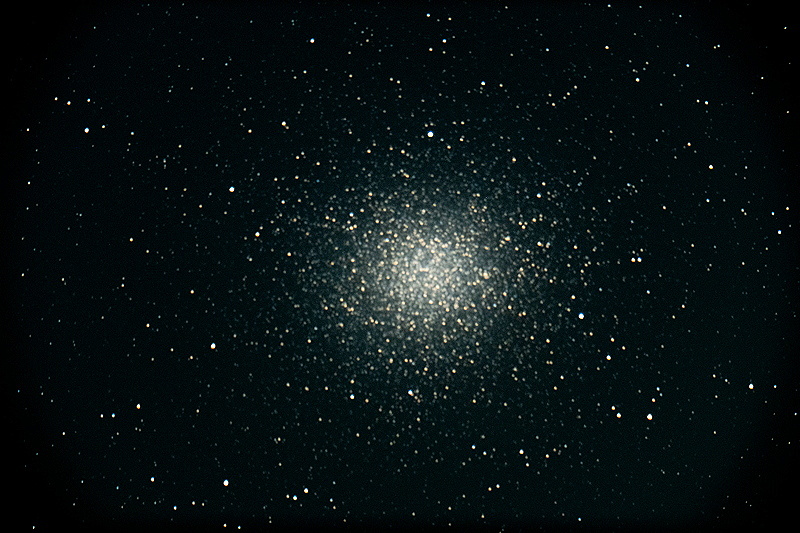
For imaging star clusters, nebulae, and galaxies, mounting the camera at prime focus, with or without a focal reducer, depending on the size and/or faintness of the object, will usually yield the best results. Guiding, either manual or with a separate autoguider telescope, will usually be required, especially for faint nebulae and galaxies. Alternatively, you can take many short exposures (to the limit of your mount's accurate tracking) and stack the multiple images. The LX600 has the integrated StarLock, which is what I use for autoguiding. For small star clusters and bright nebulae you can add a Barlow Lens or Powermate, but tracking/guiding will need to be more accurate. Here are some of my DSO images taken with the D850 DSLR.
Omega Centauri globular cluster, Prime Focus, 60 seconds, ISO 4000
Horsehead Nebula, Prime Focus, 5 minutes, ISO 6400
Sarah's Galaxy, Prime Focus, 10 minutes (stacked), ISO 5000

Afocal Astrophotography
Afocal astrophotography uses an eyepiece on the telescope. The camera (with its lens) looks at what the eyepiece "sees", just like your eye. Magnification can be greater than when doing prime focus imaging, but as magnification is increased the object becomes dimmer (requiring longer exposures and/or higher ISO values) and accurate tracking/guiding will become more important. In years gone by amateur astronomers did afocal imaging using SLR or point-n-shoot cameras (film or digital). The camera lens, either handheld or mounted using an afocal adapter, was pointed at the eyepiece. Today, many people, including me, do afocal astrophotography using a smartphone.
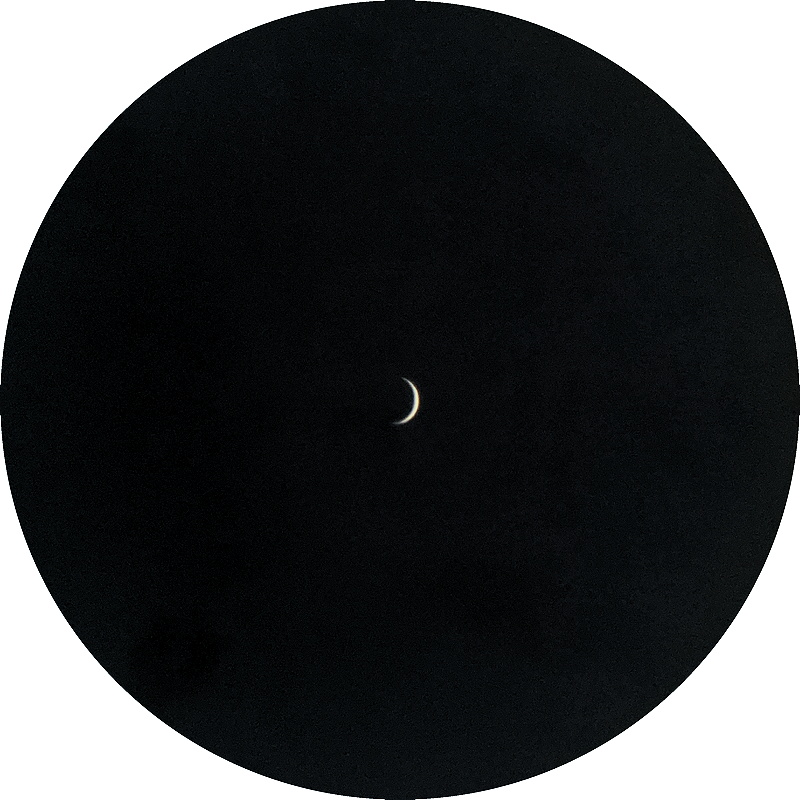
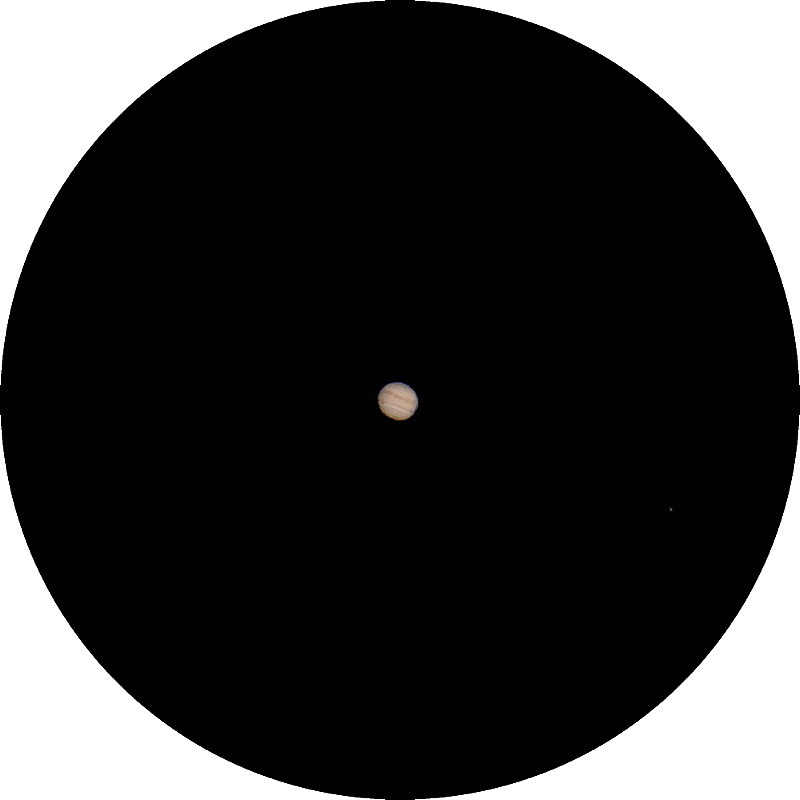
For bright objects like the Moon and brighter planets, it is possible to hand hold the smartphone over the eyepiece and use a fast shutter speed to photograph what is seen in the eyepiece. These examples were taken with an iPhone 11 Pro Max handheld.
Moon, afocal 174X
Venus, afocal 174X
Jupiter, afocal 203X
The major challenge with handholding the phone over an eyepiece is keeping the object in the camera field-of-view. If your camera app has only auto-exposure mode then as the object comes and goes in the camera the exposure will change. For best results a smartphone afocal adapter should be used. I have reviewed several smartphone adapters on my Reviews page. With most "universal" adapters, getting the smartphone camera lens centered over the eyepiece can be a challenge. But once you have the object in view you can then adjust the exposure as necessary, if your camera app allows that. Mounting the smartphone is really the only way to get good images of star clusters, nebulae, and galaxies. Using low magnification with accurate tracking/guiding during long exposures will provide the best images of these objects.
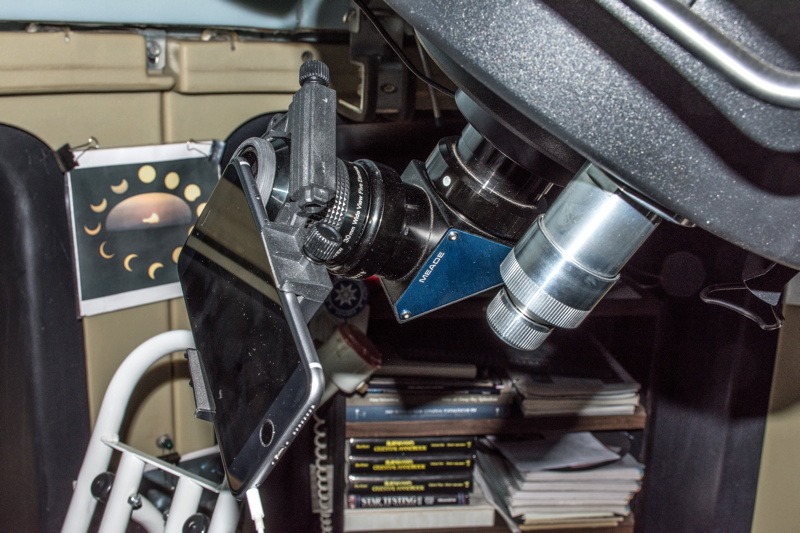
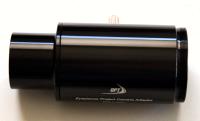
I usually mount my iPhone on an eyepiece using the Levenhuk Smartphone Adapter.
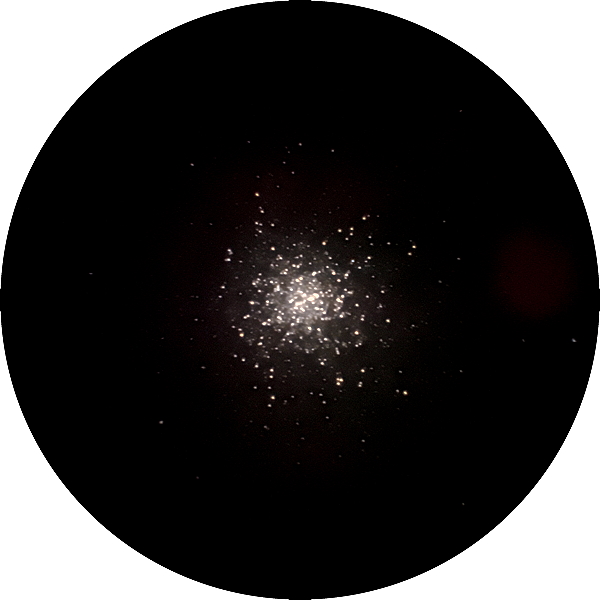
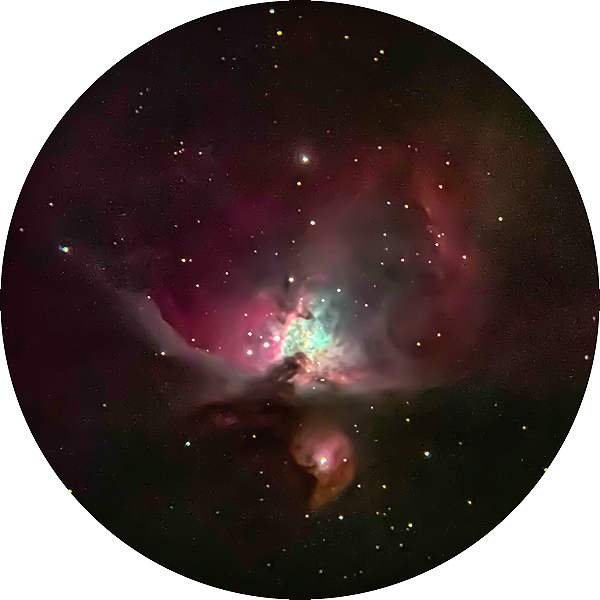
If you are using a point-n-shoot camera with a non-removable lens, you will need an afocal adapter to hold it securely on an eyepiece. As I show on some of my smartphone adapter reviews, you can also use some adapters on binoculars, monoculars, and spotting scopes. Here are some examples of mounted iPhone 11 Pro Max afocal astrophotography.
Great Globular Cluster in Hercules
Swan Nebula
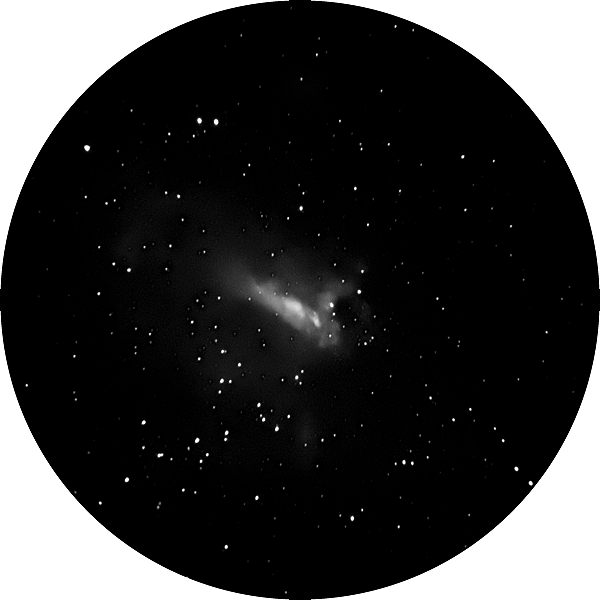
Great Nebula in Orion
Cigar Galaxy

Eyepiece Projection Astrophotography
Eyepiece projection astrophotography is probably the most challenging and limited of techniques that can be used. It takes an adapter that not only holds the camera, but also holds an eyepiece inside a tube. Not all adapters will work with all eyepieces. By using an eyepiece you increase the magnification, which can be further increased by adding a TeleNegative Lens. The object in the eyepiece is "projected" onto the camera film/sensor. The biggest downside of eyepiece projection is the dimness of the projected image, especially at higher magnifications. This means that eyepiece projection astrophotography is generally limited to photographing the Moon, the Sun (with proper solar protection), and the brighter planets. Eyepiece projection astrophotography requires a DSLR or mirrorless digital camera with a removable lens. Accurate tracking/guiding will be required even with bright objects due to the magnification. When imaging planets doing a video recording and then stacking the images will get you the best images.
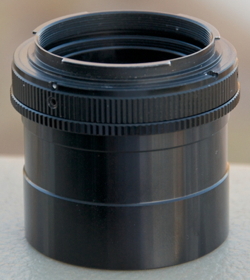
I rarely do eyepiece projection astronomy, but when I do I use an OPT Camera Adapter with a 9mm eyepiece, with or without a TeleNegative added.
Here are some examples using a DSLR.
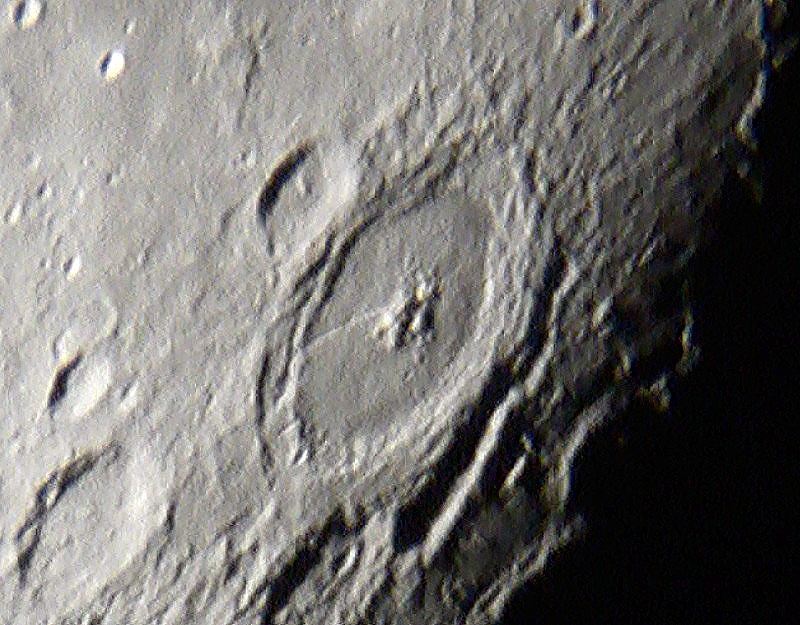
Crater Petavius, 222X
Venus, 542X, 467 video frames stacked

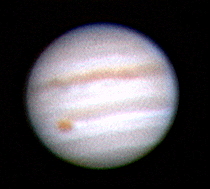
Jupiter, 271X, 297 video frames stacked
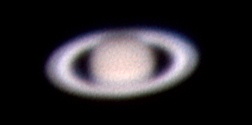
Saturn, 271X, 295 video frames stacked
Go to Focusing, Camera Settings, Tracking and Guiding, Image Processing, Accessories, and Summary.
Return to the Cassiopeia Observatory Home Page.
Copyright ©2020 Michael L. Weasner / mweasner@me.com
URL = http://www.weasner.com/co/articles/HowIDoAstrophotography/index.html